-
Please only use these forums for blogs, they are not a discussion forum
You are using an out of date browser. It may not display this or other websites correctly.
You should upgrade or use an alternative browser.
You should upgrade or use an alternative browser.
Skinners Sprint Micra
- Thread starter Skinner_87
- Start date
It sounds immense at 0.38, looks nice and flat too
Thanks Eire, think i've finally got the suspension just right for me anyway
Bit of an update engine & box are out ready for a once over & to retreive the piece of the shim from somewere in the sump 

Engine bay is looking a bit messy again so that will be getting a fresh coat of paint over the next few weeks.
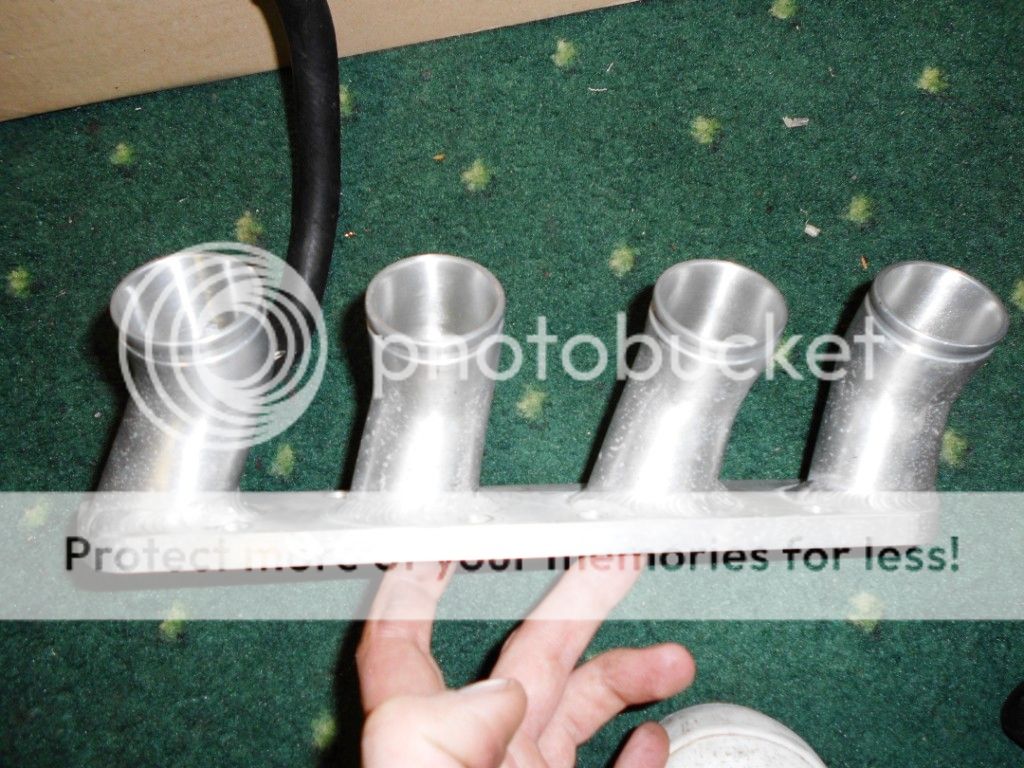
I never got a pic of the BoggBrothers manifold up first time round so here she is...

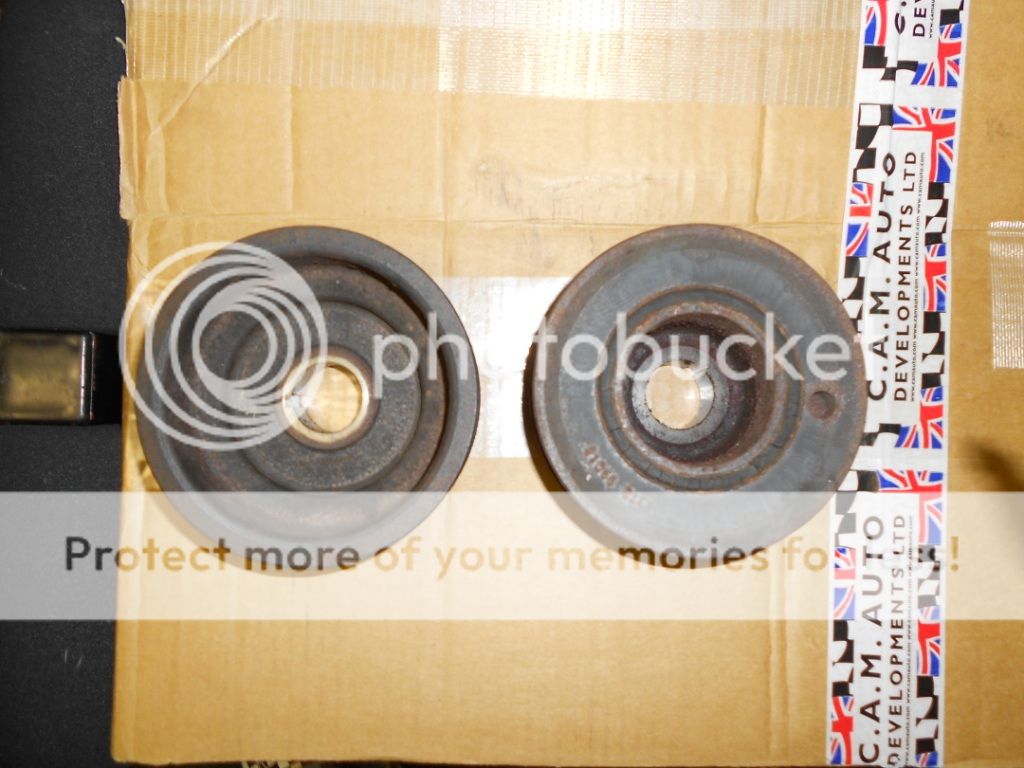
New plan is to extract as much as i can from a N/A motor, i think id miss the carbs (for now anyway) so a 1 litre pulley wheel will be going on the crank quite a mass difference in comparison to the damper fitted factory 1.3 pulley: (thanks go to Frank here )
)

Got round to uploading my first timed run of the Manx Classic out of the Grandstand, she makes quite a nice noise
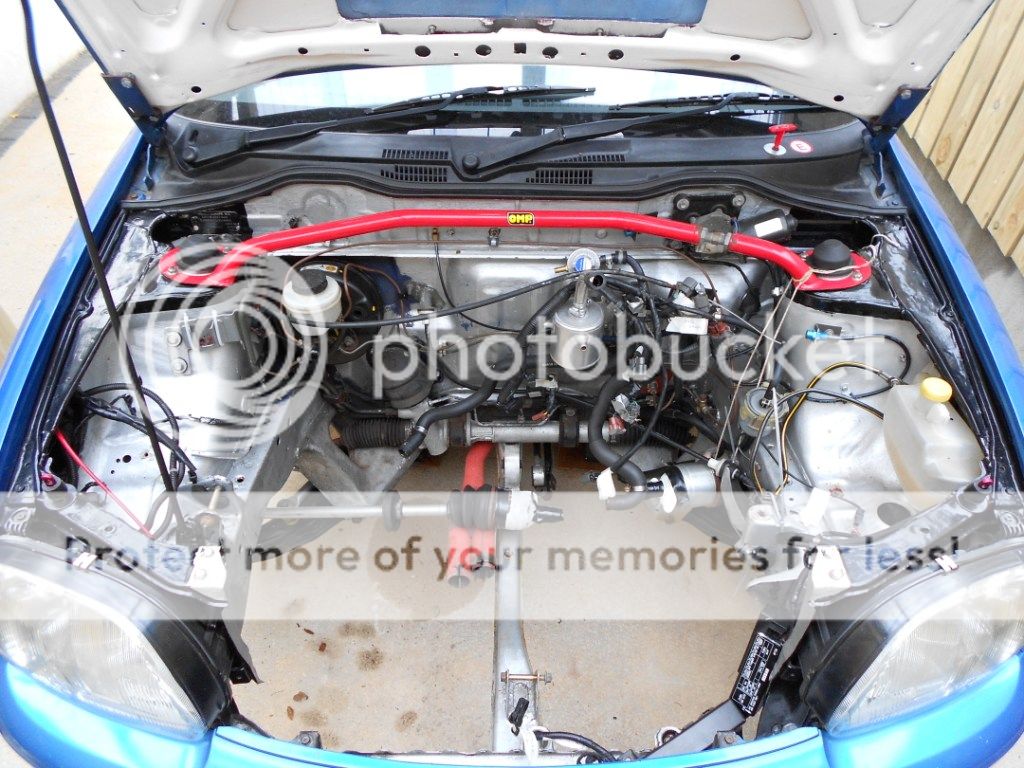
Engine bay is looking a bit messy again so that will be getting a fresh coat of paint over the next few weeks.
I never got a pic of the BoggBrothers manifold up first time round so here she is...
New plan is to extract as much as i can from a N/A motor, i think id miss the carbs (for now anyway) so a 1 litre pulley wheel will be going on the crank quite a mass difference in comparison to the damper fitted factory 1.3 pulley: (thanks go to Frank here
Got round to uploading my first timed run of the Manx Classic out of the Grandstand, she makes quite a nice noise
Hey folks bit of an update.........................
Manual steering rack arrived today, powersteering rack was removed & manual universal joint checked...... ITS FITS lil weight off my mind..
All powersteering ancilaries have been taken off the block & pipework from the engine bay..
Il be weighing the removed parts & seeing just how much the cars shead!
As well as a deivery of a few shiny bits & as always... PICS OR IT DIDNT HAPPEN
Manual steering rack arrived today, powersteering rack was removed & manual universal joint checked...... ITS FITS
All powersteering ancilaries have been taken off the block & pipework from the engine bay..
Il be weighing the removed parts & seeing just how much the cars shead!
As well as a deivery of a few shiny bits & as always... PICS OR IT DIDNT HAPPEN
Well no shiny bits have turned up yet 
Saturday i set about unpicking the unused sensors from the engine bay loom as they arnt used whilst running carbs (but will be kept incase injection is used again)
Sunday was sorting the engine bay out removing any last bits of rust, oxiding them & sticking the 1st coat over them :
BEFORE

AFTER

Fingers crossed il have a nice parcel waiting when i get home tomorrow evening!
Saturday i set about unpicking the unused sensors from the engine bay loom as they arnt used whilst running carbs (but will be kept incase injection is used again)
Sunday was sorting the engine bay out removing any last bits of rust, oxiding them & sticking the 1st coat over them :
BEFORE

AFTER

Fingers crossed il have a nice parcel waiting when i get home tomorrow evening!
Well there was a nice big box waiting for me when i got home 
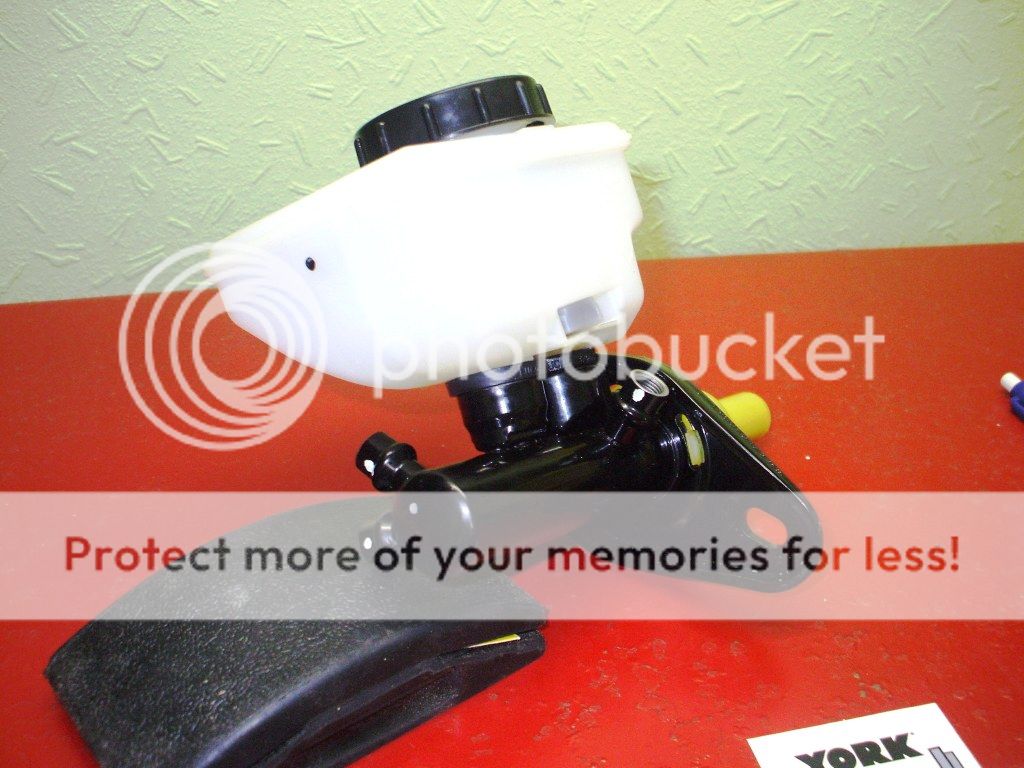
Uprated 23.8mm bore master cylinder (fast you go the quicker you need to stop!) as rust has set into the current factory unit

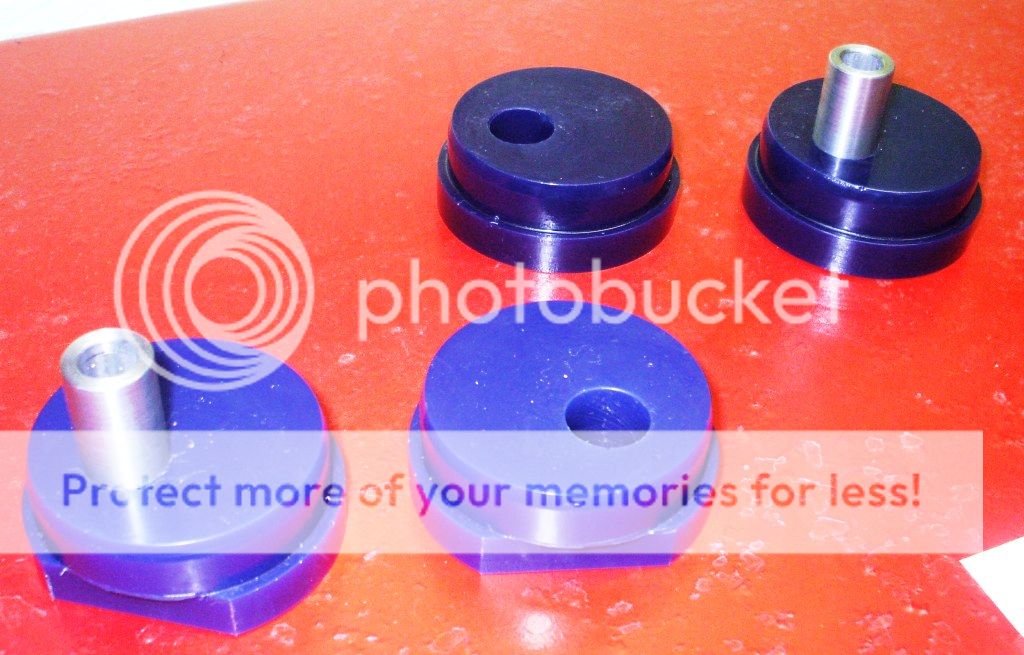
Same for the driver engine mount & passenger gearbox mount replaced by some lovely HOL poly units

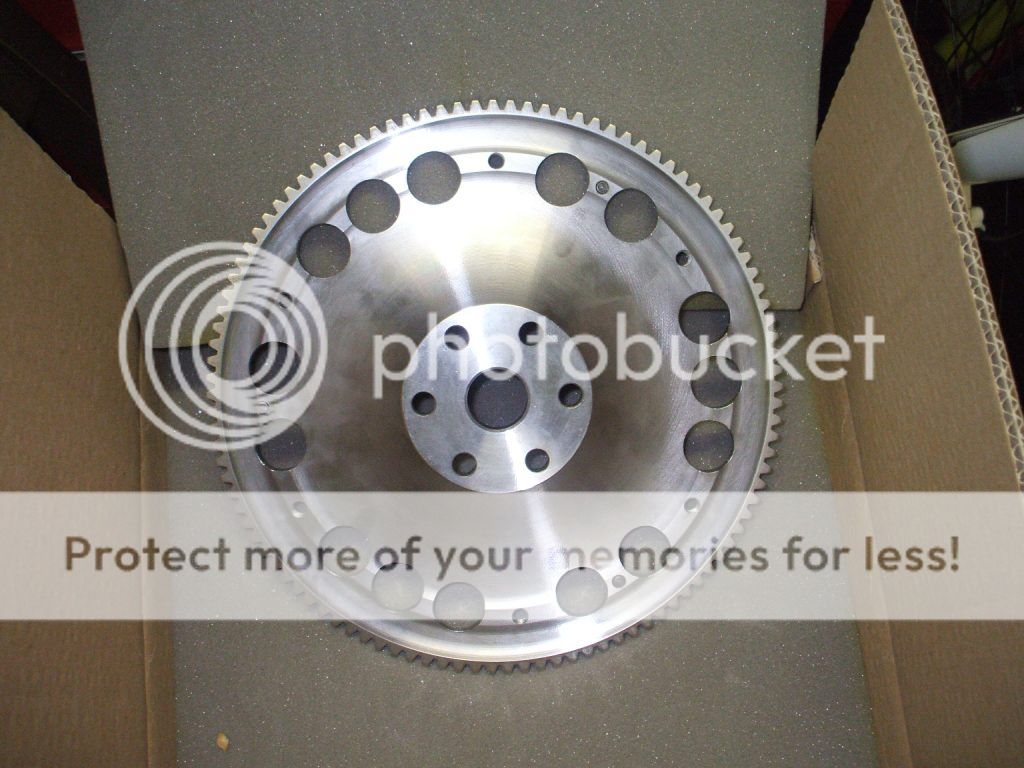
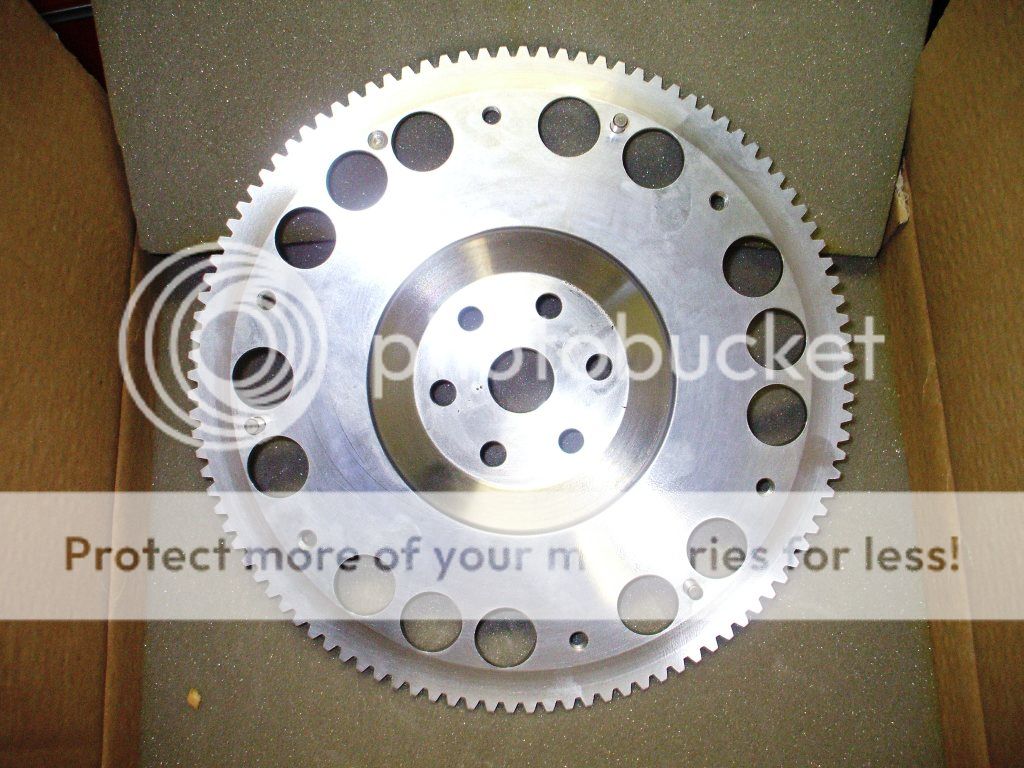
Since the engine & box are out a TTV Racing flywheel (2.8kg) will be replacing the slightly lightend factory F/W


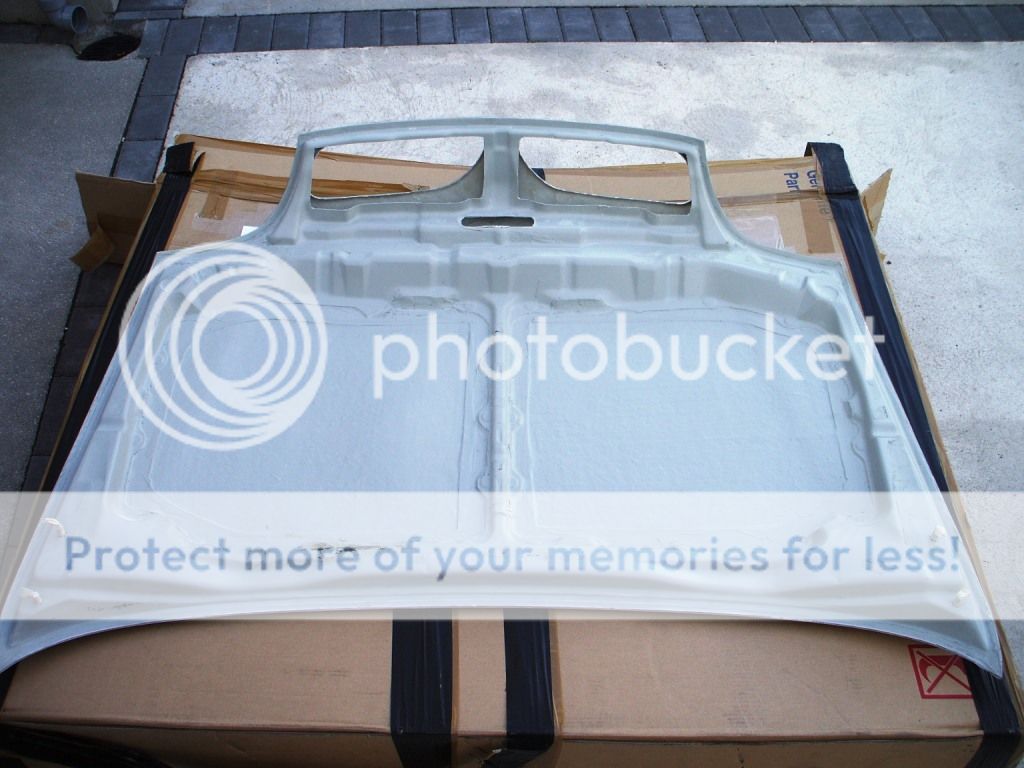
& last & by no means least a GRP Facelift bonnet to keep the cars diet plodding along at only 5kg


So this weekend is set to be busy! Manual rack to refit along with the engine bay ancillaries ready for the engines return over the next few weeks......
Il be starting a post below to show the various weights of parts removed / replaced which (fingers crossed) should be a fair weight by the end!!
Uprated 23.8mm bore master cylinder (fast you go the quicker you need to stop!) as rust has set into the current factory unit
Same for the driver engine mount & passenger gearbox mount replaced by some lovely HOL poly units
Since the engine & box are out a TTV Racing flywheel (2.8kg) will be replacing the slightly lightend factory F/W
& last & by no means least a GRP Facelift bonnet to keep the cars diet plodding along at only 5kg

So this weekend is set to be busy! Manual rack to refit along with the engine bay ancillaries ready for the engines return over the next few weeks......
Il be starting a post below to show the various weights of parts removed / replaced which (fingers crossed) should be a fair weight by the end!!
Nice parts, you mind telling me the prices of the poly units?
No worries Stani, £60.90 the pair from Matt (as were all the parts) still over £90 cheaper than Nissan were after!!
Nice one cheers, im just adding up parts needing in the future and its looking like another fortune
I know what you mean mate i try not to think about it
Stani1029
Club Member
I know what you mean mate i try not to think about itYour going to end up with a belting motor at the end of it though!!
Yeah i know it'll be worth it. I have all the reciepts for the future so the thicker the pile gets the more im like uh oh! Full engine work can still be done aswell....
Anywho love your car, its totally my taste And good luck with the engine refitting etc
Yeah i know it'll be worth it. I have all the reciepts for the future so the thicker the pile gets the more im like uh oh! Full engine work can still be done aswell....
Anywho love your car, its totally my taste And good luck with the engine refitting etc
Cheers Stani, same for your motor mate congrats on the mag feature by the way
what is the spec list on this car to date then skinner?
Sent from my GT-I9100 using Tapatalk 2
Current spec mate:
1275cc CG Block
Gas flowed ported cylinder head with slight skim
Soon to be group A Camshafts
TTV Flywheel
4-2-1 Manifold
Decat pipe
2" stainless catback group A exhaust
5.1 final drive Crownwheel & pinion
then theres the brakes & susp etc
well i was more interested in the susp setup to be honest mate just seeing how flat it took the bends in your videos
Sent from my GT-I9100 using Tapatalk 2
Sorry mate suspension is :
Rear
Sr disc axel with strengthening brackets welded on
Nismo Bushed uper rear trailing arms
Rose jointed rear trailing arms
55mm Hol tarmac springs
Bilstien sport dampers
22mm Whiteline rear antiroll bar with polybushes
Skinner made rose jointed solid drop links
Adjustable panardrod
Front
22mm antirollbar with polybushes
Polybushed antirollbar links
Bilstien sport dampers
55mm Hol tarmac springs
OMP Strutbrace
Wheels & Tyres
Team dynamics 1.2 14 x 7
Uniroyal rainsport 2 195/45/14
All in handles spot on just very very firm!!
Dash was removed over the weekend & all wireing/ brackets/ fixings & sound deadening that was no longer needed was binned.... Factory dash will be replaced with an alloy one il be making up over the next week or so along with a new dash pod.. total weight to be saved? about 6- 7 kg 

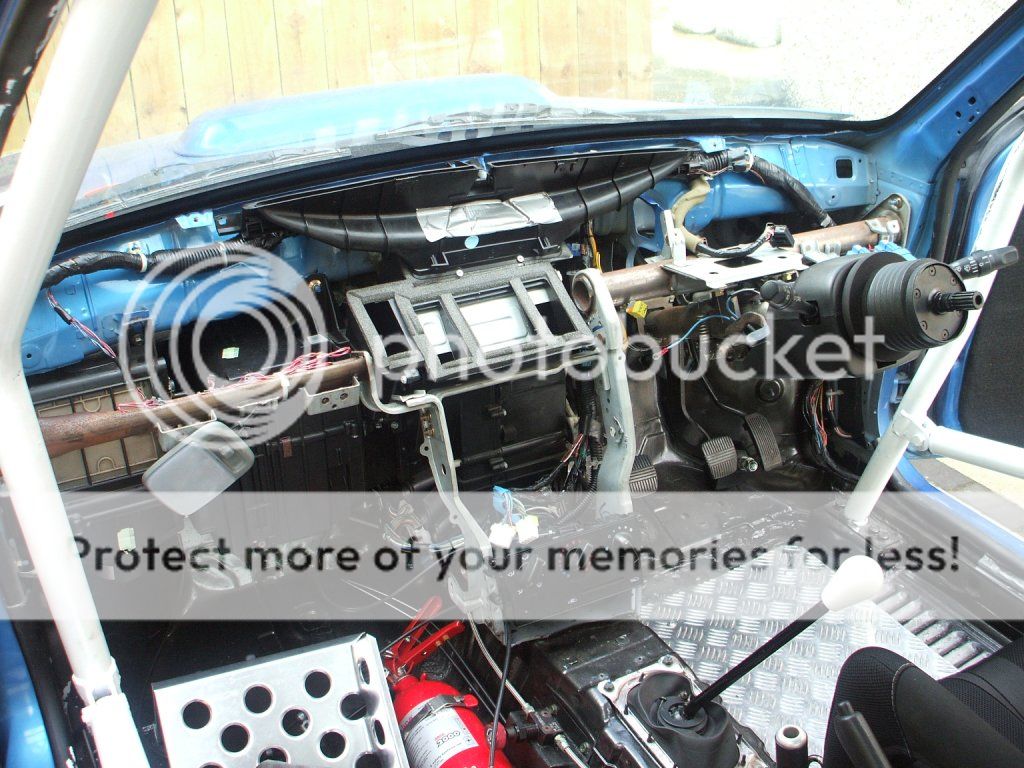
Nice job there Frank, does that box section go all the way to the passenger side? i Fancied putting a tube across just for a bit more strength!
yes mate, shoved into the A pillar as far as i could, our preface ones dont have the steel frames on the nearside tho eh (so you can save yet more weight)
mine just had this offside steelwork
View attachment 20660
ahh must be with them not having the passenger air bag i guess, no need for the metal work!
Sorted some 18 gauge ali today to make a start on the new dash.. please be kind its still in the "rough" phase but weighing in at only a few hundred grams im hoping to get the whole dash & binicle down to under 1.5KG in total

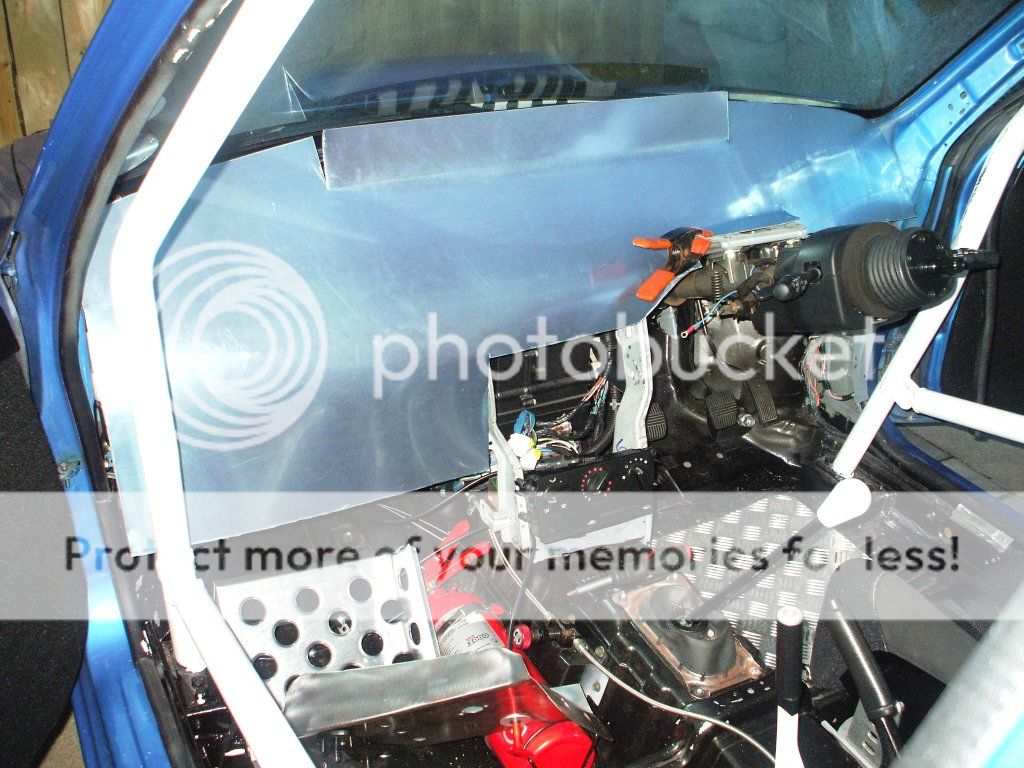
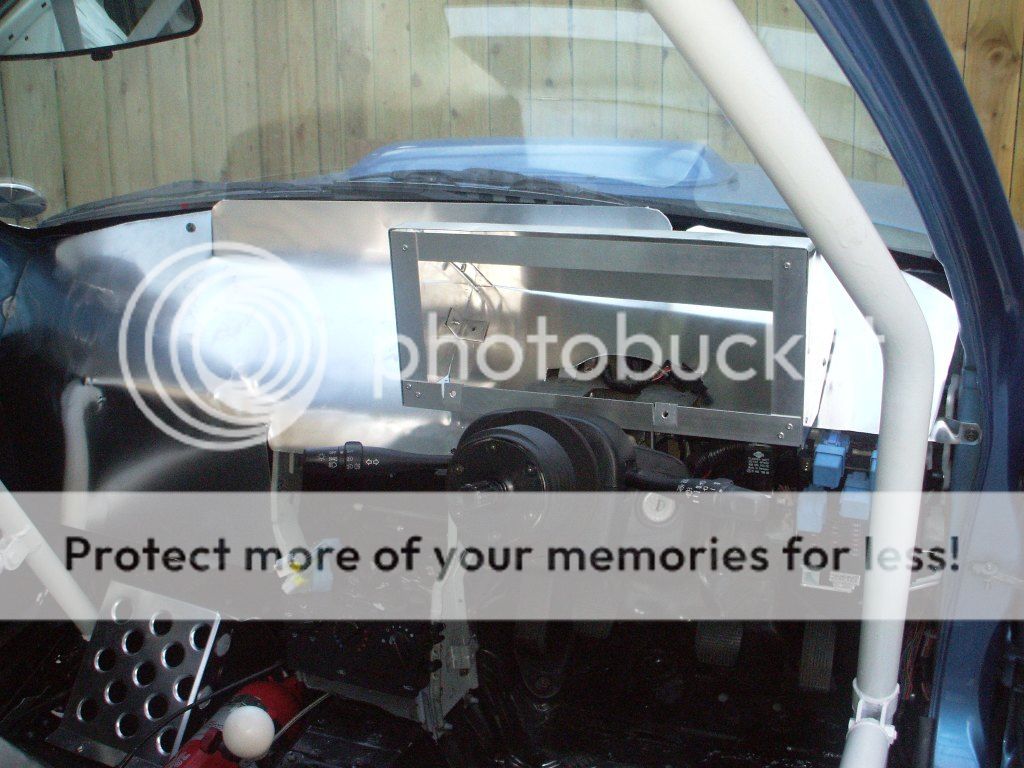
Well after much faffing & trimming the basic dash is built  hopefully to be covered & finished by the end of the bank holiday....
Centre pannel still to do but thats the simple part!

Centre pannel still to do but thats the simple part!
Belly93
to turbo or new lump :/ hmmm
are these mounts hard to fit skinner?Well there was a nice big box waiting for me when i got home
Uprated 23.8mm bore master cylinder (fast you go the quicker you need to stop!) as rust has set into the current factory unit

Same for the driver engine mount & passenger gearbox mount replaced by some lovely HOL poly units

Since the engine & box are out a TTV Racing flywheel (2.8kg) will be replacing the slightly lightend factory F/W


& last & by no means least a GRP Facelift bonnet to keep the cars diet plodding along at only 5kg


So this weekend is set to be busy! Manual rack to refit along with the engine bay ancillaries ready for the engines return over the next few weeks......
Il be starting a post below to show the various weights of parts removed / replaced which (fingers crossed) should be a fair weight by the end!!
I couldnt tell you yet mate still busy with the interior & engine etc
Shouldnt be too hard, cut out old bush & get a good surface for the new ones.. they will however allow very little movement so lining everything up well should save any headaches late on trying to get the engine & box in
Shouldnt be too hard, cut out old bush & get a good surface for the new ones.. they will however allow very little movement so lining everything up well should save any headaches late on trying to get the engine & box in
Removing the old bushes is easiest if you set them alight.
looking good though skinner...you get the bonnet from matt aswell ?
Thanks fella thats not a bad idea hey!
so you just take the rubbers out the centres? and how did you line up the bushes skinner? and did you fit the aero latches yourself?
For these the rubber and outer metal ring need to come out mate from measuring them up, il line them up as best as from the old bush & then bolt the mounts to the car half tight then to the engine & box when they are craned in... i think this should be easier than having them in situ
Yep i fitted the aero latches too bud, not hard but worth taking your time, measure twice & all that!
Are yours fitted from the top or the undeeneath of the bonnet?
On top mate i went for that option to spread the load more on the pins, should matter too much on the GRP one though as it weights next to nothing
Fitting upper ot lower mounted is 99% the same eh
Any advice on fitting them?
Mount the bonnet pin at a rough height first
Put a blob of oil on top of the pin & lower down the bonnet to mark where the pin will need to go through
(any of the support structure thats above this mark will need to be cut back to allow the catch to be fitted later)
Where the oil mark is drill a hole a little larger than the pin
Now the bonnet should be able to be lowered shut with the pin sticking out of it
Now using the guide that comes with the pins masking tape up the bonnet & draw a cross instersecting the top of the pin.
This gives you exactly where to cut out the kidney shape of the catch & also where to drill holes for the mounting bolts.
Drill the mounting holes out first as once the catch hole is cut out the bonnet wil flex alot more.
Cut out bonnet catch hole (dremel will do a good job of this)
Then its just a case of bolting the catch on and adjusting the height of the pin to get the bonnet sitting flush, this is done with a rubber that sits over the pin you can cut to desired height.
A tip here is to cut it a little high as over time the rubber will settle with opening & shutting
job done
Cheers skinnerwithout sounding stupid does the latch bolt to tge metal from tge bonnet or is there nuts/ fixing plate goes underneath
Nothing stupid about that mate, yes it bolts to the bonnet itself with nuts bolts & washers tho you can get a fixing plate as well..... if you want any pics i can pop a few up no worries
Dougyledds
Woopa Pandastyle!
Always been a fan of this mate, proper facelift inspiration
Always been a fan of this mate, proper facelift inspiration
Thanks for the kind words mate, hopefully get her all back in once piece over the next few months and see how it goes
Anyone know how much weight you lose by removing the stiffeners out of a stock bonnet? I've not tried it but I've seen one so I know it can be done. It flexed quite a bit but it felt like a worthwhile weight loss, especially that high up and from the front where it's harder to lose weight.
Belly93
to turbo or new lump :/ hmmm
ask sleeper ss he may be able to tell you he removed it in this thread iirc http://micra.org.uk/threads/rat.31477/Anyone know how much weight you lose by removing the stiffeners out of a stock bonnet? I've not tried it but I've seen one so I know it can be done. It flexed quite a bit but it felt like a worthwhile weight loss, especially that high up and from the front where it's harder to lose weight.
Anyone know how much weight you lose by removing the stiffeners out of a stock bonnet? I've not tried it but I've seen one so I know it can be done. It flexed quite a bit but it felt like a worthwhile weight loss, especially that high up and from the front where it's harder to lose weight.
have a word on frank he's done that very mod before
P.s carnt be more than 1 to 2 kg in total tbh
Hi Guys well the dash & pod are done, pods front cover is a matt black persex sheet which will house the oil pressure gague as well to keep it in my eye line 


Before the dash goes back in theres a few jobs with the brakes like fitting a T piece & grometing a hole for the oil pressure capilary pipe in the bulkhead, so that will have to wait for now untill the master cylinder & pipework is routed with these fittings...................

Brake lines some assembly required
Shims for the group A cams & 6 flywheel bolts have arrived so hopefully the engine will be built over the next weekend.... this weeks plan is to try to get as far with the brakes as i can, also with a guide of how to make you own braided lines
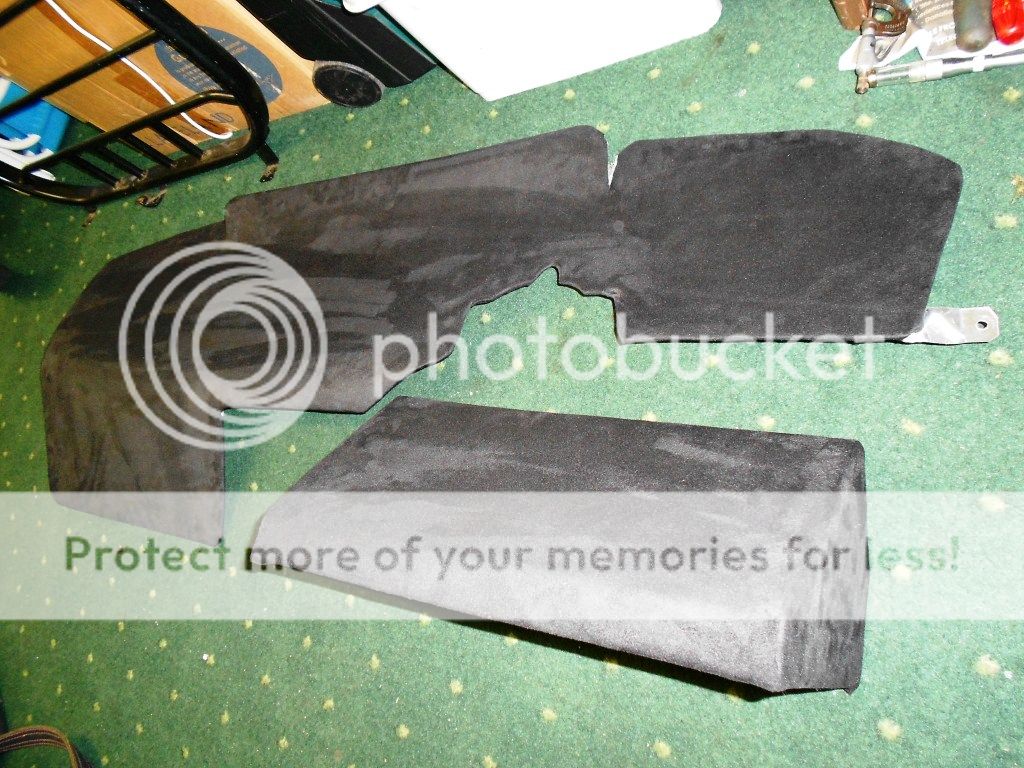
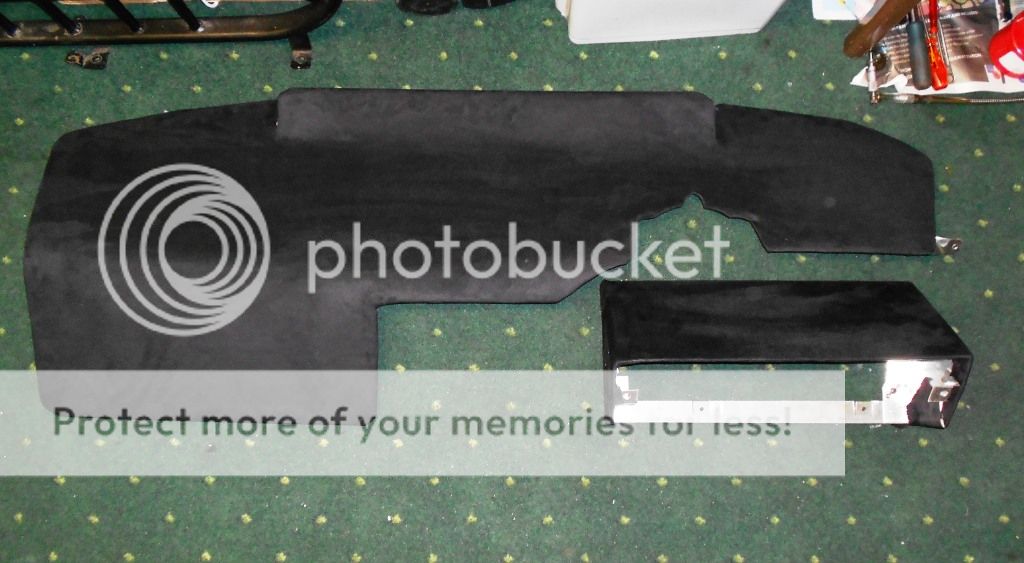
Before the dash goes back in theres a few jobs with the brakes like fitting a T piece & grometing a hole for the oil pressure capilary pipe in the bulkhead, so that will have to wait for now untill the master cylinder & pipework is routed with these fittings...................
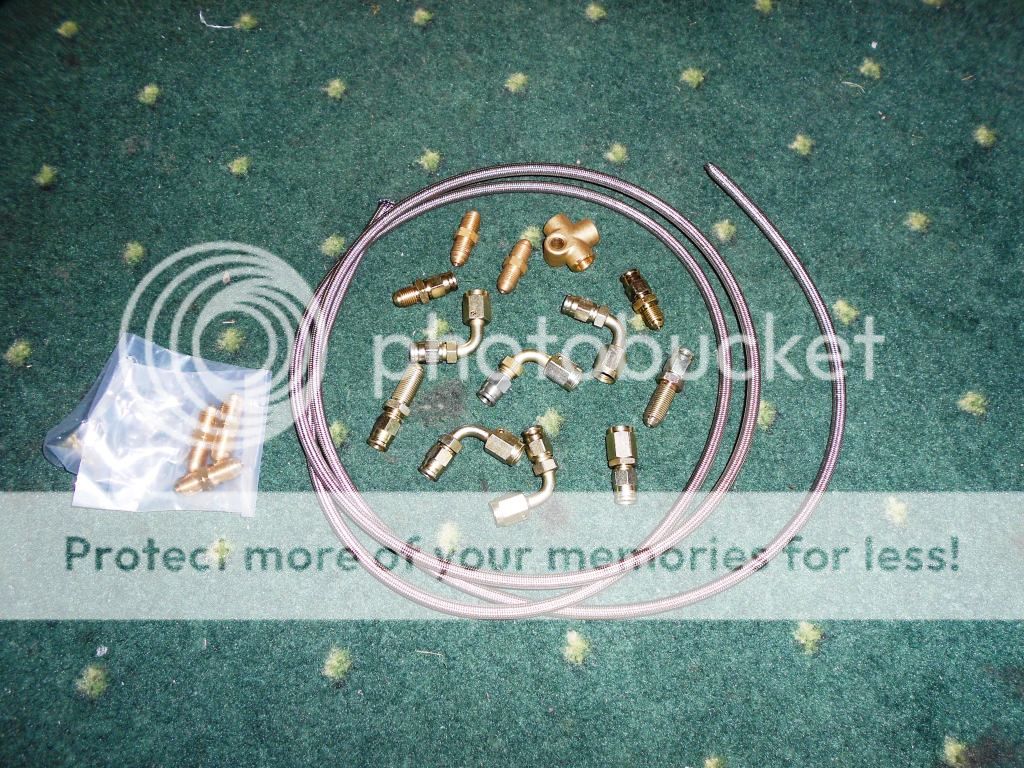
Brake lines some assembly required
Shims for the group A cams & 6 flywheel bolts have arrived so hopefully the engine will be built over the next weekend.... this weeks plan is to try to get as far with the brakes as i can, also with a guide of how to make you own braided lines
Well there was a nice big box waiting for me when i got home
& last & by no means least a GRP Facelift bonnet to keep the cars diet plodding along at only 5kg


So this weekend is set to be busy! Manual rack to refit along with the engine bay ancillaries ready for the engines return over the next few weeks......
Il be starting a post below to show the various weights of parts removed / replaced which (fingers crossed) should be a fair weight by the end!!
Please can you tell me where you have bought? And price
Pm if you want
Anyway awesome works!!!!!!!!!!!!!
Please can you tell me where you have bought? And price
Pm if you want
Anyway awesome works!!!!!!!!!!!!!
Thanks mate, you have a pm
Well thanks to Karl these arrived the other day, made sense whilegetting a bigger master cylinder to get it something worth pushing so its going to be Gti up front 

Calipers & carriers were stripped bear, ground back & new seals, clips & dust boots fitted along with a coat or redoxide which is just going off at the moment, weather depending to get a nice coat of satin black & some VHT some time soon:

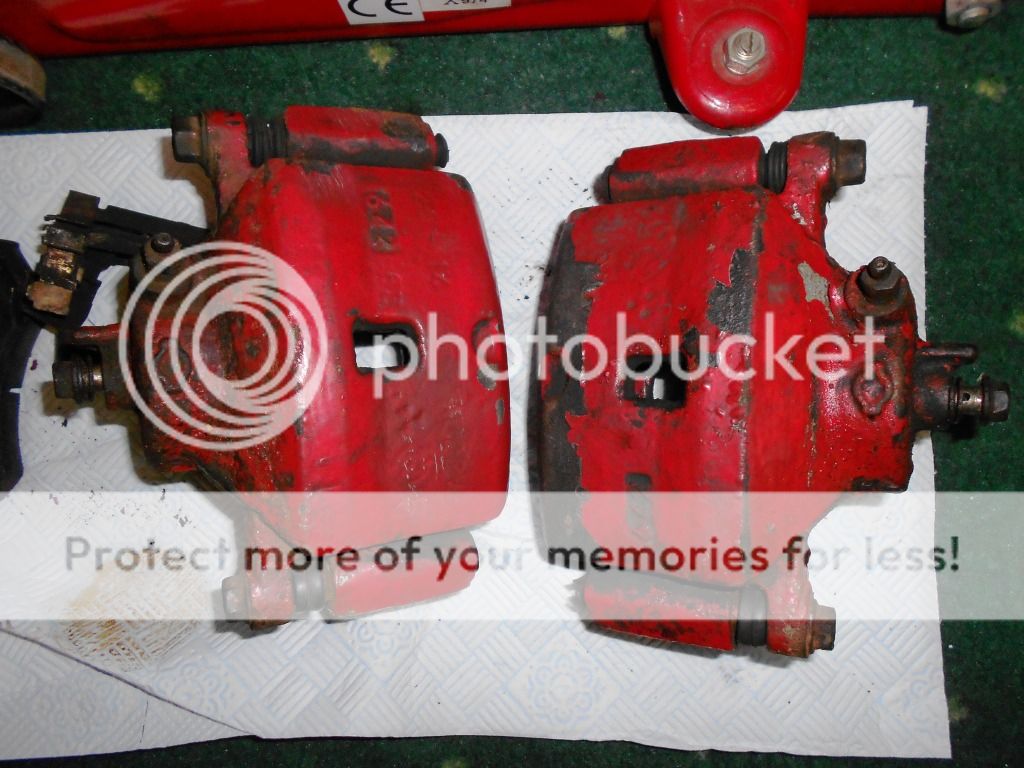
Calipers & carriers were stripped bear, ground back & new seals, clips & dust boots fitted along with a coat or redoxide which is just going off at the moment, weather depending to get a nice coat of satin black & some VHT some time soon:
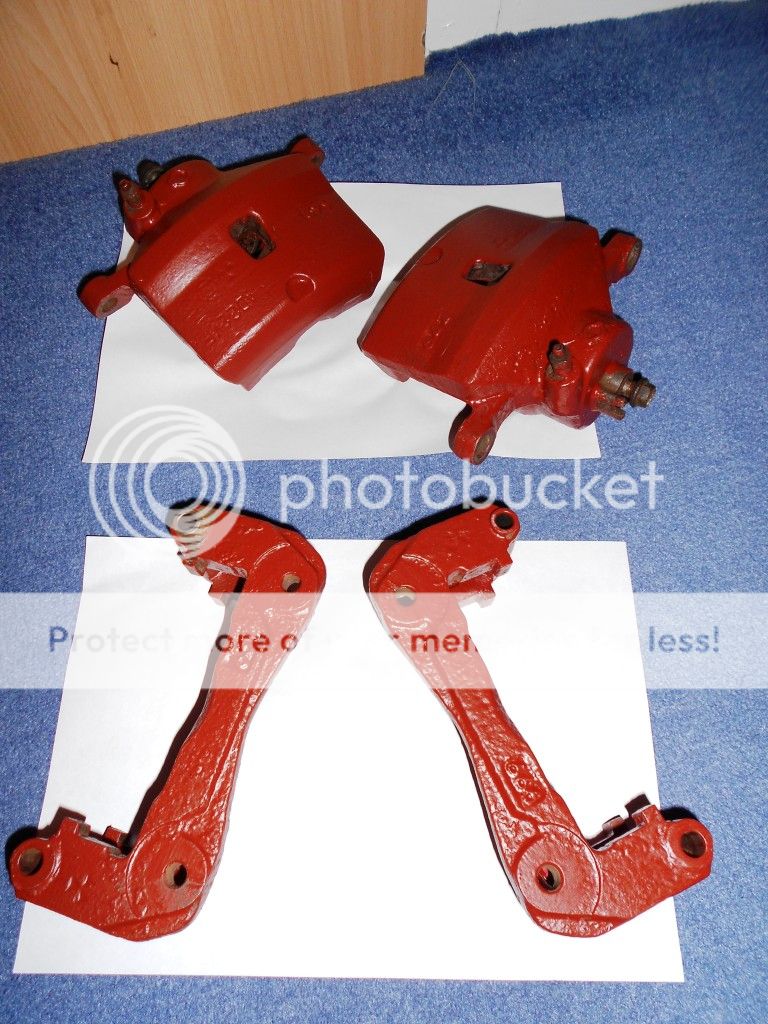
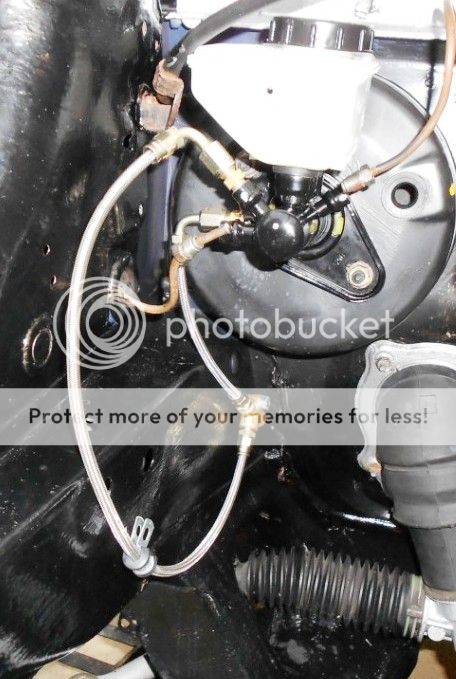
Since the engine bay is clear the bigger M/Cylinder went in today as well, though the old copper rear lines were routed as a best fit around the motor last time so in the bin they went & i cracked on with replacing them with stainless lines as below:
The fittings come in 3 parts with a crushable olive in the middle (this needs to be replaced each time the fitting is re used)

A T-piece was bolted on just below the brake servo where the 2 rear lines will be merged to one before the pipework runs to the rear. Then you will need to cut the line to size. I found the best (cheapest) way to be a 7mm hole in a split block of wood. Wrap some tape around the pipe to prevent fraying & use a fine blade saw:

Clear out any swarf with a flat screwdriver & slide both of the screw fitting for each connection over the pipe now (this make its alot easyer to slide them over as the next step makes it nearly impossible!)

Pry back the braiding to the depth of the olive being carefull not to fray it too much & press the olive over the pipe core (it should push flush against the pipe so it seats neat at the end)

Next up push your end fitting onto the pipe & clamp in a vice, now slide up the bottom fitting & tighten to crush the olive in place


Repeat for the other end of the pipe & job done

Two lines done & one to go

The fittings come in 3 parts with a crushable olive in the middle (this needs to be replaced each time the fitting is re used)

A T-piece was bolted on just below the brake servo where the 2 rear lines will be merged to one before the pipework runs to the rear. Then you will need to cut the line to size. I found the best (cheapest) way to be a 7mm hole in a split block of wood. Wrap some tape around the pipe to prevent fraying & use a fine blade saw:
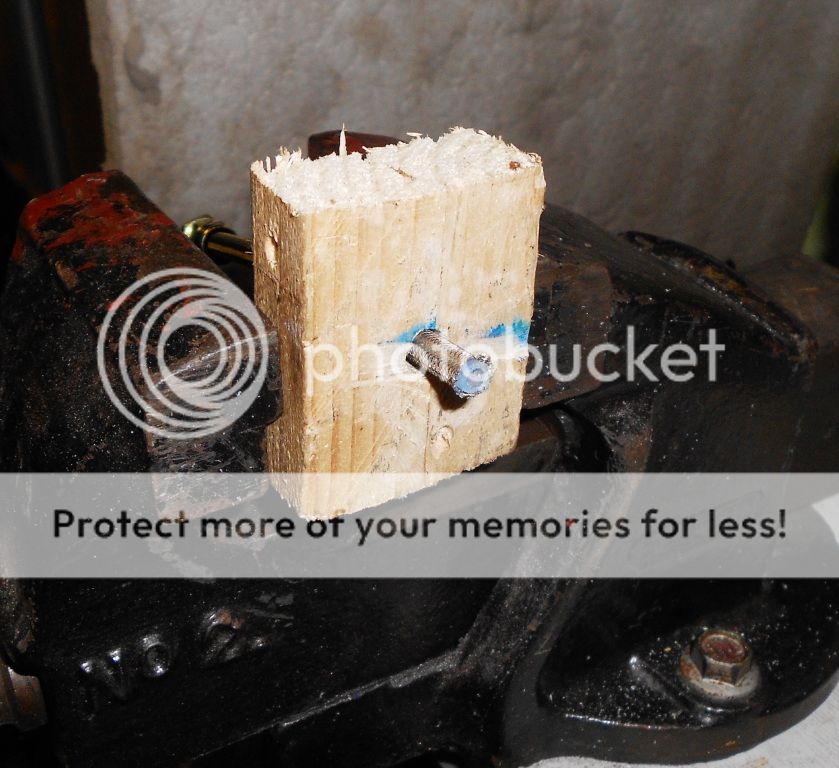
Clear out any swarf with a flat screwdriver & slide both of the screw fitting for each connection over the pipe now (this make its alot easyer to slide them over as the next step makes it nearly impossible!)
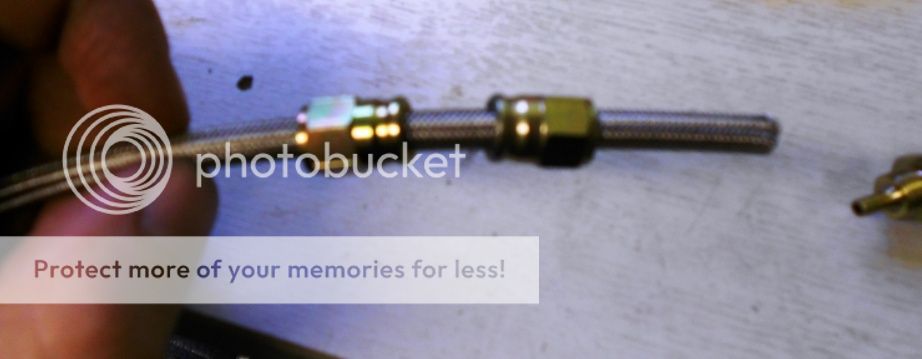
Pry back the braiding to the depth of the olive being carefull not to fray it too much & press the olive over the pipe core (it should push flush against the pipe so it seats neat at the end)
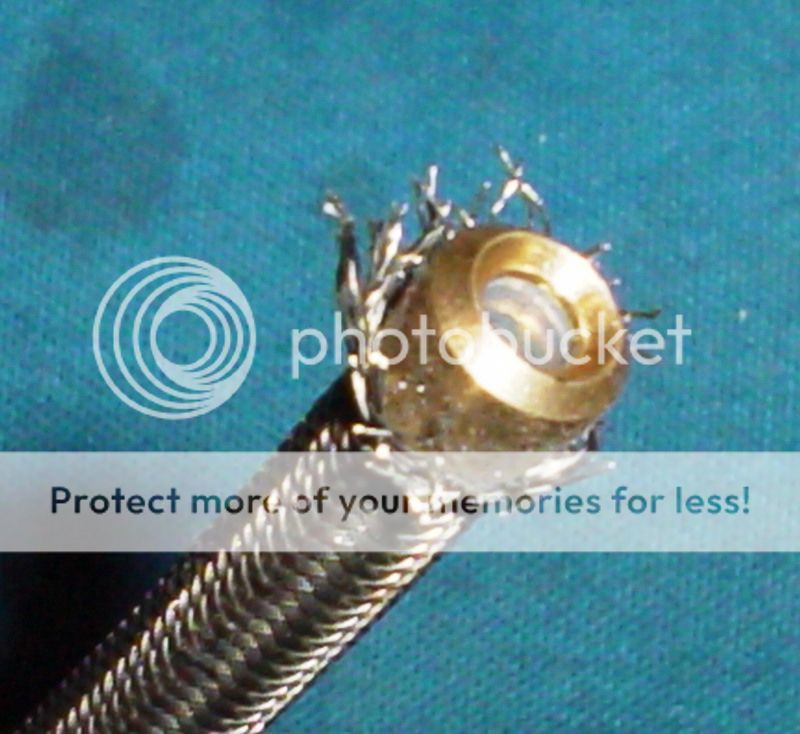
Next up push your end fitting onto the pipe & clamp in a vice, now slide up the bottom fitting & tighten to crush the olive in place


Repeat for the other end of the pipe & job done
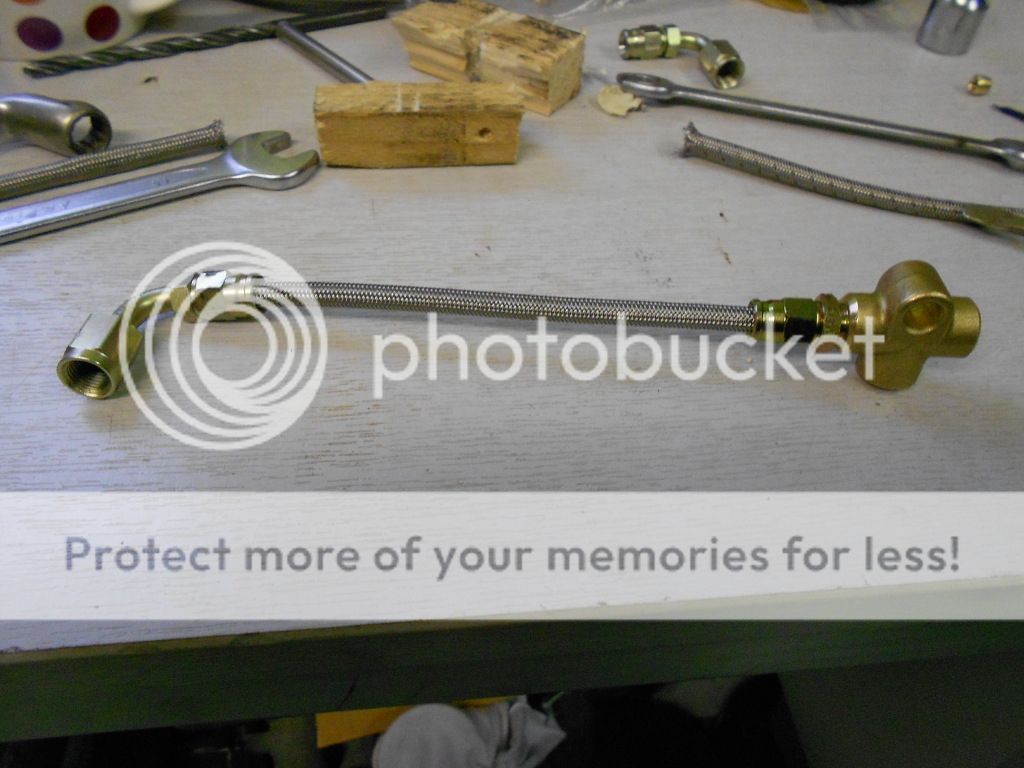
Two lines done & one to go
Cheers Mike, once you've done a few its not so bad at allreally good guidei think even i can follow this fully

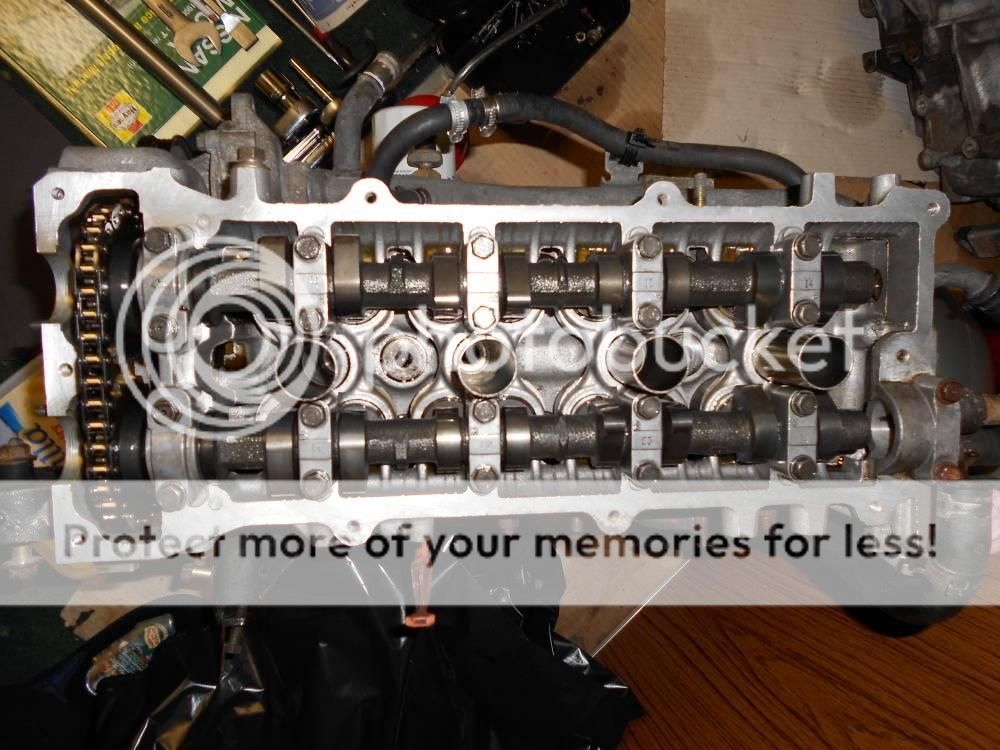
773 Cams are in and shimmed  still looking clean after a few thousand miles..........

Similar threads
- Replies
- 16
- Views
- 3K
- Replies
- 8
- Views
- 2K


