• Please only use these forums for blogs, they are not a discussion forum

Ryan's Micra Blog

DannyG
you mentioned that you fitted central locking to your micra, i would like to do the same to my 95 Super S and have a pair of genuine nissan front door solenoids, i am not bothered at this stage to have remote C/L, can i ask you what components you needed to do your install ?
 
DannyG
you mentioned that you fitted central locking to your micra, i would like to do the same to my 95 Super S and have a pair of genuine nissan front door solenoids, i am not bothered at this stage to have remote C/L, can i ask you what components you needed to do your install ?
Your car is actually the reason I bought a micra! But anyway, I was lucky enough to have a donor car with central locking already on it so I simply swapped everything over so if I'm perfectly honest I have no idea hahaha!
 
But I know you will need the wiring loom as it contains two boxes which control the central locking, one box is located at passenger footwell the other is next to the fuses at the right hand side of the driver, I don't know how easy it would be to buy universal stuff on eBay but I wouldn't use the genuine Nissan ones, a lot of work if you don't have everything there
 
I would like to have central locking some day. And yeah, I noticed that box near the fuses on my '95 Micra, something to do with timing, it clicks after a second or so when locking.

Anyway back to my Micra blog, more paint applied today!
c1.jpg
c2.jpg
c4.jpg
c5.jpg

Doorhandles are a little runny but I don't mind too much.
Now she's got whiskers on the front!
 
In addition I just did some general TLC. Pumped up tyres, the front right on Billy was flat again, must be a slow puncture. Put air in and swapped it for the spare. Just otherwise tidied up some bits, for example the rubber seal around the rear window was poking out again, and I happened to have some glue to I stuck it down.
Used the glass cleaner finally, only on the outside of Cassie. Did the headlights too. Looks nice, just need to do the inside.
c3.jpg
 
Hi flyboypuoi, sorry man didn't mean to be rude and hijack your thread, just seemed a good opportunity to inquire about central locking with someone who had experience of fitting it to a car that originally was without it. Your cars are coming along nicely too mate, keep up the good work !
 
Hi flyboypuoi, sorry man didn't mean to be rude and hijack your thread, just seemed a good opportunity to inquire about central locking with someone who had experience of fitting it to a car that originally was without it. Your cars are coming along nicely too mate, keep up the good work !

Hey, that's alright, I didn't think you were hijacking it! In fact it's nice to know I've caused a conversation about Micras! I too would like central locking some day so it's interesting to see what you guys say. Honestly you weren't rude! :)
 
Well I attempted something probably a little stupid tonight!
It was already about 7pm, and I felt like investigating the mechanism in Billy where pulling a lever to the side of the driver seat opens the boot without using the key. Pushing it down opens the fuel flap as there isn't a key lock at all.

I am so fed up of taking the keys out of the ignition and switching off the engine to open the boot. And taking the keys when refueling too.
So naturally I started taking things apart...
13403979_1160585757296725_5810347704337068426_o.jpg

Okay, I haven't looked up any tutorials or tips, and am on my own with basic tools, as normally.
I ended up just taking the back of the rear seat off of Cassie and detached the base of the seat (at least partially).
13411946_1160585873963380_8122699331342189589_o.jpg


I managed to swap over the locking parts to Cassie...
13443304_1160586180630016_5056180724712359027_o.jpg

(^Not finished here^)
13416887_1160585930630041_7194494743393183628_o.jpg
Finally I found out where the boot light switch is in Billy. It's in that part above. The switch just disconnects but on Cassie there's nowhere to plug it in... beginning to wonder if Cassie is even compatible.


Soon I managed to pull out the whole cable system in Billy. Time to transplant!
13411659_1160586117296689_1324521877062623756_o.jpg

Lever mechanism in Cassie..:
13411905_1160586240630010_4079467288707273648_o.jpg


And after hours and hours... I finally got closer to getting it to work. It is a little iffy though. Really found it hard to set up correctly, but finally, long into the night it's at least more-or-less working..! Well, the boot open that is. I'll have to buy a new fuel flap without a keyhole to do the fuel flap, but it looks easy, as long as the mounting isn't broken on it.
13403155_1160586200630014_8136728849767304120_o.jpg


Pro tip #1:
Don't start a relatively big job really late in the evening when you need to be clocked in and working at work tomorrow at 7am.

I haven't even made my dinner yet.
 
I did this last week but only now am posting..!
I couldn't get the wires to feed inside the boot so I ran them along the glass.
1.jpg
2.jpg


Unfortunately, no matter how I did it, the boot light would blow whatever fuse the power source wire was from. I ended up blowing 5 or 6 fuses before giving up.

I know there was some way to fix this, but I decided "eh" and went for a switch option instead:
3.jpg

And I am surprised, it really makes a difference at night! The wire I used to power the light came from a previous splice in the steering column, used for the front fog light warning light and the sport light, as I knew it was constantly powered (so no need for ignition or anything).
That switch is only glued in place so I am careful with it. Though it seems really secure.

While I was back here I taped up my centre brake light:
4.jpg

It's actually broken at the screw. I did have some sellotape here but apparently it's not a great fix, plus it's noticable.
I originally only intended to do this to stop it from rattling on some motorway roads, but I only realised now that it was the cause for my centre brakelight not being straight!

Anyway I am seriously thinking about finding some pillar speakers soon, and maybe that dash with the rev counter.

Also I just woke up thinking that a mesh grill would look nice. I took one off to see how it goes together, I guess it could be possible. I wanted to keep the outside chrome but lose the middle bit. I think it'd look nice, and a little different.
 
So I went ahead on that mesh grill thing!
Ended up finding some in Halfords for a ludicrous price. Being impatient I bought it anyway.
And so began the attempt!

Here's a quick preview with some practice mesh on one side before securing it, was contemplating keeping it silver but I felt it looked too "I'm trying to be posh".
1.jpg


Anyway, I managed to cut them both into shape, time to spray! I decided to spray these gloss black.

2.jpg


I also sprayed the black back parts as now I realised how grey they were, like the rest of the black plastic. These I decided to spray matt black.
Also I resprayed the air box cover matt now instead of gloss.

3.jpg


A quick preview before putting it on!

4.jpg

And the end result:
5.jpg
6.jpg

I'm very pleased with this. The pictures don't do it justice.
I later bought some glue to secure the chrome trim as it isn't actually clipped to the black back part, due to the mesh being in the way.
 
Last edited:
One thing with Cassie is that the left number plate light lens is burnt/corroded, I'm guessing from bulbs and my many cheap LED replacements burning out in there. I've tried to clean it out before but it always had this brown-y colour to it.
So I thought... Why not swap for one from Billy?
They're actually differently patterned but of course it fits. No more discoloured left light!
13552779_1171439056211395_1813594006_n.jpg


Anyway I finally put Billy back together from the boot lever thing.

Next up was the headlight connector on the left side (Cassie)
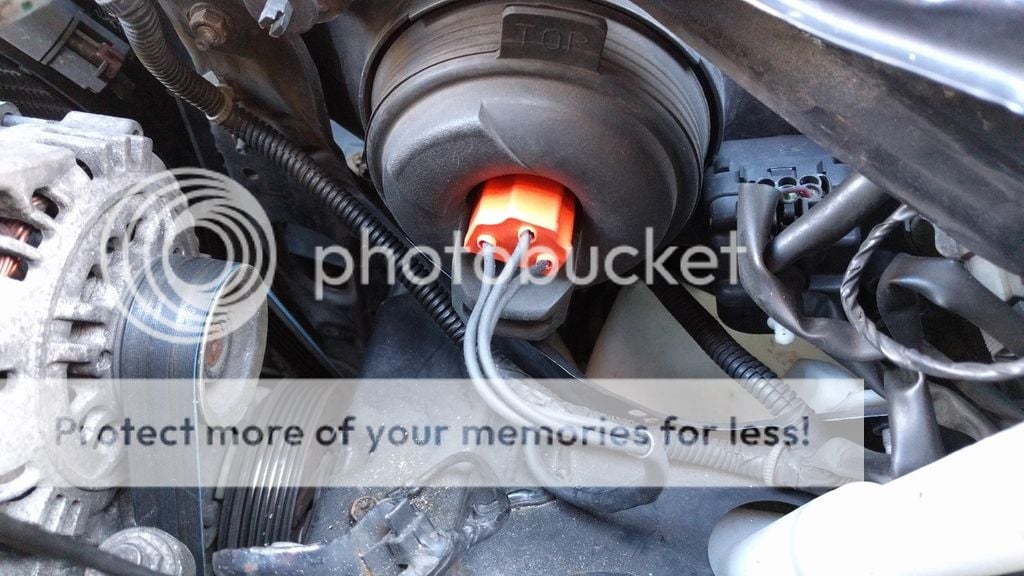
If I remember right Agent Smith, you replaced one on your car? A ceramic one or something? Bright orange?
13553409_1171439059544728_166632260_n.jpg

Here's my new one. A Halfords bit. Really thick insulation on those wires!
13563411_1171439049544729_1323341289_n.jpg

Praise be connector blocks, greatest invention right next to cable ties!
13566130_1171439042878063_832666384_n.jpg

Of course I wrapped it in electrical tape to stop water ingress.

Just went out for a couple of quick spins in Billy (On uhh... private roads...), remarkable car, never fails to start and feels so nippy! And that broken exhaust just sounds awesome. Really crackles lifting at high revs.

Oh also I put him on eBay.
http://www.ebay.co.uk/itm/252444349419?ssPageName=STRK:MESELX:IT&_trksid=p3984.m1555.l2649
 
Almost done with the trim paint!
13565424_1173350859353548_770069326_n.jpg

13608276_1173350862686881_988939064_n.jpg

13599496_1173350872686880_1859699542_n.jpg
Annoyingly I ran out of paint before I could finish this coat! There are a few little areas that haven't quite got enough paint on them, so I'll get some more tomorrow after work and complete it, along with a second or maybe third coat.
13598825_1173350869353547_1674609607_n.jpg

But it does look good!
13595647_1173350876020213_708657845_n.jpg
13578696_1173350879353546_1560258219_n.jpg
 
Firstly: Tyre shine is quite nice!
tyre shine.jpg

Doesn't work quite as nicely on older worn tyres though. Still, improves them!

So I finally got around to finishing the trim painting!
13625054_1174602712561696_1039704972_n.jpg

I did put some more coats on the front whiskers as they didn't quite match the big bit. They seem to take more of a beating than anything else.
And yep, door strips and the front mudguards & the bottom painted up!
13595723_1174602699228364_1822696934_n.jpg

^Before...

13598952_1174602702561697_1854132629_n.jpg
^And after!

While I was doing things, I thought I'd have a third try at fixing that drooping middle brake light. New attempt is looking good..:
13598890_1174602729228361_619863483_n.jpg

That's Blu Tack.
Also seems to have stopped that horrid rattle from the boot panel:
13607869_1174602739228360_207173233_n.jpg


Anyway. Back to the painting..:
13595882_1174602752561692_1012030780_n.jpg

That's the big section of the rear done now too!
cass ass.jpg

And of course the other side door etc.
That's the whole lot done now! Very happy! Although I did only put one coat on the back (ran out again). And it wasn't a particularly good one. But it will do!

Also cleaned things up. Glass cleaner on the outside and on the inside, and on the lights & mirrors. Didn't wax it but I did T-Cut quite a bit as I finally oversprayed a load of paint. Tyre shine added too. Result:
13624886_1174602785895022_709682838_n.jpg
13624991_1174602805895020_1754018316_n.jpg
13607863_1174602812561686_1314851210_n.jpg
13624862_1174602845895016_947673172_n.jpg


One happy looking Micra! :D

Now!
I have been thinking on those mods. I would definitely like:
•Pillar speakers
•Rev counter
•Fuel flap with no key barrel
•Almera steering wheel

I've seen that people have put Almera wheels on their car. I prefer the black look to it but it's mainly because mine is so warn. Also, if the radio controls work, that would be nice as it is beginning to get annoying leaning over to change the track (though I guess it has a remote). I wonder what adjustments need to be made for all this?
 
Last edited:
Well, I may have just spent £99 on some Taiwanese replica (Super March?) LED tail lights!
Here they are!:
13652770_1179766998711934_1576353742_n.jpg

And the rear:
13705199_1179767002045267_2070412084_n.jpg

Now I've read many times that you need to move over some pins in the socket, and yes, I did have to.

13706132_1179767008711933_1182014509_n.jpg

They were pretty hard to figure out how to get out. As usual I looked at no tutorials and have the most basic tools. Slightly damaged a couple on this side but they still work. When I did the other side it took only a minute.
I had a look at a wiring diagram though, and drew out this:
GA.jpg

(I'm putting a disclaimer on the image so that people don't find it in Google Image Search and use it! Whenever I look for help by images it takes me to the MSC site!)
This wasn't quite right (or at least I put it in wrong) as it made this happen:

Anyway I soon got it fitted and working!
13694980_1179767005378600_637341017_n.jpg

And soon enough I got them both in and looking great! :D
13672203_1179767012045266_1125049900_n.jpg
13705173_1179767025378598_275699994_n.jpg
13652377_1179767022045265_586103132_n.jpg
13689544_1179767038711930_282337064_n.jpg

Very very happy!
I got both reverse lights to work by bridging a wire across from the left side.

Now I should think about adding a rear fog light somewhere.
 
Finally sold Billy. In the end (what with moving home iminent) I settled for £150. Didn't have my iPhone with me but had my S2, hastily took some awful pictures.
13731971_1187473961274571_1869216024818827351_o.jpg
13767193_1187474281274539_2714610706459251823_o.jpg


Got a look underneath finally. Rusty but not terrible.

Apparently the guy exports them. I asked about LHD/RHD and they get swapped over. So Billy is going to become a left hand drive, that's a crazy thought.
The guy's just over to pick up a red pre-facelift and tow it behind! :D
 
Finally have some internet, now staying temporarily in Wales.
Didn't do much since I was gone due to moving, but:
13956923_1197346356953998_705262756_n.jpg

Swapped the bulb in here for a huge LED block. So big in fact, if I remember, I had to carve out a lot of the bulb housing:
13933449_1197346353620665_435521305_n.jpg


In addition, after coming home from abroad, got a new interior light to match:
14341583_1228180890537211_1078857686_n.jpg
14348701_1228180870537213_1243581202_n.jpg
14356134_1228180867203880_827488687_n.jpg

I've just seen others with bigger ones, this is only 4 LEDs but it'll do for now, brighter would be nicer. Also, I've been thinking of installing more white lights in the footwells as this light kindof aims more at the rear seats really.
Staying in an open garage, what luxury!:
14341907_1228180893870544_366776448_n.jpg


Also, just this moment, I finally bought some pillar trim with speakers! They wanted £30 but I offered £25 and they sold it to me immediately! Only condition issue is the mounting brackets on the speakers, they both have only one but that'll do.

Just had a go at pulling off my steering wheel, I'm still going to put a black Almera wheel (with radio controls), but didn't get very far due to those screws on the sides, nothing seems to budge them. Will I need the actual tool?
 
Pillar trims with speakers, almera steering wheel, and now also some footwell lighting is in the post to me. The latter will likely take many weeks.
Had a go already at pulling off the pillar trim, not easy initially (using fingers), but easy enough with a screwdriver as a lever.
In addition, I removed the interior light to familiarise myself with the wires and where they go, for the footwell lights.
Also good news, the tweeter speakers have connector blocks ready and waiting.
14341859_1228887793799854_621073722_n.jpg
14384014_1228887800466520_1510430957_n.jpg

And a surprise visit from a new friend I made here!:
14383271_1228887803799853_1818147741_n.jpg
14348790_1228887833799850_294162628_n.jpg
14365240_1228887820466518_1110297853_n.jpg
14383387_1228887797133187_696986079_n.jpg
14331702_1228887823799851_1336993862_n.jpg

Will keep y'all updated!
 
One final attempt at securing my broken centre brake light..:
14388989_1228900493798584_149757811_n.jpg

The tape didn't work, nor did the electrical tape, and the Blu-Tack works only for a while before I need to push it back up (usually hot days it droops)
Now the last of my superglue had better do the job!
 
Look at what arrived in the post today!
14398140_1229697617052205_1237607231_n.jpg

And in surprisingly good condition too, they said it's "definitely worn" and even on the receipt it says so, but it looks great! Complete with airbag and radio controls! (Didn't realise until yesterday that they have volume hidden on the side too)
This was somewhat of an action shot as it's pretty heavy to hold in one hand.
And then suddenly!
More post!
I thought it was something I ordered for uni, for next day (today), but no! Look what arrived about 10 minutes later!:
14365262_1229697627052204_1843579193_n.jpg

Awesome! Can't wait to get these on (I've already had the old ones off yesterday)!
Really decent condition too, other than being a little dirty. The speakers are both missing a mounting bracket but one is enough.
14383286_1229697620385538_654758890_n.jpg

Here I am just lining up the speaker with the hole as it can rotate without the other bracket side. Quite hard to get the mesh back on from here so I don't recommend it.
14397933_1229697623718871_397371571_n.jpg
14388965_1229697650385535_1549837526_n.jpg

That's it! They're in and working! Now I have the full 6 speakers, all OEM!
They're surprisingly subtle in sound, but they do make slight improvements in treble and in songs where the sound moves around from left to right.
For the steering wheel, I'm just bidding on some -- never mind. As I was typing that, I got outbid.
I'm just trying to get some hollow torx bits/allen keys for the airbag removal, and then I'll need to borrow a 19mm socket for the wheel itself (remember, I have really basic tools).
Any way, happy to have those speakers in! They look great from inside and out!
Just have this steering wheel sitting here taunting me..! D:
 
Girlfriend of the year got me a decent socket set for my birthday. And my sister got me a car jack. So now I'm not-so-much using only an adjustable spanner, some curved pliers and my fingers to do anything to my car.
My hollow torx set came in the post and so...
It begins!
14445876_1235470969808203_716458335_n.jpg

(Copper grease there because finally I'm changing the front pads. Probably just scrap metal down there by now)
14469302_1235470976474869_1521107470_n.jpg

^A regular visitor now^
14463758_1235470959808204_1144391071_n.jpg

So these were an absolute nightmare.
Of course they've never been undone in their existence. And they were threadlocked 14+ years ago. So of course they rounded off.
Luckily where I'm living, there's a tool shop just a minute walk away, so I got some junior hacksaw blades and chopped the airbag module out.
14429681_1235471003141533_1727343309_n.jpg

Shame. I was wondering if I could reuse it for something funny like a gaming wheel.
Anyway. Next problem (this whole thing is just problems after problems):
14458989_1235471009808199_2120195038_n.jpg

Like I've read, the airbag is different. But so is the connector, which threw me off a little. Luckily, salvaging the plugs that where there, I made this bodge-of-the-year. The wires still have the plug female pins attached and went right on the pins on the module. I bent them slightly to the sides to allow room. As far as I can imagine, and looked up, airbags don't have a polarity, so it doesn't matter which way the wires go.
To be extra safe, I scrapped some plastic from a plug and stuck it in between. Then after this, I wrapped it in electrical tape. Made sure the new "plug" doesn't touch anything when the wheel is on (like the horn plate/switch)
14458889_1235471006474866_685833184_n.jpg

And the rest was easy, really. Here it is! The radio controls will be sorted out at a later date. This wheel feels so different, despite being the same shape (might I just add that I love the shape!). It's a different material and it has stitching along the whole inside and the back of the spokes.
Also it's black.
14445430_1235471023141531_102791000_n.jpg

So there we go. The SRS didn't blow it up and the airbag test goes through fine. I've been driving with it for a couple of days now and it's good. One thing I will need to do though: It's not quite straight. Just needs one spline tooth to the left.
I also prepared to spray the panels behind (with the key barrel) black, but after setting it all up I realised I only had gloss black and not matt.
 
14425563_1239753636046603_1243014003307357227_o.jpg

Woooooooooooooooooooooooooooooo!
Anyway!
I decided to check out my brake calipers. And then clean them up and paint them. I know it's a little chavvy, but I did it for the same reason I painted my engine, to keep it from corroding more and to make it look nicer.
14508487_1241474832541150_1729726828_n.jpg

Oh and by the way I did a pretty crap job of painting these. The paint was so runny, it was like red water.
14518751_1241474849207815_2142398234_n.jpg

Really enjoying my new tools!
14528489_1241474845874482_937629262_n.jpg

Chucked on some paint to this. I like the colour. Did another coat after this as it was crap. This is caliper paint, before you ask.
14542769_1241475155874451_241862620_n.jpg
14555832_1241474839207816_1844460931_n.jpg
14542910_1241474899207810_526860339_n.jpg

Left side was patchier unfortunately. But it'll do. Checked the pads, glad I've bought some new ones. The left side was at the end of its life and the right... Well... had gone a little beyond, I think.
Oh and I also fixed up a floppy back-of-bumper that technically failed my MOT last time. Missing a screw.
14502109_1241475149207785_975177918_n.jpg
 
Last edited:
Oh, also I sprayed the panels behind the steering wheel to match the wheel itself.
14508539_1241418635880103_27979299_n.jpg
14518291_1241418625880104_1162182310_n.jpg

It's quite nice. I have to be careful with it though, if I scratch it it reveals the original colour.
New pads!
14518468_1241418645880102_1102905418_n.jpg

14528421_1241418629213437_1751651493_n.jpg

14518749_1241418679213432_2054313137_n.jpg

Woah, these are thick! Looks so good to have new parts in there.
14543487_1241418675880099_1900897613_n.jpg

And the old pads:
14518409_1241418699213430_305508431_n.jpg

Got my moneys worth outta them!

I tried to adjust my steering wheel also. So 1 click to the left put it way off. Just when I was about fed up of removing and replacing the wheel and airbag, right at the end, I don't think I connected the airbag properly as I got a flashing warning light. After fixing it, the light stayed flashing as it needed a reset. ****, I thought, how will I do that?
And then I looked on here on my phone and someone gave me the answer in the K12 section! It seems it works for the K11 too!
I had to switch on the ignition and switch off as soon as the SRS light went out, then wait a few seconds and repeat 2 more times. Then switch on and off again (or something) and it reset!
 
Now I know I've said that the K11 can fit a lot in the back, but have you ever put in a kingsize spring mattress? With 2 people inside?
IMAG0001.jpg
IMAG0002.jpg

I think the boot was sticking out a little on the last picture. It definitely bent the inside panel so it rattles again/more.
Wait, you guys haven't seen what I look like yet!:
IMAG0003.jpg

So now in this situation, I'm hoping the airbag does not work.
Some action shots:
GOPR2738.JPG
GOPR2739.JPG
GOPR2740.JPG
GOPR2741.JPG
GOPR2742.JPG
 
Forgot to post, had a look at one of the rear drums, looks alright, probably won't change the shoes for a while. Cleaned it up a bit. I'm aiming to spray them black.
IMAG0008.jpg
My new jack in action.
IMAG0009.jpg
^Looks pretty funny with just the hubcap in there. :)
IMAG0010.jpg
Stance yo!
IMAG0011.jpg

Anyway enough dicking around.
Now that the footwell lights are here I fitted them today. Thought it'd just be a simple job but turned into such a pain in the ass. Had to take apart so much interior, some of which I haven't done before. Ran out of wire during, so walked to Screw Fix and got some speaker wire, quite handy that it's two wires stuck together as that was my final setup.
IMAG0017.jpg

Final design was to stick the wires in on the front (left as pictured) contact for the bulb, and one on the power rail where it's held in (top).
And finally, after longer-than-should-have-been,
IMAG0018.jpg
IMAG0020.jpg

Drivers side was harder as the adhesive didn't stick to most of the area I wanted it to go. As the strips were both longer than I needed, I wrapped them around the corners a little for some light pointed at the sides too.
And a nice extra was this:
IMAG0021.jpg

The interior fusebox is illuminated! Great for fault finding in the middle of the night. Unless it's the interior lighting fuse that has blown.
IMAG0028.jpg

Really pleased with the results. The light is a little blue-er than I had hoped but it'll do just fine.
In the dark:
IMAG0046.jpg

Bear in mind that the exposure makes it look much lighter. It's not blindingly bright like the picture shows!
IMAG0043.jpg

Again I couldn't get a good picture. Kinda funny how from the back, the boot light is white. The middle, it's got a slight blue hint. And the footwells have even more blue. It's like a scale.
Anyway, in a week hopefully I'll have sorted this little fella!:
IMAG0042.jpg
 
Finally painted the rear drums... Well. One. As you can see it got dark, as always.
IMAG0047.jpg
IMAG0050.jpg
IMAG0051.jpg

Was a right pain to clean the rusty surface. Didn't paint the inside much as it's not seen, and didn't want paint to go where it shouldn't.
 
Had a go at two things:
First of all I resprayed the other side rear brake.
It was even rustier than the first one but scratched off well.
IMAG0077.jpg
IMAG0078.jpg
IMAG0079.jpg

The other thing I tried was to fit the fuel flap release (as part of the boot release cable). I spent ages doing this and in the end I realised it just wasn't going to work as it was broken, and my attempt at redesigning it wasn't good enough. Just to top it all off, the white bit (that pokes out and holds the flap closed) fell into the abyss known as inside the rear bumper.
So if I do continue to look to fit this system, which I want to, I'll need a new one of those. Annoyingly I can't find it on it's own, or even the whole part (two metal bits that attach to the cable) on it's own. I think they're only sold as a whole cable unit.
Maybe I can make it myself?
 
Look what I got!
IMAG0095.jpg

This one is from a Silvia S15. Nearly bought one from an X-Trail, which I probably should've as it was cheaper.
Anyway here it is. One day I'll get power folding mirrors.
 
Just put that switch in, not functional yet, but long in the future I want power folding mirrors. I think it's going to be a difficult one though.
IMAG0097.jpg
IMAG0098.jpg
 
Happy Halloween! I'm not dressed up this year but Cassie is a little!
IMAG0109.jpg

It's called the "Barn Find".
Also, anyone a fan of Fury Road?
IMAG0107.jpg

My first pumpkin carving!
 
IMAG0113.jpg
I removed the rear bumper as I'm planning on doing something special for rear fog lights.
Also I found the fuel flap release mechanism part! Yay! I think the spring is still missing though.
Tyres look nice and fat:
IMAG0114.jpg

Luckily the bumper already has a couple of struts in it, which I'll probably mount the bits to.
IMAG0115.jpg

Oh, also I broke both of the lower bolts, but I guess it still hangs on nice.
 
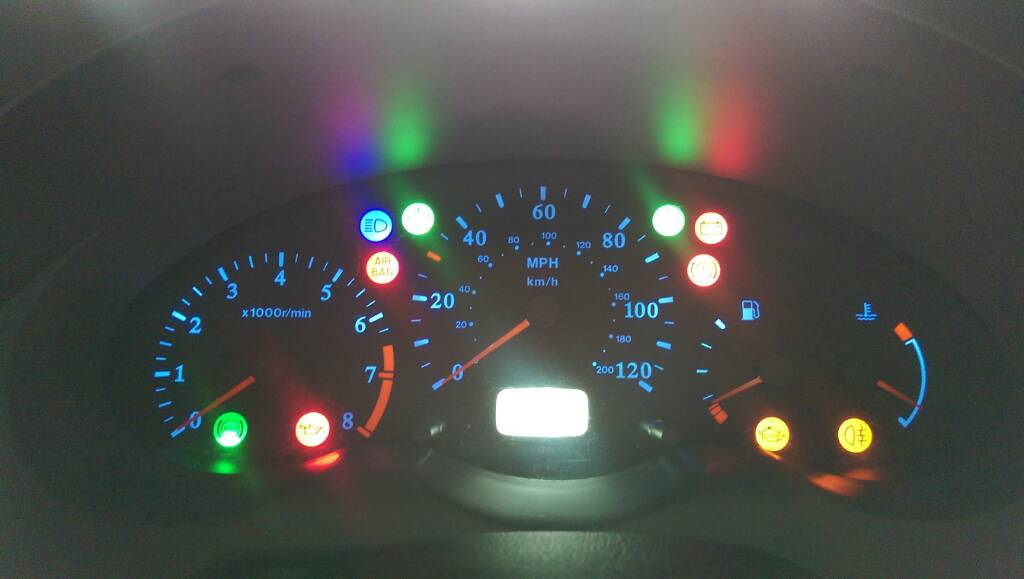
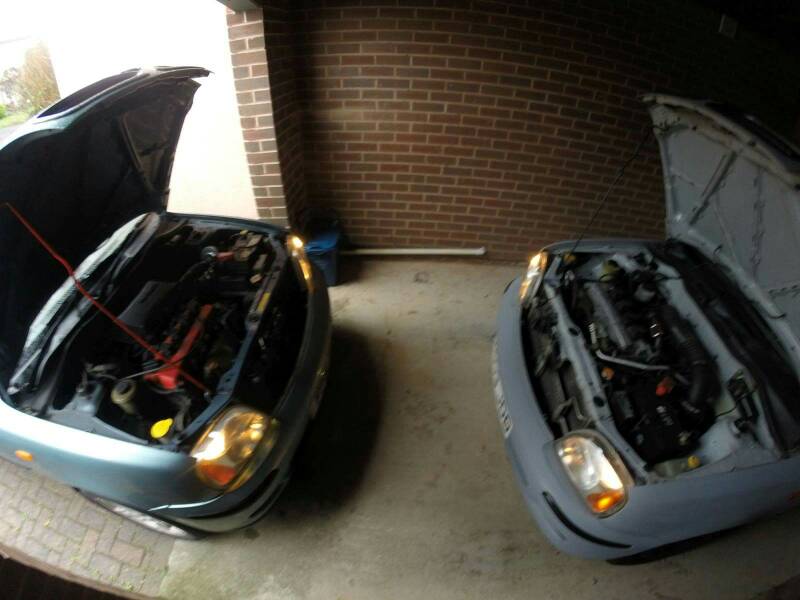
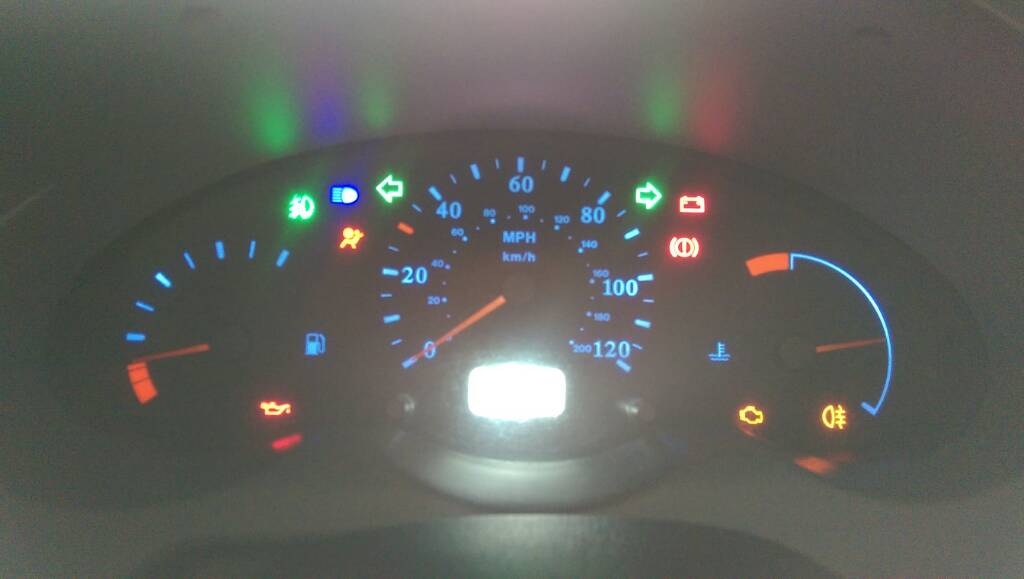
New clocks with rev counter from Danny's K11!
Original:
47273bf72bf0684d18f6193e55239c13.jpg

And the new one:
5cab976c5e192966be841b38b4d1360d.jpg

You might be asking why I have a green ABS light. Well, this cluster doesn't have a front fog light warning light. It has the space for it, marked with a glow plug symbol, but it's got nothing there.
This is a temporary measure. I'm not keen on those symbols, the black symbol on coloured background. I thought that was what first facelifts had, but Nissan once again chucks parts around.
I'm thinking of removing the plastic from both, putting them together and cutting out the symbols and swapping them over. It'll be a precision job for sure.

Should be buying a 1.4 donor soon too.

Sent from my HTC One_M8 using Micra Sports Club mobile app
 
The difference between the gauges, without seeing the symbols, seems to be that the newer type symbol ones have a different redline on the revs. Instead of a bar like mine, it ends in a point, like a curved triangle.

Sent from my HTC One_M8 using Micra Sports Club mobile app
 
I think I'll need some info on some of the parts I'm swapping over, if anyone can help.
Electric Windows:
Pretty straightforward I imagine, hoping any wire plugs and stuff are already there. I'm guessing there are relays, hopefully somewhere easy to find.
Remote Central Locking:
This one is more complicated. I'm swapping the engine, so I'll be swapping the ECU and keys, including all key barrels. I'm far from ready to do this though.
Interior Light:
The interior light works with the central locking, so I guess it ties into the control box? Will it be simple? Also the light comes on when the key is removed from the ignition (not when it is turned off, when it's pulled out).
In addition, the light doesn't just turn off, it has this lovely fade out. What makes that happen? Central locking again?
Pop-out rear windows:
How?
Air Conditioning:
I can get to the air controls box, but what is connected at the back? There are wire plugs and some moving cables right? Then the radiator, is it going to be as easy as do it back up on Cassie as it's un-done on the donor? Are there sensors, cables and stuff?

Everything else should be relatively easy though. If you guys can help at all that'd be great. Thanks!
 
Forgot to add, also want to swap over the passenger airbag module. Starting to think that a loom swap is sensible.
Am I just going to be pulling out several miles of wires and then carefully stuffing the new ones in?
 
And so the transplants begin. (Replaced blown sidelight on donor, I can't stand that!)
c330046d66e5ced5dee6d26640cafb7c.jpg

Now, what do you think the first thing I swapped over was?
312ed5437643ff5cee0ab4383f290392.jpg

You guessed wrong!
de4d44721f1d958a00d30de1b4da0d89.jpg
e9757b7f1e5e4c79a0a6328c7abd91ea.jpg

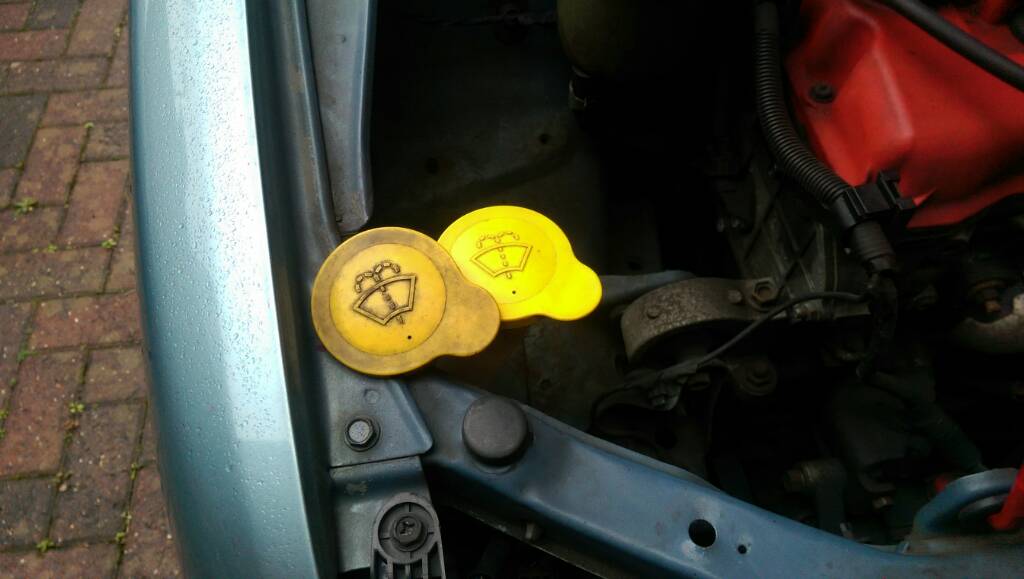
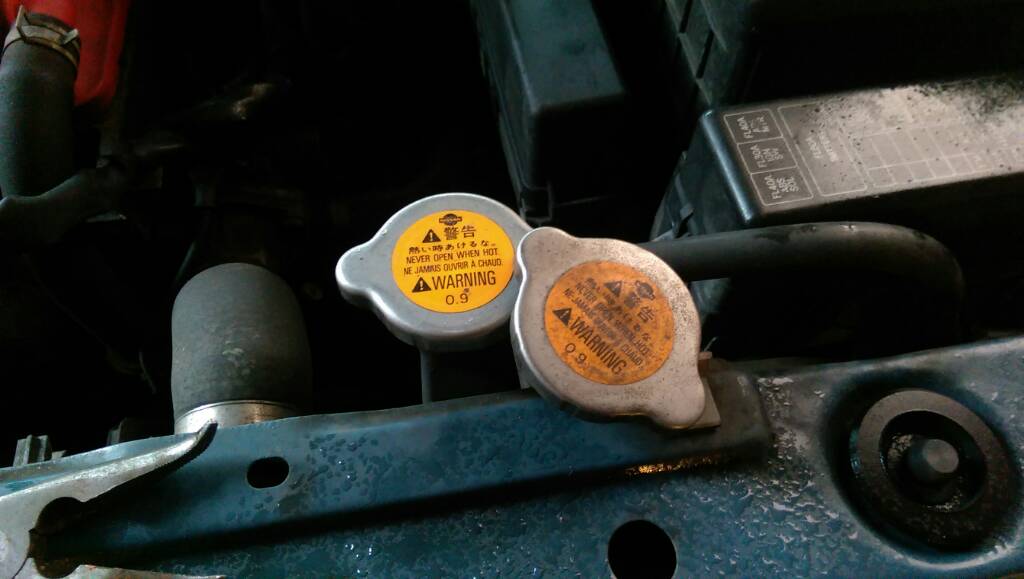
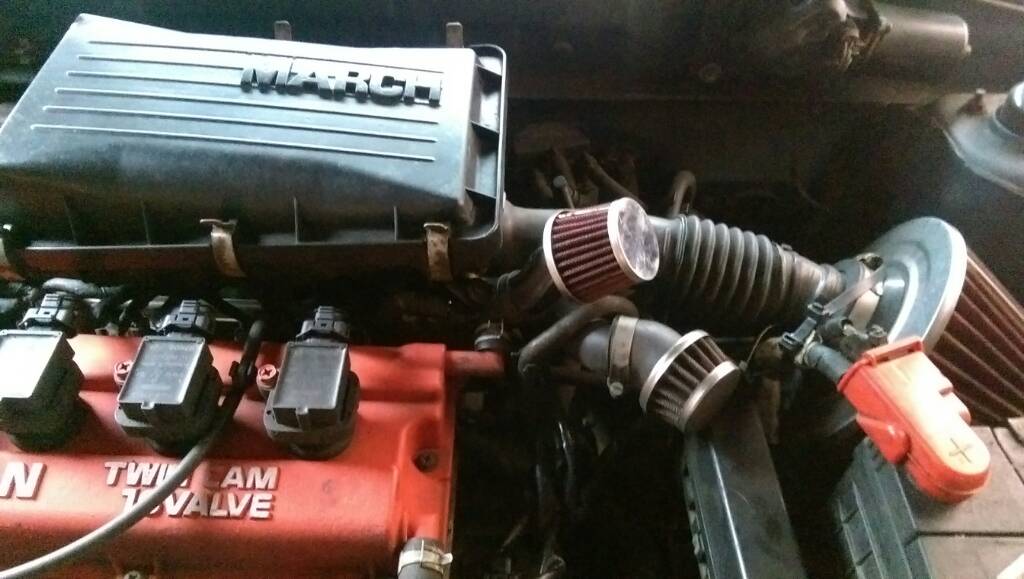
I also swapped this breather over from the other car.
09a2426b5c8c04c5c2f6bd77ec39dc4f.jpg

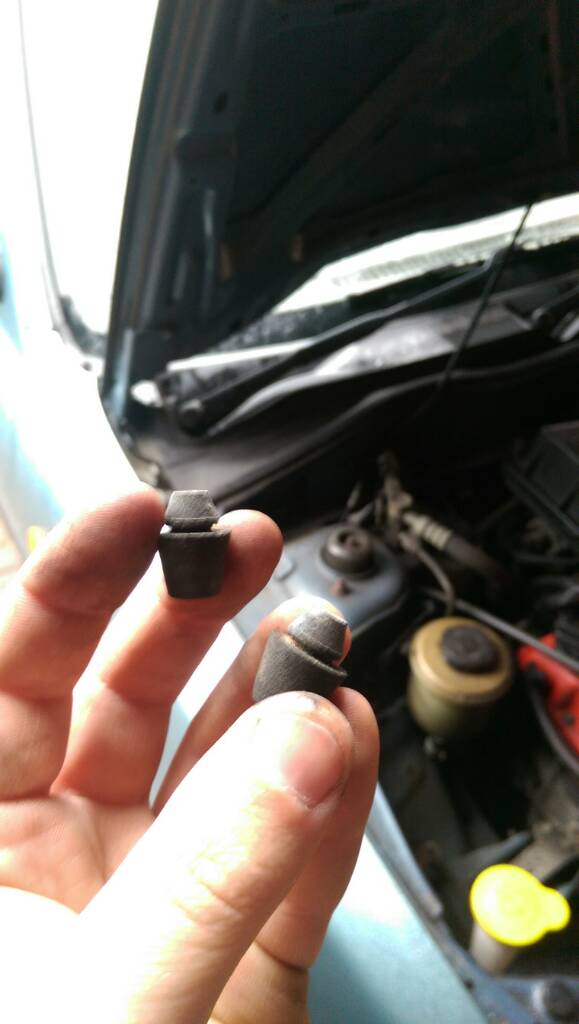
Also the donor had these little bonnet nipple things, hopefully that reduces my bonnet rattle...
5d0210849c620c591ad96450114c4c77.jpg

So anyway.
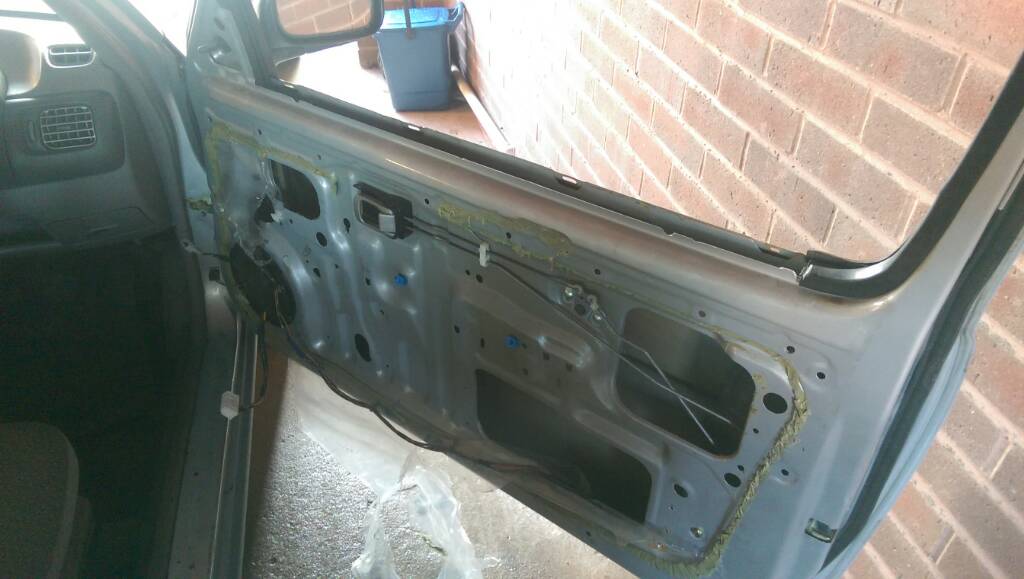
I began pulling off everything from the donor's door. Got this far:
c1f2eaab57a26c1d212372abc8017c67.jpg

Now where do I go? Everything is inside the door. How do I get to it all?
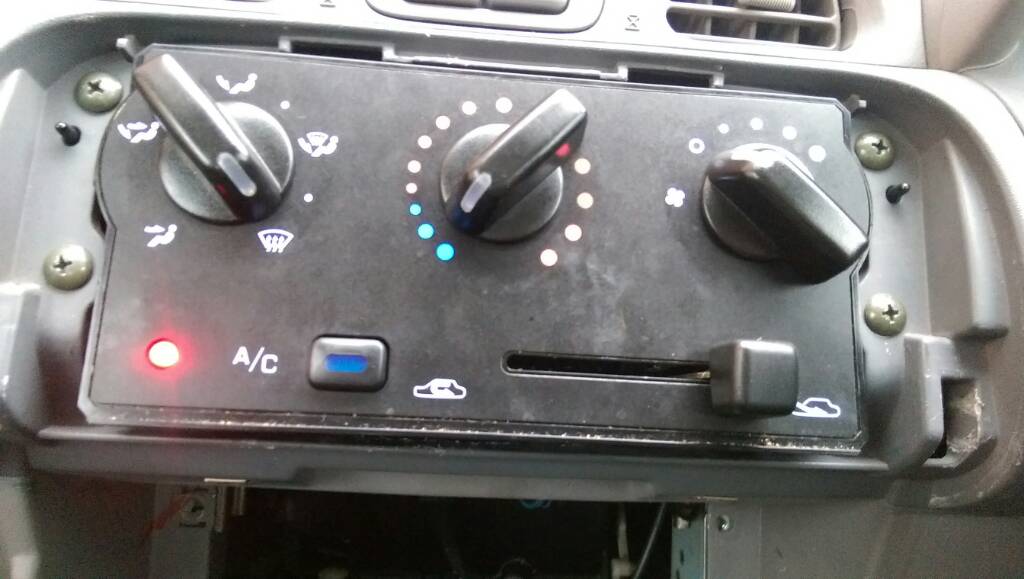
Also after much agro, I swapped this little bastard over. Many little cuts on my hands. In the end though, this one looks cleaner (after giving it a wipe), I put in the 42-LED bulbs from Cassie (one nearly broke) and swapped the little white bits inside over too as Cassie's were whiter. Cassie's old one had a really annoying issue, with the temperature dial. It'd click randomly when turned, and not fully change the temperature. Such a relief to have it working properly.
00402988e5c9122b0891dca9eb191da3.jpg

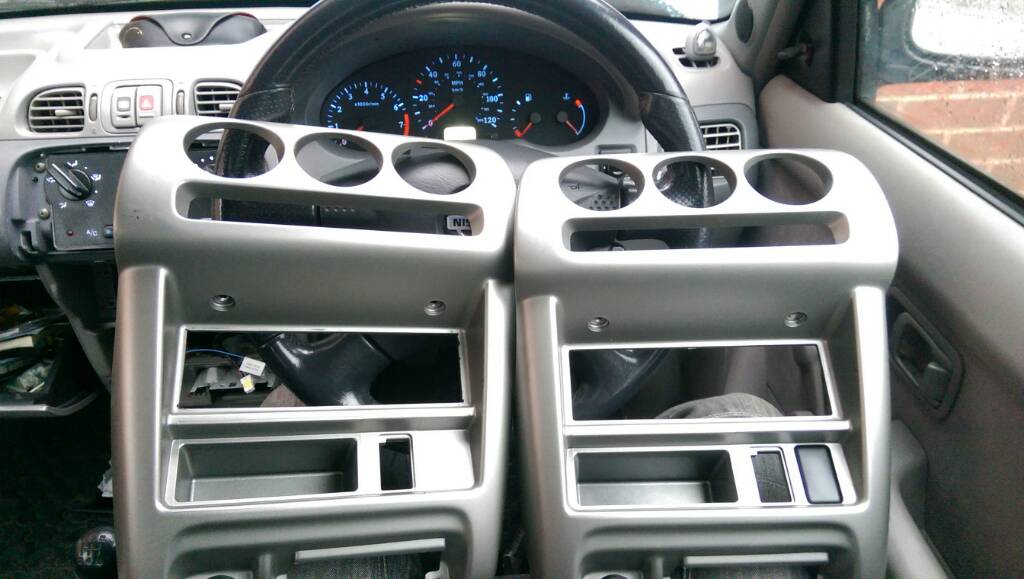
I also swapped these. The donor one is shinier! Also Cassie's has a few marks (hard to see from picture), also she didn't have that blanking panel for future goodies, for some weird reason.
98da3ed2e54fe8c60dd1ceb24d8996d1.jpg

Fully reassembled, annoyingly for the second time as after I put everything back together, I noticed the left knob wasn't working. Anyway, it is now. The AC light doesn't come on but I'm assuming that's because there isn't a fuse or more electrics in yet.
524c69a74d75e74de457cd07421ed430.jpg

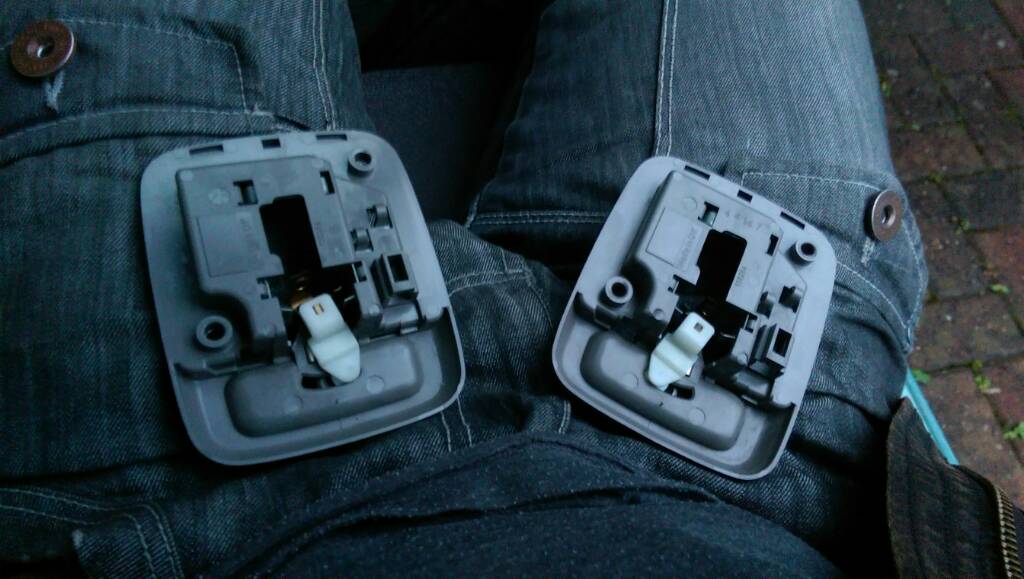
Finally, I swapped the interior light, because the donor had one that clicks in the 3 positions, rather than being loose and crappy. Was a bit of a fiddle with my bodgy footwell lighting, but works well now.
4d499d8d5978fdf959ebfd42c4282cf1.jpg

Oh, I continued doing something that I haven't posted about too. My passenger door doesn't seem to be quite the right shape, in a way that the door switch (for the light) often doesn't work. Previously I've been stuffing Blu-Tack into the switch to extend it, but it inevitably fails.
What I continued tonight was hammering (with a rubber door mat between the hammer and paint) the corner of the door to bend it back to shape. Seems to have done the trick, and looks much nicer too.
Sent from my HTC One_M8 using Micra Sports Club mobile app
 
Last edited:
So I began taking this apart further. Since I couldn't find any help online, I just unscrewed literally everything like some kind of barbarian. It actually worked, the window did drop in a little (next time have it wound down), which was a bit scary.
Anyway, I got it all out, so now to do the same to Cassie...
f4e60b6f67937f14283b2ae9050b493c.jpg
4d2e4d670e3b17f1d32b422b0bc5fe5e.jpg

Easy now, doing it the second time.
But I am unlucky. Cassie doesn't have the wires & plugs for it.
With loads of grease and glue on my hands (and some of my blood thanks to sticky plugs and sharp metal) I put the whole thing back together.
So it looks like I need to literally swap the wiring looms over.
That doesn't sound like fun. When will I ever have time for that!?

Sent from my HTC One_M8 using Micra Sports Club mobile app
 
Back
Top