• Please only use these forums for blogs, they are not a discussion forum

PollyMobiles Rebuild

been feeling abit low n lacking some drive to job search so instead lets do something I like, get the printer working.

last time getting the print off the stainless bed had bent it slightly so decided it's time to use a flat smooth piece of glass from a picture frame. also fitted an LED strip to light it better

IMAG2472.jpg


hollowed out the design to try improve the flow, reduce material and stop the print warping

1.jpg


dremelled the supports off

IMAG2474.jpg


could only emerse the print into a shallow acetone bath bit by bit so some areas weren't fully sealed

IMAG2475.jpg


I had to build a fully enclosed suspended acetone vapour tank so made this and dunked the print inside for few secs

IMAG2476.jpg
IMAG2478.jpg


worked but when I tested screwing the one-piece cap onto the bottle, the soft plastic threads quickly failed. printing threads into the cap wasn't gonna work, had to be separate

IMAG2479.jpg


so redesigned to be clamped onto the jar with the original lid

2.jpg
3.jpg


another big issue with the printer since using glass was the edges often warped & peeled off the bed ruining hrs of work (ABS plastic cooled & shrinks alot).
I tried enclosing the whole printer to trap heat but that simply overheated all the motors till the extruder could grip onto the melting filament ruining the flow and it still peeled.

tried hairspray on the bed with little success.

after days of frustration the final success was to use "ABS slurry" which is a mix of acetone with bits of abs, painted over the bed, acetone dries off leaving a sticky film of ABS for the printer to lay hot abs onto. and it worked better than ever

IMAG2482.jpg
IMAG2483.jpg


the finished print, the huge tension eventually ripped some of the ends off the bed but its minor

IMAG2484.jpg
IMAG2485.jpg
IMAG2487.jpg
IMAG2488.jpg


smoothed the part in vapour tank

IMAG2489.jpg


complete

IMAG2490.jpg
IMAG2491.jpg


cut hole in the jar lid and it barely slips over the part

IMAG2493.jpg
IMAG2494.jpg
IMAG2495.jpg


cut the card seal

IMAG2496.jpg


and the catch cans finished & seals well. test it soon

IMAG2497.jpg
 
realised the mount holes were the wrong way so I had to redesign with the holes turned 90deg

1.jpg
2.jpg


began reprinting

IMAG2498.jpg


the warping forces of the tube ends pulling the base off the bed

IMAG2499.jpg
IMAG2500.jpg


most of the surfaces intact

IMAG2501.jpg
IMAG2502.jpg
IMAG2503.jpg


can see how much its trying to warp

IMAG2504.jpg
IMAG2505.jpg


afew minutes smoothing in the acetone tank

IMAG2506.jpg
IMAG2507.jpg
IMAG2508.jpg


catchcan done

IMAG2509.jpg
 
removed the old soggy can

IMAG2510.jpg


fit the new one, much nicer

IMAG2511.jpg
IMAG2512.jpg


printed the second can

IMAG2513.jpg


and both complete

IMAG2514.jpg


the turbo oil return connection was clearly leaking alot so I cleaned both surfaces and applied some copper sealant to see if it helps, retightened

IMAG2515.jpg


was gonna inspect/replace the driveshaft seal & stem seals but that's alota work, gonna leave it till after JAE
 
checking the 595RSR after the trackday, still has loadsa life life

DSC01371.JPG
DSC01373.JPG
DSC01374.JPG
DSC01372.JPG


so after resealing the oil return with copper sealant did it work? no

IMAG2516.jpg


the sealants squished but dunno if it sealed

DSC01375.JPG
DSC01376.JPG


ok as a last attempt, lets try this soft crush washer

DSC01377.JPG


at idle it seemed fine but went round the block and bah, didn't work

IMAG2517.jpg


I can't tell if it's the conical seal leaking or the TIG weld or if the fitting itself has a crack?
need to try get a camera down there

think the only best solution is to try find some hydraulics place that can make a new hose assembly
 
so tday parents wanted to goto some classic car show in Rippon.
I drove em down, popped in and right at the entry is this beaut :cool:
certainly one of the most lady curvy gorgeous looking car in the auto world :)

IMAG2523.jpg
IMAG2519.jpg
IMAG2520.jpg
IMAG2521.jpg
IMAG2522.jpg


another that catches me eye is this cool Mach 1 mustang in black :cool:

IMAG2527.jpg
IMAG2528.jpg


the rest of the huge field is some same old same old array of british, european, american classics. didn't interest me much tbh, just breezed through.
only place that I did fancy at the show was the tools & parts section all around the outer perimeter that had some cheap stainless nuts bolts, tools and materials :p
got some stainless allen bolts for the engine cover
 
immediately fitted the engine cover allen bolts obviously :D better

IMAG2530.jpg
IMAG2531.jpg


the old printed HT lead clips looking abit lost unsecured, so redesigned some mounts and began printing

IMAG2532.jpg
IMAG2533.jpg
IMAG2534.jpg


cleaned up the prints

IMAG2536.jpg


smoothed

IMAG2537.jpg


sanded flat the mating faces

IMAG2538.jpg


bolted all the leads & cable down and gee look at that :D it's worked, soo much neater & secure :)

IMAG2539.jpg
IMAG2540.jpg
IMAG2541.jpg
IMAG2542.jpg
 
no surprise why the oil return fitting didn't seal

DSC01378.JPG
DSC01379.JPG
DSC01380.JPG


I dunno how these fittings are constructed exactly but I suspect the oil is leaking either via the conical seal past the threads and down the sump face, or inbetween where the male cone seal is tolerance fitted into the hose fitting end?

DSC01381.JPG


last attempt if it's the cone seal leaking is to try some thread lock

DSC01382.JPG
DSC01383.JPG
 
been trying to resolve this oil return leak for days/years and now after recording the area, I've finally traced the cause...
 
after afew days of trying to fix this sump oil leak thinking if it was the cone seal, the threadlock has cured and I decided to mount a camera at the sump hoping to catch where it'll leak


initially it was fine leaving the garage but from @2:30 once I began boosting up the country hill, it slowly began to leak, and even more whilst cruising @ 3:30
it ain't leaking from the hose fitting/threads but from somewhere above which I can't see in the vid.

had another peak around the fitting/sump area and the screw thread bit is all fine & dry, there's no obvious pin holes / cracks but the sump/weld bit is oily..odd

remounted the camera closer to see above the weld and since it's only leaking on boost, I drove around town off-boost to check it's fine with low loads


yup with no boost and gentle driving, it's not leaking. only leaked abit when up-shifting & decelerating @3:15

next I applied some boost


and yup @1:00 / 2:40 / 3:45 you can clearly see it seeping through the TIG weld like it's porous.
during boost it's fine.

it seems like there are microscopic pin holes at the top part of the TIG weld (whether since Noddie welded it 3yrs ago or whether it gradually developed these holes from vibrations over many trackdays. and may be a big contribution to why she's constantly losing 1L per 300miles) and it only leaks out abit when the pool of oil is sloshed forward during deceleration.

well, I definately can't fix that before JAE cos it's a tedious sump-off fix to get it rewelded but for the time being, I'm gonna try seal around the leaking weld with some bodyfill, exhaust paste or JBweld for the trip to JAE.
 
it only leaks out abit when the pool of oil is sloshed forward during deceleration.

There's your solution right there...full speed ahead captain.

Hopefully though you can get it sealed, now you know where its coming from til you get the chance to cure it. :)
 
after afew days of trying to fix this sump oil leak thinking if it was the cone seal, the threadlock has cured and I decided to mount a camera at the sump hoping to catch where it'll leak


initially it was fine leaving the garage but from @2:30 once I began boosting up the country hill, it slowly began to leak, and even more whilst cruising @ 3:30
it ain't leaking from the hose fitting/threads but from somewhere above which I can't see in the vid.

had another peak around the fitting/sump area and the screw thread bit is all fine & dry, there's no obvious pin holes / cracks but the sump/weld bit is oily..odd

remounted the camera closer to see above the weld and since it's only leaking on boost, I drove around town off-boost to check it's fine with low loads


yup with no boost and gentle driving, it's not leaking. only leaked abit when up-shifting & decelerating @3:15

next I applied some boost


and yup @1:00 / 2:40 / 3:45 you can clearly see it seeping through the TIG weld like it's porous.
during boost it's fine.

it seems like there are microscopic pin holes at the top part of the TIG weld (whether since Noddie welded it 3yrs ago or whether it gradually developed these holes from vibrations over many trackdays. and may be a big contribution to why she's constantly losing 1L per 300miles) and it only leaks out abit when the pool of oil is sloshed forward during deceleration.

well, I definately can't fix that before JAE cos it's a tedious sump-off fix to get it rewelded but for the time being, I'm gonna try seal around the leaking weld with some bodyfill, exhaust paste or JBweld for the trip to JAE.

70e78ceb2790d9a071a73f2e34c87313.jpg
u can try this ?


Sent from my iPhone using Tapatalk
 
There's your solution right there...full speed ahead captain.

Hopefully though you can get it sealed, now you know where its coming from til you get the chance to cure it. :)

hehee it's the engines way of shedding a tear whenever it misses boost :D

aye hope the epoxy will patch it up for now till I can be bothered/afford to get the sump welded on or off the car.
JAE first, job 2nd then fix car 3rd
 
Is it knocking; your engine? It sounded quite noisy compared to other vids I've seen of yours. Or is it just the way the mic pics up the sounds. Glad you got that leak pinned down.
 
Is it knocking; your engine? It sounded quite noisy compared to other vids I've seen of yours. Or is it just the way the mic pics up the sounds. Glad you got that leak pinned down.

on the other vids I only enable the cabin camera mic which is quieter with minimal wind noise but can hear what I hear. all the other external cameras are usually very noisy/windy.
in this video I've included both the quiet cabin mic and the engine bay camera mic cos it didn't have much wind noise and could hear the turbo too :p
but cos it was ziptied to the chassis or boost pipe, it does pickup all the other noises like injectors & chassis vibrations.
so what you hear as knock is actually the loud injectors clicking away :)

just sealed the weld and hope it'll reduce most of the oil loss
 
Was it expensive? Or fairly reasonable?

the makibox A6 heated bed kit originally costed me £255 (comes with heated stainless bed for ABS, the original unreliable nozzle and 0.5kg spool of ABS)
tday the same kit costs just £194
http://www.makiboxclearance.co.uk/c...rts-and-a-roll-of-abs-filament-ready-to-build

and you get this

imag1611-jpg.39488
imag1619-jpg.39492

https://www.micra.org.uk/threads/pollymobiles-rebuild.35251/page-122#post-710600

it's fine as a cheap basic starter kit and will print "ok" quality/accuracy for afew dozen prints but there are alot! of flaws in it's plastic design that makes it unreliable.

- the extruder tensioning plastic wheel tends to crack and ruin the whole printer so after calibration, one of the first thing to print/replace imho is a new reliable extruder mechanism.
- next thing to fail shortly is the original hot end nozzle, the fragile heater element ribbon is prone to snap/crack and most ppl upgrade to a far superior E3D V6 head (which also requires a new mounting slider block to be made too).
- next weak bit is the plastic frame which flexes and the screws tend to cause cracks till the whole thing falls apart, hence I fabricate a whole new stuff steel frame.

E3D V6 head was £66
thinner longer teflon bowden tube £3.70
1kg filament £15 each

upto this point the makibox kit with new head & filament costed me bout £340 (£280 if I brought the printer kit again tday)
on the website they have a super-makibox kit (heated bed printer kit with E3DV6 head with mount and 4x0.5kg spools) for £290 (I'd get this one imo cos of the ready to fit hotend)

http://www.makiboxclearance.co.uk/c...-a-roll-of-abs-or-pla-filament-ready-to-build

other stuff I upgraded to make better are
Linear bearings for the sliders £14
new steel tube frame £18
5L acetone to treat few hundred prints £15

plus other things, overall I've spent upto £440 on it :confused:
 
Cheers for that pollyp. Doesn't sound too bad but I don't think I would get enough use out of it to justify buying one :( glad you found the source of that leak tho finally even though it's annoying to fix properly without a sumo off job!
 
Cheers for that pollyp. Doesn't sound too bad but I don't think I would get enough use out of it to justify buying one :( glad you found the source of that leak tho finally even though it's annoying to fix properly without a sumo off job!

aye for someone who have the skills, software knowledge, alot of time & especially the need for one, it ain't too bad considering a proper nice machine costs over 1k :/
but for most of the market it's still a very specialised hobby tool.

had a chat with sirchris and we concluded it could actually be welded over whilst still on the car :cool:
 
cleaned the area with carb cleaner

DSC01384.JPG
DSC01387.JPG


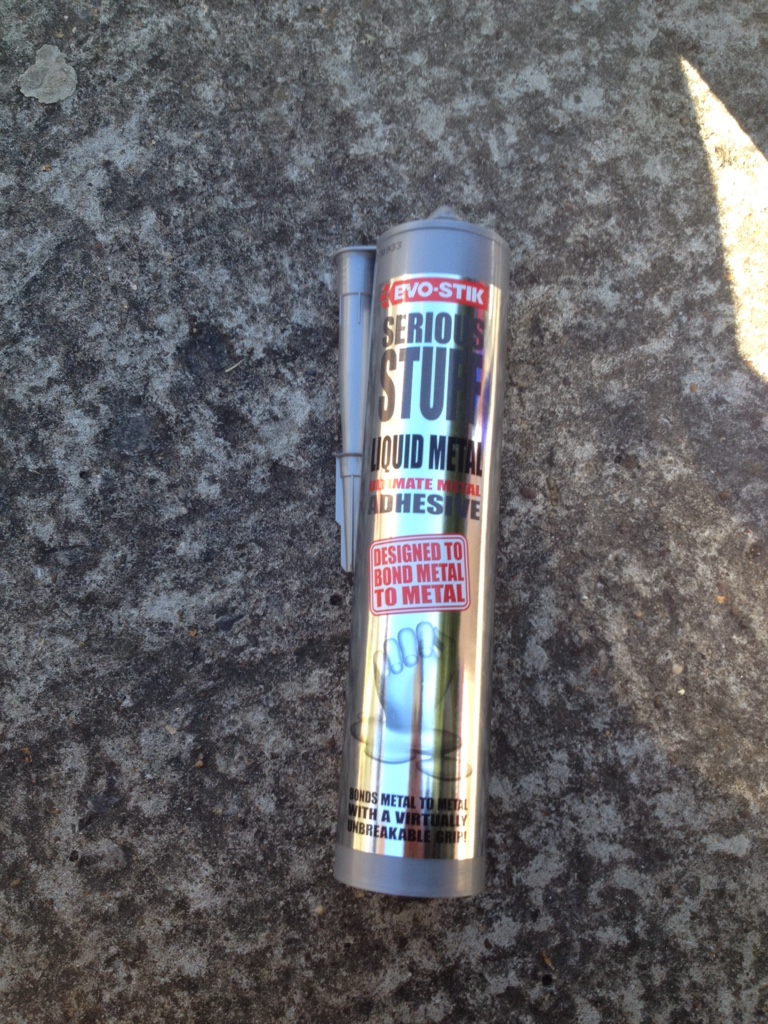
mixed some Chemical Metal and tried applying with a small blade. geez this stuff cures fast like bodyfiller, begins to stiffen after 30s.
made some more and just gently smeared over with my gloved fingers which does a better job.
it's been curing for afew hrs now so gonna retest it soon

DSC01389.JPG
DSC01390.JPG


new LSD oil came so I can attempt to fix the leaking driveshaft seal after JAE

DSC01391.JPG
 
It's Worked!:):D

went for a drive in the drizzle after it's cured and not a drop of oil under the sump YAY :cool:
sorry for the poor dark engine view, it was a drizzly evening


gonna monitor her oil consumption over the next few days. if she stopped losing oil, then this leaking oil return fitting could've been the cause of the huge oil loss since I began turboing
 
attempted to print 2 sets of HT clips on the printer

IMAG2543.jpg


but u can see at the bottom right that sections of the slider rail is binding/jamming making it deform the alignment, so I'll have to restrict using half the bed till I resolve the issue

IMAG2544.jpg


print some spare clips for JAE one by one

IMAG2545.jpg


pack of M6 socket cap bolts for the clips arrived

IMAG2546.jpg


matching bolts now :cool:

IMAG2547.jpg


fixing a vibrating sunroof motor section

IMAG2548.jpg


after 6years I finally found out why this plastic drip tray across the sunroof kept rattling loundly (unless I ziptie it snug), twas cos this rear lip wasn't slotted into this holder at the back (arrowed) :rolleyes:
better late than never, it's quiet now :)

IMAG2550.jpg
 
now the suns out, went for a long cruise & country drive to check it ain't leaking oil and see if it still consumes oil


after 50miles the dipsticks gone 70% to 40% so she still drinks oil (I'm guessing inlet stem seals that burns oil after high vacuum coasting)
 
tday received some purple filaments that MicroPro requested, a new extruder gear and afew more linear bearings for the printer

IMAG2551.jpg


now printing MicroPros purple lead clips

IMAG2552.jpg
 
MicroPRO requested some clips in purple and his Magnacore leads where a thicker 8mm so edited the model.
From editing some support ribbing into the models where it arches overhead, it stays intact much better during print

IMAG2553.jpg
IMAG2554.jpg


can see the ribbings I included in the model

IMAG2556.jpg


3 prints ready to refine

IMAG2557.jpg


slowly dremel the support ribs off

DSC01393.JPG


drilling the 6mm holes and deburring every edge, this step takes the longest labour

DSC01394.JPG
DSC01395.JPG
DSC01396.JPG


ready to smooth in acetone

DSC01397.JPG
DSC01398.JPG
DSC01399.JPG


removing the smoothed prints off the mesh leaves a rough face so all the mating faces had to be sanded flat

DSC01400.JPG
DSC01401.JPG


so there we have it.
1 x red 7mm HT lead set (left)
1 x red 8mm HT lead set (middle)
1 x purple 8mm HT lead set for MicroPRO (right)

IMAG2558.jpg
 
this blog diary & index is getting soo huge to search through, even for me.
so before JAE I wanted to compile a spec list of kasandra as she stands tday so for ppl interested I could just point em to this link and there it all is:

Pollymobile II Specification
 
fitted the new extruder drive gear to grip the filaments better with less slip

DSC01407.JPG


print & assemble the new extruder

DSC01405.JPG
DSC01408.JPG
DSC01409.JPG
DSC01410.JPG


redesign this end support to slide on linear bearings

1.jpg

DSC01413.JPG

DSC01414.JPG
DSC01415.JPG


recalibrating all the steps-per-mm units.
the last extruder setup had X:401 Y:395 Z:402 E:170

after afew calibrating measures I refined the units to
X:405 Y:395 Z:402 E:153

printed a 10mm3 cube working very nicely and it measures close enough at 10.05 x 10.1 x 9.95 :cool:

DSC01411.JPG
DSC01412.JPG
 
Back
Top