Micra K11 1.3 Auto doesnt drive (gearbox)

Micra K11 (2000) 1.4 Automatic

The car doesn't drive at all, the sound of the engine changes when you put a gear, I have checked underneath the car and there is oil all over the gearbox. There is dipstick to check the CVT fluid (Gearbox oil I think) and there wasn't anything at all.

What I have done so far:
I have drained the CVT fluid and there was less than 2 liters in there
There was this filter on top left hand side of the engine, does this need changing too? and is it best to use Nissan CVT Fluid NS-1 or you can also use Dexron IIE or Dexron III automatic transmission fluid (ATF)?
 

Attachments

  • IMG_0743.JPG
    IMG_0743.JPG
    136.4 KB · Views: 3,828
  • IMG_0745.JPG
    IMG_0745.JPG
    157.6 KB · Views: 2,400
Last edited:
Has anyone used anything other than Nissan CVT Fluid NS-1 for their post 2000 k11?

Nissan CVT Fluid NS-1 seems to be expensive and Dexron IIE or Dexron III were for Pre 2000 I believe.

if there is no alternative then anyone know a reputable place to get one?
 
Last edited:
It is me again:)

Engine code CGA3DE Title should say 1.4 but I cant edit it.

The car is in really good condition and only done 45k but has no drive, when gear selector is moved to R, D or L you can hear engine RPM change. I press on the gas pedal and the spedo is not moving at all. I will have to get the driveshafts out and see if they are the problems but waiting when the weather is a bit better
Is there any more checks I can do before condemning the gearbox and hunting a second hand one from scrapyards?

checks done so far.
front wheels move freely so no frozen brake calipers
Gear oil was a bit low and dirty so I have changed it but still no drive
I get someone to sit in the car with reverse selected & their foot on the brake, engine ticking over, looked at the driveshafts from under the front of the car none of them was turning.
 
Last edited:
Hi Abaaba just came across your thread!
If your engine is a 2000 onwards NCVT engine then you have a filter and a conventional torque converter (as Frank said) so is slightly different to my 1997 NCVT but both engines have a electromagnetic powder clutch, it is important to check the wear on the electromagnetic brushes and this is a fairly easy task. The electromagnetic brush holder is located on the front of the transmission case but for ease of access you should remove the battery and battery tray and also unclip the fuse box holders attached to the battery tray. Remember to disconnect the battery before starting!

Location of electromagnetic brush holder:
micra-k11-cvt-transmission-brush-holder-location.jpg

The battery and tray removed the brush holder is to the left of the dip stick holder/tube (can't see in this pic)!
PA311720A.jpg

Then unplug the brush holder electrical connector and undo the to retaining bolts carefully (this is the new brush holder in place)!
PA311722.JPG

Old brush holder removed exposing the electromagnetic armature on which the brushes make contact!
PA311718.JPG

The brand new genuine Nissan Electromagnetic Brush Holder and Brushes (£200), you could try and just solder in new brushes or if available use a cheaper clone version but this is such a vital component for the continuous optimum performance of the NCVT IMHO I did and would always buy genuine Nissan parts for reliability and piece of mind! The part number I was told by a Nissan dealer is the same for pre and post 2000 NCVT transmissions but check!
P8251602.JPG

The left is the old worn brush holder and the new one on the right the old one does not look to worn but it was. There is a worn line indicator on the brushes which had been worn away on the old ones!
PA311713.JPG

New brush holder in place and bolts correctly torqued! :)
PA311722.JPG

Everything back in place job done! :D
PA311725.JPG


On the test drive after the renewal of the electromagnetic brush holder and brushes there was a marked improvement and increase in pick-up and smoothness of transmission performance! :)

For more information on this task it is best to get hold of a Nissan Micra 1993 to 2002 (K to 52 registration) Haynes Service and Repair Manual Chapter 7 Part B Automatic Transmission Section 3.
For your reference your transmission designation is: RE0F21A

If you need anymore info please feel free to message me!

Cheers
Andy :D
 
Thank you Andy5077,

I have already taken the battery, battery tray and fuse box holder but will have to get torque wrench before removing it. I have got Haynes manual as well so will have to read those chapters too.


Thanks again mate, sure I will be back with more :)
 

Attachments

  • 314155337.jpg
    314155337.jpg
    173.5 KB · Views: 9,055
Last edited:
Hi Abaaba just came across your thread!
If your engine is a 2000 onwards NCVT engine then you have a filter and a conventional torque converter (as Frank said) so is slightly different to my 1997 NCVT but both engines have a electromagnetic powder clutch, it is important to check the wear on the electromagnetic brushes and this is a fairly easy task. The electromagnetic brush holder is located on the front of the transmission case but for ease of access you should remove the battery and battery tray and also unclip the fuse box holders attached to the battery tray. Remember to disconnect the battery before starting!

Location of electromagnetic brush holder:
View attachment 47511
The battery and tray removed the brush holder is to the left of the dip stick holder/tube (can't see in this pic)!
View attachment 47512
Then unplug the brush holder electrical connector and undo the to retaining bolts carefully (this is the new brush holder in place)!
View attachment 47513
Old brush holder removed exposing the electromagnetic armature on which the brushes make contact!
View attachment 47514
The brand new genuine Nissan Electromagnetic Brush Holder and Brushes (£200), you could try and just solder in new brushes or if available use a cheaper clone version but this is such a vital component for the continuous optimum performance of the NCVT IMHO I did and would always buy genuine Nissan parts for reliability and piece of mind! The part number I was told by a Nissan dealer is the same for pre and post 2000 NCVT transmissions but check!
View attachment 47515
The left is the old worn brush holder and the new one on the right the old one does not look to worn but it was. There is a worn line indicator on the brushes which had been worn away on the old ones!
View attachment 47516
New brush holder in place and bolts correctly torqued! :)
View attachment 47517
Everything back in place job done! :D
View attachment 47518

On the test drive after the renewal of the electromagnetic brush holder and brushes there was a marked improvement and increase in pick-up and smoothness of transmission performance! :)

For more information on this task it is best to get hold of a Nissan Micra 1993 to 2002 (K to 52 registration) Haynes Service and Repair Manual Chapter 7 Part B Automatic Transmission Section 3.
For your reference your transmission designation is: RE0F21A

If you need anymore info please feel free to message me!

Cheers
Andy :D
That's a great reply Andy :)
 
I will take out cv joints and driveshafts this weekend, what should I be looking out for? Are the manual and automatic driveshafts different or the same?

Am thinking maybe they installed the wrong driveshafts or something

Project gearbox strip down starts tomorrow (depends on the weather;))
 
I am struggling to find the electromagnetic brush, my gearbox is slightly different (mine is a replica of the one on post 11) to the one shown on andy's post so it is not to the left of the dipstick, anyone know where to find it?

On a separate note, I have noticed the driveside cv joint is disconnected from the driveshaft, so maybe that's what's causing the no drive problem..., I couldn't take out the hub nut with basic tools so i had to give up, i put some wd40 - ordered breakerbar and electric impact wrench, she lives to fight another day but I will be back..
 
ok, the driveshaft is out the problem was the tiny pin holding the cv joint was missing - where can I get that pin? or is it better replacing the whole thing?
 

Attachments

  • IMG_0831.JPG
    IMG_0831.JPG
    1.4 MB · Views: 929
Anyone got a picture of k11 automatic driveshaft? I wana compare to make sure I dont have manual one
 

Attachments

  • image.jpeg
    image.jpeg
    1 MB · Views: 1,005
  • image.jpeg
    image.jpeg
    2.7 MB · Views: 979
I am getting a gearbox this weekend and will attempt to do the change soon...got few questions beforehand

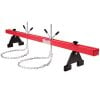
Where would you use to hold the engine with engine support beam? I am thinking of buying the below one, hopefully it is fit for the job
51G-PR2+eoL._SL1000_.jpg
Anything else I should be checking whilst the box is off?

Thanks
 
Just want a second opinion really, will a box from a dizzy k11 1.0 fit coilpack 1.4? Am gana be travelling over 100 miles to collect one thos weekend
 
Guys need a bit of advice please.

Now that the box is out, how would I know if the torque converter is bad/good? What is holding the torque converter to the engine? Cant see any bolts or anything at all

Pictures coming
 
4 bolts on the backplate aint it mate ?

Nice one mate, I have seen the bolts now...they were hidden behind the the torque converter. Does it matter which way i turn the flywheel (clockwise or anti clockwise) to undo the bolts?
 

Attachments

  • image.jpeg
    image.jpeg
    980.5 KB · Views: 1,577
  • image.jpeg
    image.jpeg
    750 KB · Views: 1,502
What is the attached connector? Please tell me it aint that important:(

I broke the one on my old box and the new box came with a broken one as well.......BUT apart from that the boxes are identical (the new one came from 1.0 auto coilpack) so I should be up and running soon :)
 

Attachments

  • IMG_1372.JPG
    IMG_1372.JPG
    799.7 KB · Views: 1,158
  • IMG_1374.JPG
    IMG_1374.JPG
    749.1 KB · Views: 1,221
Update..

I put 1.0 gearbox today and you have no idea how it felt to see it drive:) :):)

It was nightmare to level/align the box (I nearly gave up at one point) but once the first bolt went in It was straight forward.

There were few casualties along the way though, I broke 2 sensors and 1 exhaust bolt but apart from that it was a success for a first timer lol

Thanks everyone that has helped/advised.., really appreciate it
 
The joy is short lived, I have got a massive leak between the sum & the box, the seal/gasket is broken.

I have looked at it and there 12 or 13 bolts holding it together so is it a case of undo bolts remove the bottom, remove the old seal, clean and then put the new one on and bolt them?
 
The seal between the box and the botton part which holds most of the oil....am probably not explaining right but I got a video, I will post it later.
 
Hi Abaaba just came across your thread!
If your engine is a 2000 onwards NCVT engine then you have a filter and a conventional torque converter (as Frank said) so is slightly different to my 1997 NCVT but both engines have a electromagnetic powder clutch, it is important to check the wear on the electromagnetic brushes and this is a fairly easy task. The electromagnetic brush holder is located on the front of the transmission case but for ease of access you should remove the battery and battery tray and also unclip the fuse box holders attached to the battery tray. Remember to disconnect the battery before starting!

Location of electromagnetic brush holder:
View attachment 47511
The battery and tray removed the brush holder is to the left of the dip stick holder/tube (can't see in this pic)!
View attachment 47512
Then unplug the brush holder electrical connector and undo the to retaining bolts carefully (this is the new brush holder in place)!
View attachment 47513
Old brush holder removed exposing the electromagnetic armature on which the brushes make contact!
View attachment 47514
The brand new genuine Nissan Electromagnetic Brush Holder and Brushes (£200), you could try and just solder in new brushes or if available use a cheaper clone version but this is such a vital component for the continuous optimum performance of the NCVT IMHO I did and would always buy genuine Nissan parts for reliability and piece of mind! The part number I was told by a Nissan dealer is the same for pre and post 2000 NCVT transmissions but check!
View attachment 47515
A esquerda é o antigo porta-escovas gasto e o novo à direita o antigo não parece gasto mas era. Há um indicador de linha gasto nas escovas que tinham sido gastas nos velhos!
View attachment 47516
Novo porta-escovas no lugar e parafusos corretamente apertados! :)
View attachment 47517
Tudo de volta no trabalho feito! : D
View attachment 47518

No test drive, após a renovação do porta-escovas e escovas eletromagnéticas, houve uma melhora significativa e aumento na qualidade de transmissão e suavidade do desempenho da transmissão! :)

Para obter mais informações sobre essa tarefa, é melhor adquirir um Nissan Micra 1993 a 2002 (registro de K a 52) Manual de Serviço e Reparo da Haynes Capítulo 7 Parte B Seção de Transmissão Automática 3.
Para sua referência, sua designação de transmissão é: RE0F21A

Se você precisar de mais informações, sinta-se à vontade para me enviar uma mensagem!

Felicidades
Andy : D[/ QUOTE]
 
oa amigo, voçe poderia me informar onde se compra
Hi Abaaba just came across your thread!
If your engine is a 2000 onwards NCVT engine then you have a filter and a conventional torque converter (as Frank said) so is slightly different to my 1997 NCVT but both engines have a electromagnetic powder clutch, it is important to check the wear on the electromagnetic brushes and this is a fairly easy task. The electromagnetic brush holder is located on the front of the transmission case but for ease of access you should remove the battery and battery tray and also unclip the fuse box holders attached to the battery tray. Remember to disconnect the battery before starting!

Location of electromagnetic brush holder:
View attachment 47511
The battery and tray removed the brush holder is to the left of the dip stick holder/tube (can't see in this pic)!
View attachment 47512
Em seguida, desconecte o conector elétrico do porta-escovas e desfaça os parafusos de retenção cuidadosamente (este é o novo porta-escovas no lugar)!
View attachment 47513
Antigo porta-escovas removido, expondo a armadura eletromagnética na qual as escovas entram em contato!
View attachment 47514
O novíssimo Nissan genuíno Escova Eletromagnética Holder e Brushes (£ 200), você poderia tentar e apenas soldar em novas escovas ou se disponível usar uma versão clone mais barato, mas este é um componente tão vital para o desempenho contínuo contínuo do NCVT IMHO que eu fiz e sempre compraria peças genuínas da Nissan para confiabilidade e tranquilidade! O número de peça que me foi dito por um revendedor da Nissan é o mesmo para transmissões NCVT pré e pós 2000, mas verifique!
View attachment 47515
A esquerda é o antigo porta-escovas gasto e o novo à direita o antigo não parece gasto mas era. Há um indicador de linha gasto nas escovas que tinham sido gastas nos velhos!
View attachment 47516
Novo porta-escovas no lugar e parafusos corretamente apertados! :)
View attachment 47517
Tudo de volta no trabalho feito! : D
View attachment 47518

No test drive, após a renovação do porta-escovas e escovas eletromagnéticas, houve uma melhora significativa e aumento na qualidade de transmissão e suavidade do desempenho da transmissão! :)

Para obter mais informações sobre essa tarefa, é melhor adquirir um Nissan Micra 1993 a 2002 (registro de K a 52) Manual de Serviço e Reparo da Haynes Capítulo 7 Parte B Seção de Transmissão Automática 3.
Para sua referência, sua designação de transmissão é: RE0F21A

Se você precisar de mais informações, sinta-se à vontade para me enviar uma mensagem!

Felicidades
Andy : D[/ QUOTE]
o amigo voçe poderia me dizer onde comprou esta peça, precisava muito porque o meu carro tem o mesmo problema obrigado
 
google translate.
Hi friend, could you ask (tell) me where to buy this part, because my car has the same problem, thank you


which part mate? engine hoist? gearbox?
 
Back
Top