• Please only use these forums for blogs, they are not a discussion forum

K11 Micra (First Car)

Ok so I'd say today was a pretty productive day. We went to the local breakers (Harry Bucklands near Cheltenham), and set out to look for some bits I could nab. There were mostly pre-facelifts there, but managed to grab a boot light from one of them:

E0B9HNa.jpg


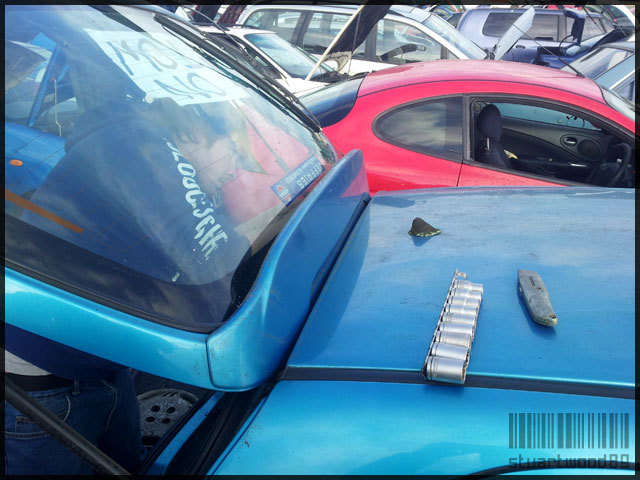
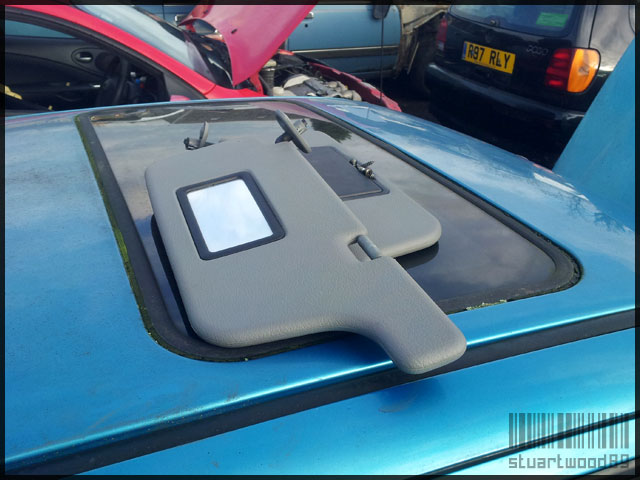
Then we hit some luck and came across a blue GX! Unfortunately the rear parcel shelf was already gone, but I managed to get hold of a few things, including a stock spoiler and a drivers side visor with a flip up mirror:

MC1aTg7.jpg


13hGsA2.jpg


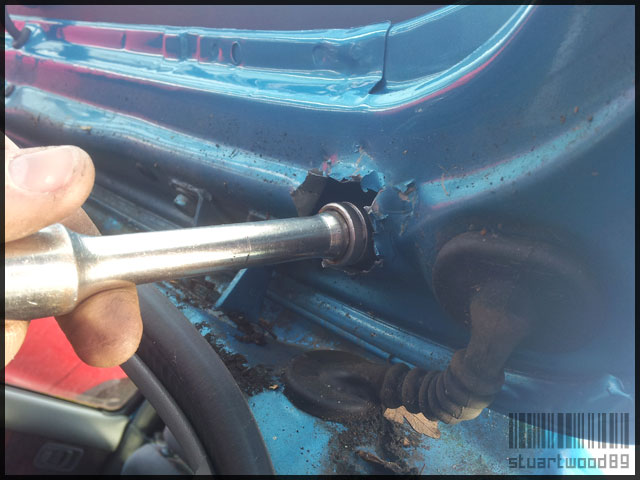
The socket set which we brought along was too big to fit into the holes to undo the bolts behind the spoiler, so Ryan had to err.. find a way in:

QIGpzRn.jpg


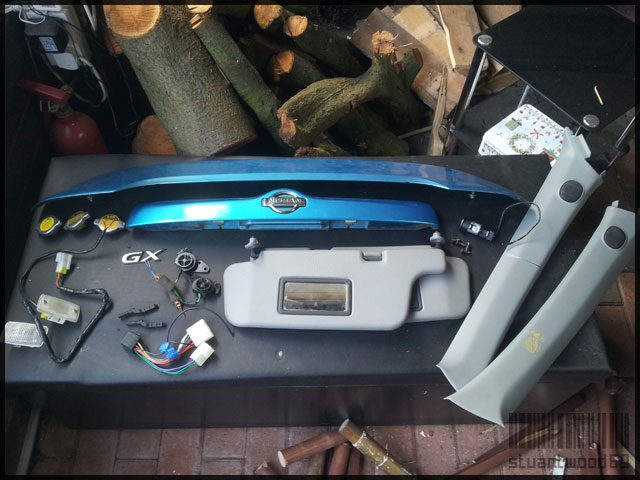
After some more scavenging, we managed to come out with the following: A GX spoiler, a colour coded tailgate plinth, three radiator caps (because why not?), a cigarette lighter, replacement/spare sun visors, front A-pillar tweeters, replacement A-pillar trims to house the tweeters (one is broken but can hopefully find another), two parcel shelf clips, a piece of stereo wiring loom, two boot lights and the GX badge. No I will not be using the GX badge. The whole lot came up to £20.

Brdv1fk.jpg


We also went to Twigworth Breakers to see if we could score some fog lights. They had K12 lights, but no K11s. Still it wasn't a wasted journey as it's always fun to walk down corridors full of car parts. I ended up buying an entire bumper on eBay, which includes the fog lights, so not all bad! This means I can have a spare in case I have a whoopsie whilst parking. The reason I pulled the plinth off the GX was because I wanted to colour code the one on my car, but it would put the plate lights out of commission whilst doing so. This one was already painted, so easy to respray and it means that we can take our time with it before quickly swapping it out with the black one, which I can paint at my leisure if I decide to.

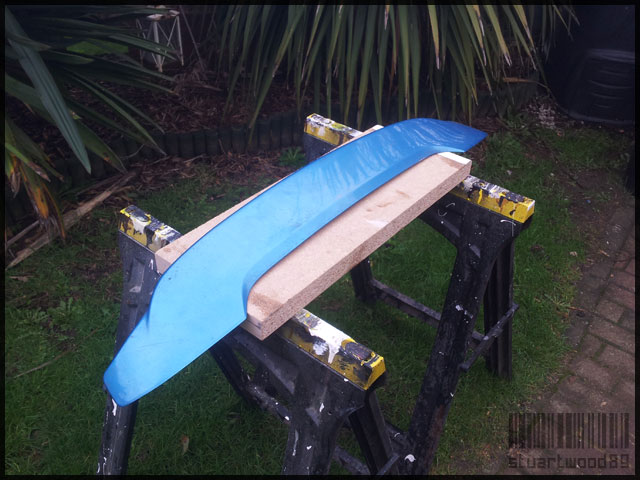
So once we got back, it was time to prep and paint the spoiler and the plinth. We removed the dirt and spider nests from underneath the spoiler and started to rub it down with 600 grit to give the paint something to bite into:

WMGkyKP.jpg


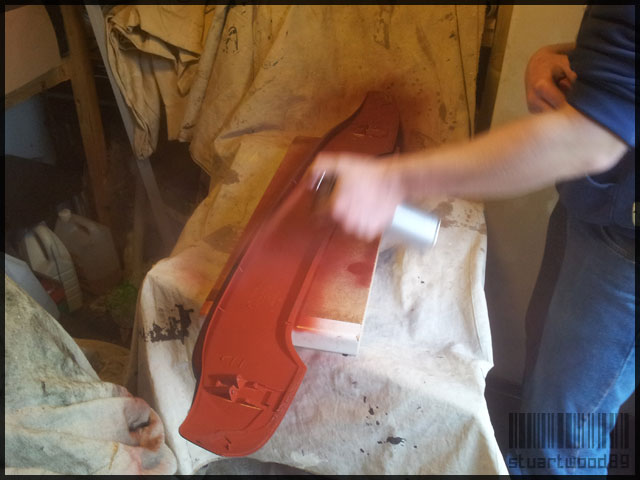
First coat of red primer:

1dZUuMs.jpg


We ran out of Flame Red, so off to Halfords to get some more. The spoiler has been painted, but will need rubbing down and then clear coating. My phone ran out of battery before I could take any more photos.

We did managed to get the plinth stripped down and cleaned however:

K8nimuo.jpg


This has also had some paint (no photos due to phone battery):

CFP2XG9.jpg


Will hopefully have some more progress later on in the week.
 
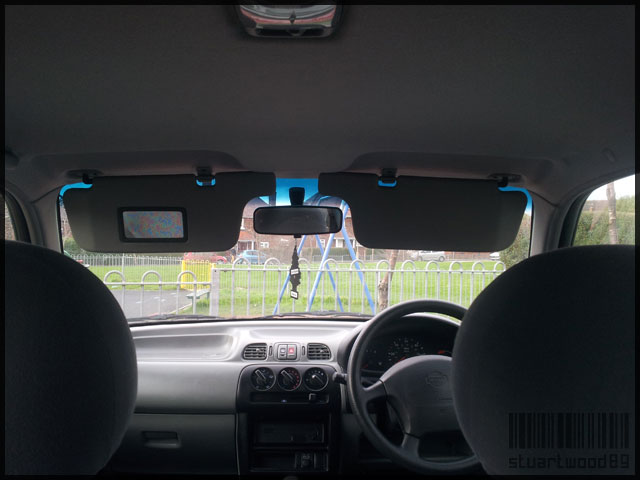
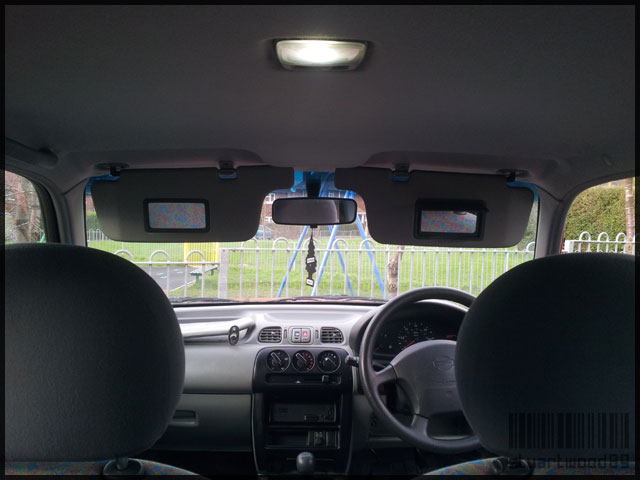
Thanks guys. I forgot to post pictures of the fitted visors:

Before:

ZOaYBje.jpg


After:

S6jBFtY.jpg


It's a bit pointless as I'll never really use the mirror, but it took me seconds to take it out the scrap car and mount it in mine, so was worth the time.

I also fixed the radio resetting every time I started the car. As suspected the wires were crossed, and replacing them in the right order fixed it right up.

I replaced the parcel shelf clips, which had snapped off previously. I pulled those from a pre-facelift and they fit perfectly. Now the boot closes properly without the rubber hangers getting stuck in the seals.
 
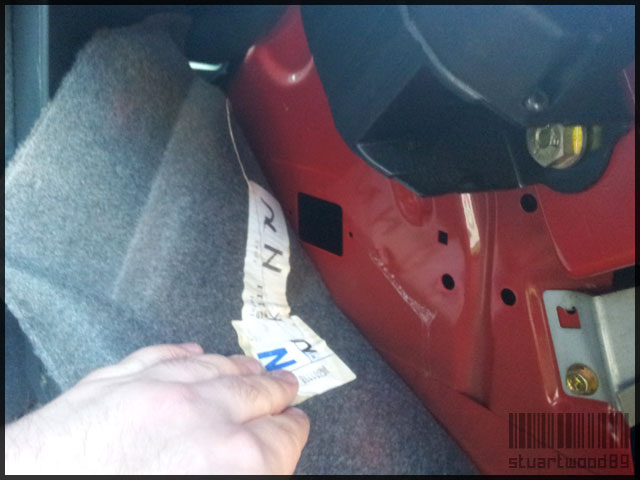
I decided to have another quick inspection of the car this afternoon, and I was happy to see that there was a hole in the boot for the light to screw into. I'd have to cut a hole in the fabric but that's no biggie. The only problem was I couldn't find anything in the loom back there to plug it into. I suspect this may be down to the light being connected to a special boot release switch, so I'll have to find another way of wiring this in:

Bh0puYv.jpg


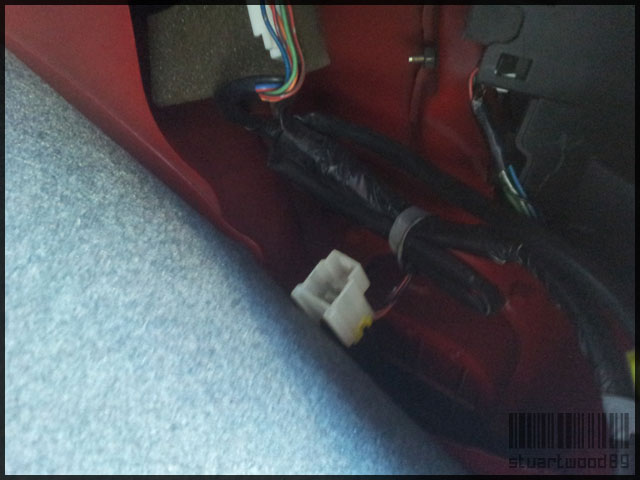
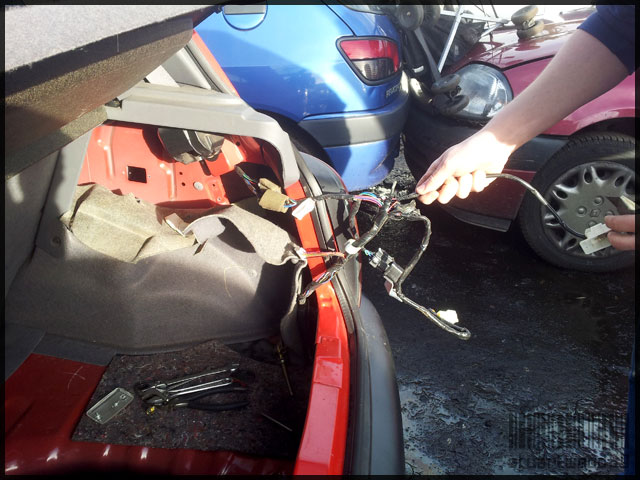
Whilst I was back there, I managed to find this 4-pin connector. I assume this is for optional shelf speakers, but not 100%. I'm fairly certain that GX I picked from yesterday had a speaker parcel shelf, but someone had already beat me to that as it was gone:

VWICitH.jpg


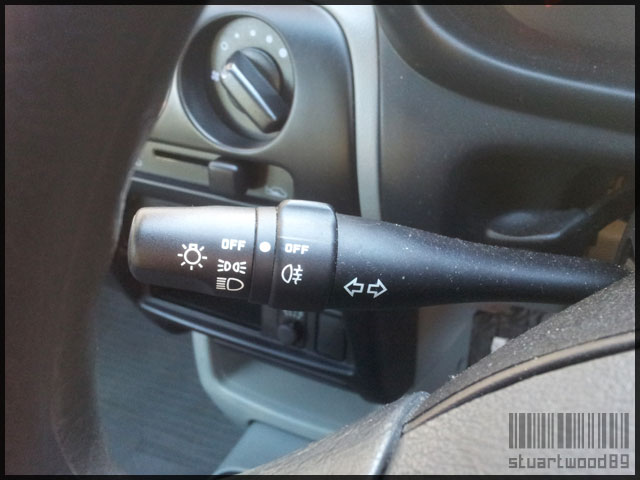
And one last thing. I was driving home yesterday evening, and after parking up I went to turn the lights off. I accidentally flicked something on the left-hand stalk, but it seemed to do nothing except turn on a blue (EDIT: orange) light on my instrument panel. I dismissed it but had another look today, and it appears to be a fog light switch:

UdtsGai.jpg


My car doesn't have fog lights, which is why this switch does nothing, but I figured that perhaps there is a connection in the front of the car somewhere, so that when my lights arrive I can just plug them in and be done with it. I popped the bonnet and couldn't find anything. The engine was still a bit warm, so I didn't dig around, but is it likely that the connection (if there is one) is tucked away behind something else? I also wondered if this was normal to have a fog light switch on this car but no connection to the lights once fitted.

Appreciate any help on this. It might be better to open a separate thread but thought I'd try here first :)

Thanks for reading!
 
Ah hah! Just went out to check this and you are correct. Feel a bit of a pillock now haha. Does this mean (assuming there is no connection up front) I will need to run a wire from the stalks for rear light to the front of the car, if that makes any sense?
 
Same as mine bud, eh theres a really good guide on here ill try find it but basically

there should be a connector at the front for your fogs, all you need to find a if its there is the fogs a stalk with front fog switch and another connector

then you put in the stalk, pull the connector down and splice the other connector in so it runs along to the other side plug and play from then on.

Ill go see if I can find the thread im on about.

Finding a stalk can be a PITA but I found a stalk out a primera sport+ fits just make sure it has fogs :p :)

car4.jpg
 
Ah hah! Just went out to check this and you are correct. Feel a bit of a pillock now haha. Does this mean (assuming there is no connection up front) I will need to run a wire from the stalks for rear light to the front of the car, if that makes any sense?

My car had fog light connections, it's just a normal 1.0s so with any luck yours will :)
You never know, maybe the stalk you have there will work with front fogs too
 
You switched on your full beam. That was the blue light that came on. Also all cars are required to have a rear fog light.

Yeah when I checked, I noticed it was in fact an orange light, not a blue one, which is full beam as you mentioned.

Same as mine bud, eh theres a really good guide on here ill try find it but basically

there should be a connector at the front for your fogs, all you need to find a if its there is the fogs a stalk with front fog switch and another connector

then you put in the stalk, pull the connector down and splice the other connector in so it runs along to the other side plug and play from then on.

Ill go see if I can find the thread im on about.

Finding a stalk can be a PITA but I found a stalk out a primera sport+ fits just make sure it has fogs :p :)

I didn't realise stalks from other cars would work. That's good to know, I may be able to find a Micra with the fogs built in which I can nab the stalk from. Failing that I could just either wire up the front fogs to the same circuit as the rear fog, or I could add a switch on my dash to independently switch the front fogs on or off (there's a blank next to the headlight adjustment switch I could mount it to). I appreciate you helping me out with finding the thread, I'll be taking a look myself shortly too.

My car had fog light connections, it's just a normal 1.0s so with any luck yours will :)
You never know, maybe the stalk you have there will work with front fogs too

Mine appears to be the very base model. The paperwork says it's an 'Equation' if that means anything to anyone. There are no stickers or badges on the car that say this though. Hopefully I'll find something and it'll be plug and play, otherwise I have some wiring to do!
 
I wouldn't recommend the idea with the rear fog

You may get away with having the front ones running but youll get pulled with the rear one on instantly

If you cant find a stalk you could wire up a flick switch in a black slot on the dash but it should be too hard to find a stalk as primeras with fogs arnt exactly rare.

Just make sure the stalk looks identical to the micra stalk and you should be ok :)
 
I think the switch on the dash idea is a lot more manageable in my opinion. I was discussing fog lights yesterday actually, and in terms of having the front fogs running, what defines the extra lights as being fog lights and not just daylight running lamps? It's illegal to drive with the fog lights on if not necessary, but what's stopping me from saying that they're driving lamps or DRLs? Is it something to do with how they bright they are, where they point, how they are turned on and off, or all of these?
 
Driving lights come on with the headlights iirc so you could wire them up to come on with the headlights?

Not entirely sure on that part of it all :)
 
Would be awesome if I could do that. I'll get them fitted first - without wiring - just to see how they look, then I can worry about them working after some research and some more scavenging in scrapyards for parts. I'll just have to remember to remove them before the MOT as non working fog lights would probably fail it.

I might end up taking the front bumper off and finding a connection anyway, in which case no need to worry!
 
connection you can see under the bonnet, just needs to be pulled down gently.

Glad you can find some fog lights, iv been searching for ages.

Might need to give @Shamalam a shout see if he'll get me some and meet me half way with em :p
 
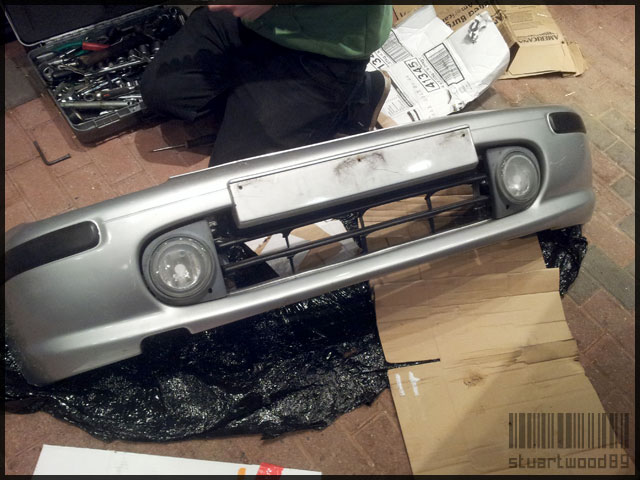
I searched high and low in my area, but couldn't find any fogs. In the end I just bought an entire front bumper for £55 including postage from eBay. As the bumper included the fog lights, it seemed like a good deal, especially as new ones (not even OEM) cost nearly £40 each!
 
It's a bit pointless as I'll never really use the mirror, but it took me seconds to take it out the scrap car and mount it in mine, so was worth the time.

That's the same reason i put the coin tray / ash tray in between the front seats (theres usually just a blanking plate)...i have no real use for it, but as i could get one i figured why not. haha.
 
I decided to have another quick inspection of the car this afternoon, and I was happy to see that there was a hole in the boot for the light to screw into. I'd have to cut a hole in the fabric but that's no biggie. The only problem was I couldn't find anything in the loom back there to plug it into. I suspect this may be down to the light being connected to a special boot release switch, so I'll have to find another way of wiring this in:

You just need to swap out the latch, which if you find boot light it will all be in one car anyway. Really easy to install. :)
 
There were some latches if I remember, but I never bother getting one in the end. Guess I can take another trip down soon and get one. I was thinking of just using one of those pressure switches, like the front doors use instead, wouldn't that be much easier? I also found a boot/fuel cap release, but would have had no idea how to remove and reinstall in my car :(
 
The lights we all call front fogs are actually just driving lights. They were never actually meant to be fog lights by Nissan. You can switch them on with only sidelights switched on if you get the correct stalk.
 
Meanwhile the hunt for the parcel shelf with OEM speakers continues. Man these are hard to find in my area (none on eBay or Gumtree either). I'm not sure if this is against the rules to ask, but does anyone have any going? If preferred I'll pay for a buy/sell sub and ask there.

Thanks guys, really hope to get another update out soon!
 
There were some latches if I remember, but I never bother getting one in the end. Guess I can take another trip down soon and get one. I was thinking of just using one of those pressure switches, like the front doors use instead, wouldn't that be much easier? I also found a boot/fuel cap release, but would have had no idea how to remove and reinstall in my car :(

I'd say there's less probably wiring to do if you use the proper latch, loom etc plus no drilling holes. :) (just depends how you wanna go about it really).

Fuel and boot release is really easy to remove, you just have to follow the cable from the boot latch all the way to the drivers side handle. There's only a few bolts to undo and each end and a few little clips, it does run right to left behind trim panels and under the rear seats though so its not a five minute job but nothing excessive.
 
Thanks Solarice, I'll look out for both when I'm next at the breakers. Even if I don't get round to fitting it right away, it's worth taking it anyway.
 
Will hopefully be going round my mates tomorrow to check on the paintwork. I'll be sure to take some photos if my crappy phone hasn't run out of battery by then ¬_¬
 
Just had notice that the bumper is being dispatched today, and should be here tomorrow :D

Had a bit of a parking scare yesterday. Got a bit too close to the wall I park up against and could have sworn I scraped the front wing. I was so close that I couldn't even turn the wheel to turn out. Got out in the end though, with only a bit of brick dust on the arch, which brushed off.

Should have an update tonight hopefully.
 
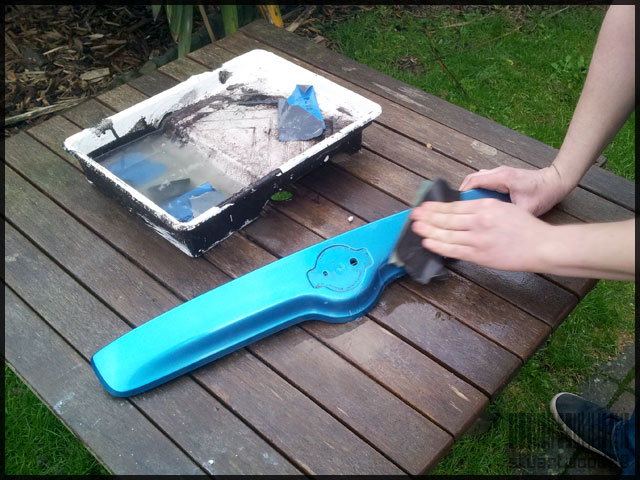
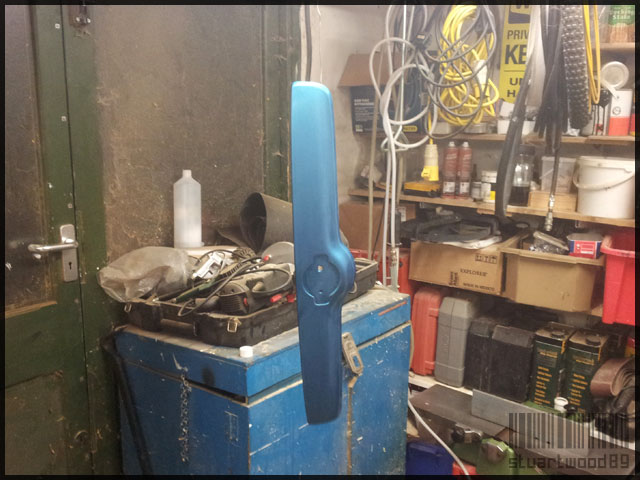
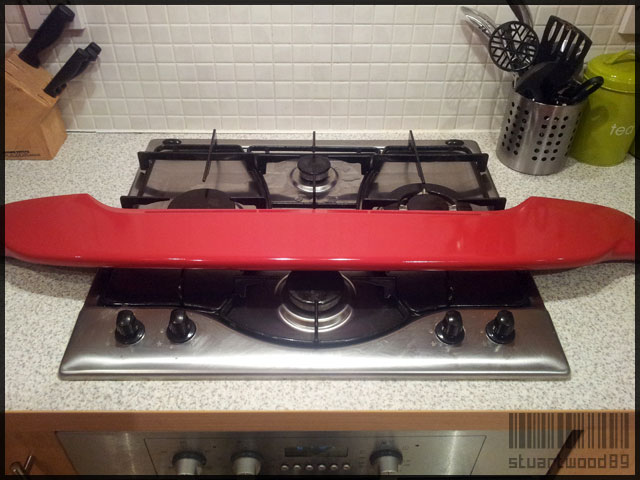
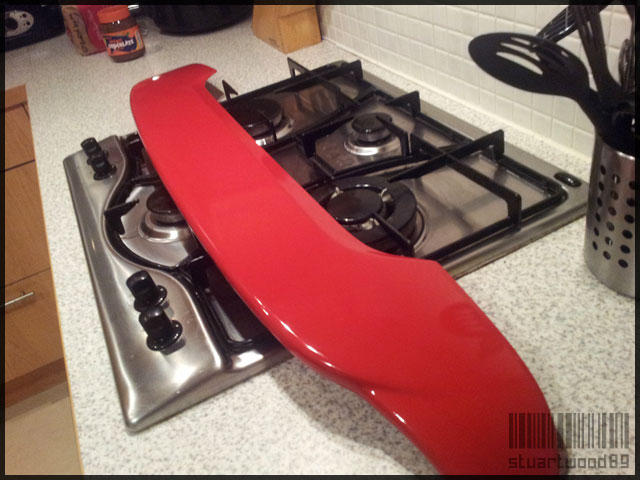
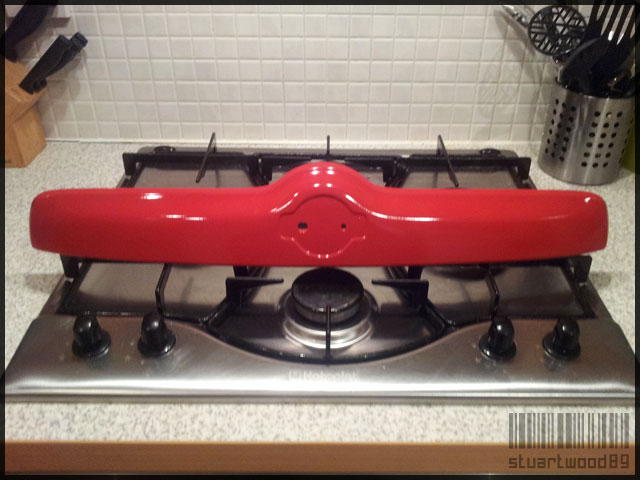
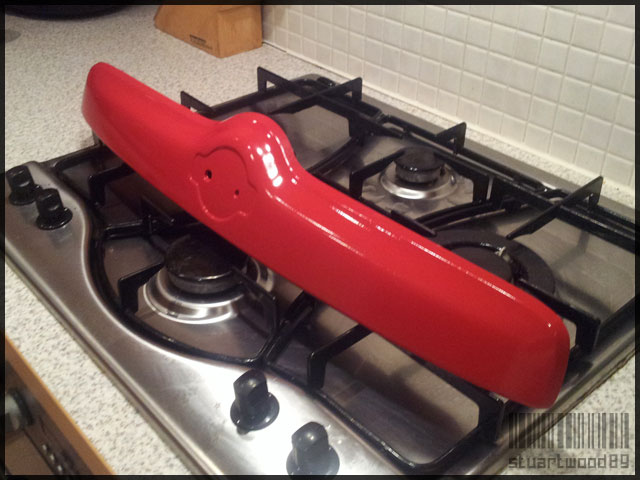
As promised, went to check on the paintwork this evening. Ryan has applied a few coats of lacquer and has done a really good job. They still need some work - some wet and dry and then more clear coat - but I took the spoiler and plinth home with me to look after.

BPfAWTh.jpg


udQcGty.jpg


emW6w0i.jpg


rjOwh0B.jpg


The photos don't really do them any justice, but in person they look spot on. Like I said, they need some work still, and then I'll be able to see my face in them. Only once I'm 100% happy with them will they go on the car.

Sorry about the photo quality guys. I'd love to get some daylight shots, but before work it's dark and after work it's dark too so I can't seem to win.
 
Well look what arrived:

4b6fcl3.jpg


PN2tE6F.jpg


I don't need the bumper, but it will come in handy somewhere down the line I'm sure. Until then it's in my bedroom.

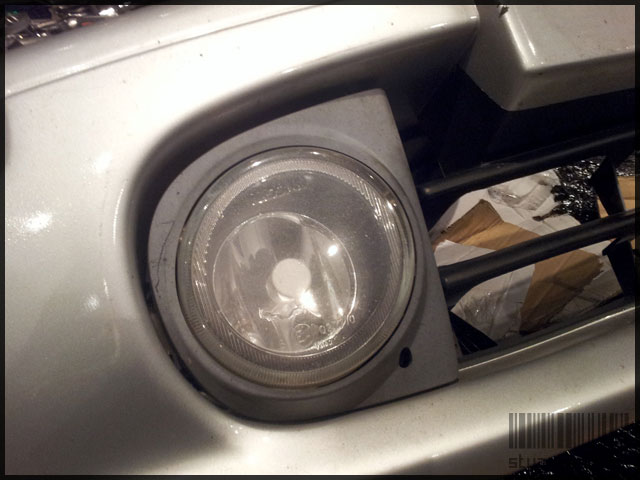
Unscrewed the fogs from the bumper to check for any damage:

zZnuro6.jpg


zhAwlpV.jpg


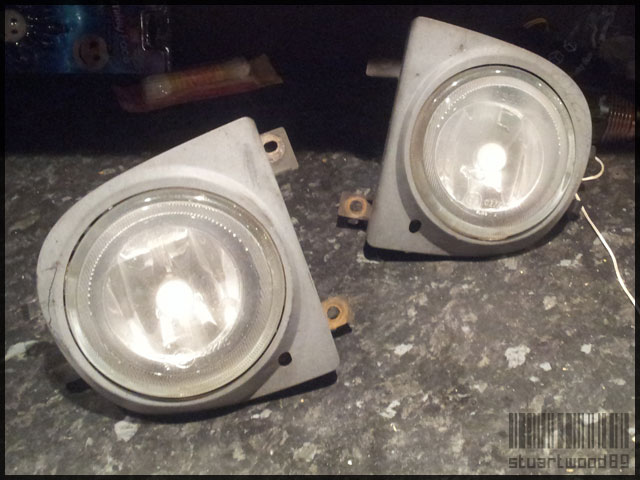
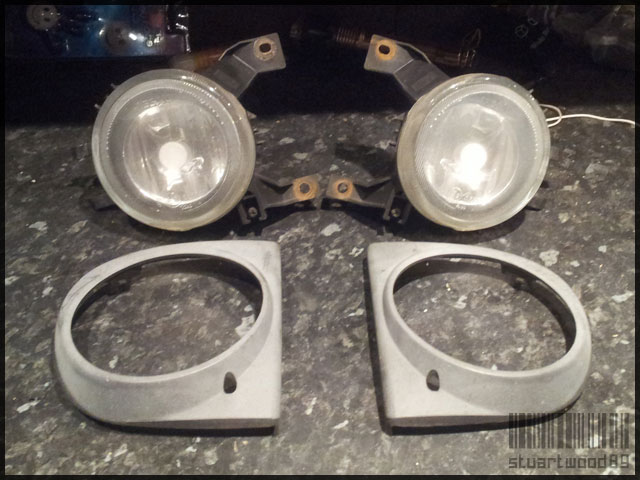
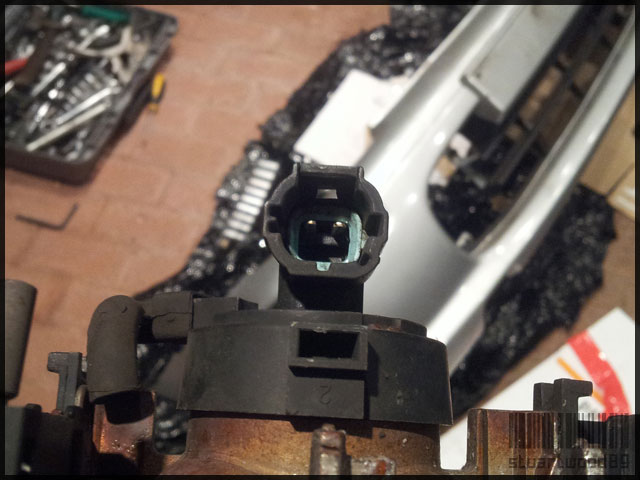
Unclipped the surrounds and it all looks fine. They need a clean, as one of them is a bit cloudy compared to the other. I'll also try and bring the black to the plastic surrounds. Unfortunately the bumper didn't come with the cable to connect the lights so the car, so I'll have to source on of them from somewhere. On the lights themselves there is a two pin roundish connector:

jb75uYK.jpg


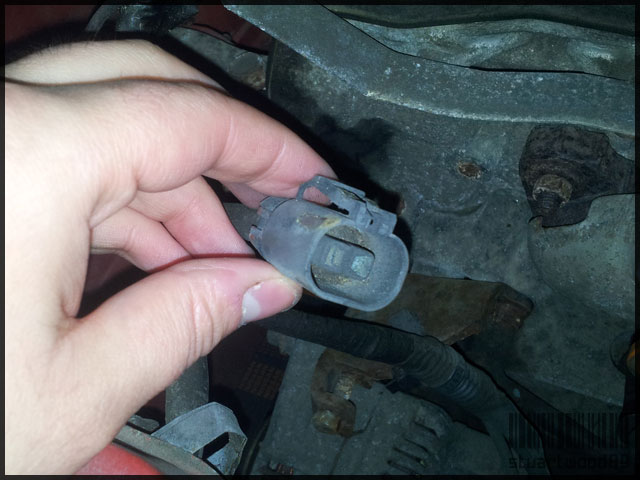
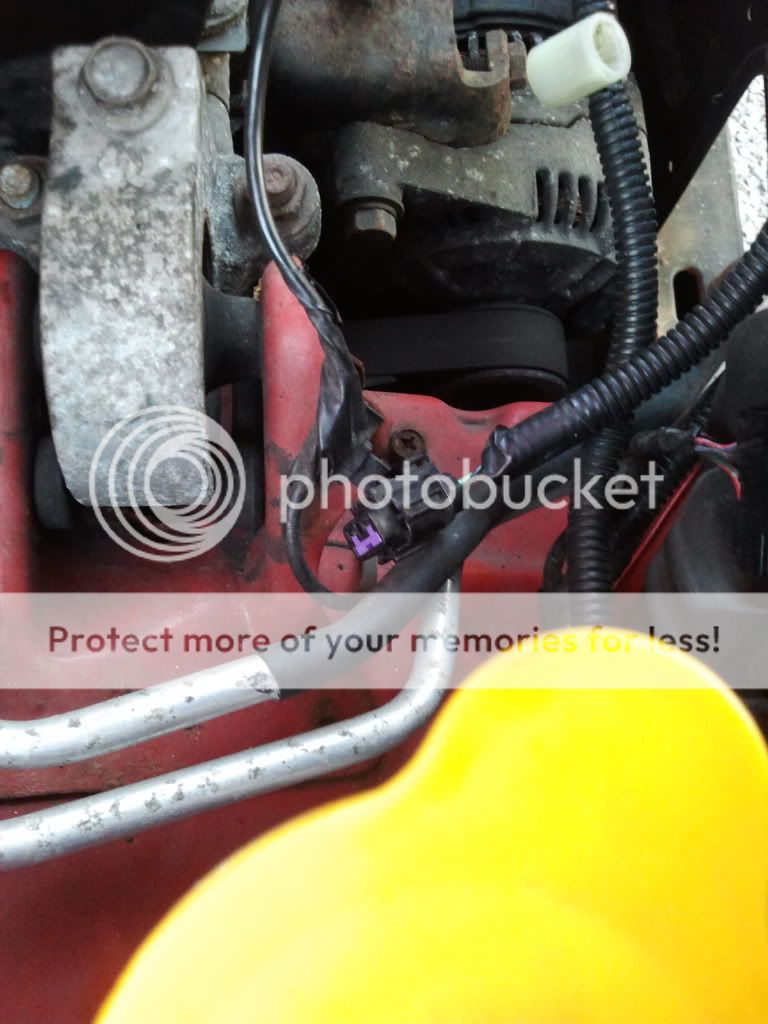
I also had another look in the engine bay to try and locate a connector, and the only one I could immediately find was this one which was taped to the back of the drivers side headlamp:

ivd8Rob.jpg


It looks different to the ones I've seen in various posts, but if it's not for fogs then does anyone know what this is for?
 
Cable for the fogs should already be there.

Taped down behind the driver side headlight, the inside of the plug should be purple but sometimes its all black
 
Yeah I have that one bookmarked :D

It's this image that made me question it:

2012-10-27171637.jpg


That connector looks like it should fit into the one I found.
 
Helps bake the paint :D

I just gave the lights a bit of a clean. I took the bulbs out (both are blown, typical) and squirted some window cleaner inside the lenses, then gave them a shake. That seemed to shine them up quite a lot just by itself. I then realised that the backs come off entirely, they only hang by the adjustment screws which I couldn't remove, so I was able to properly clean the lenses from behind. I've left them to dry on the draining board in the kitchen overnight. Should look good I think.
 
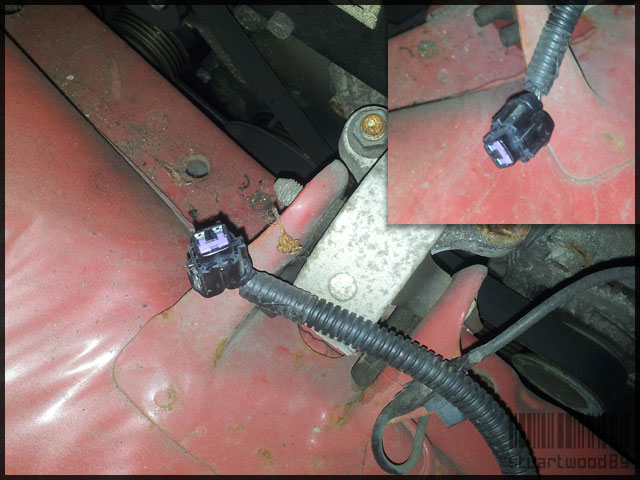
I've been looking through various threads and it was really bugging me, so I decided to go out and have another look for the connector. I just might have found the little bugger:

CWSWIA2.jpg


It means that there's a lot less cabling to do, however I'll still need to get hold of the cables to go in the back of the lamps and some way of switching them on and off. Any idea on where to get the harness?
 
I have my mate Ryan to thank for the paintwork, he's a master with the rattle cans. The next step will be to get rid of all the dents, wet and dry the entire car, then polish it. I'm dying to clean it, but with this weather it hardly seems worth it.
 
Another update! Not much though, as despite the forecasts telling us it would be sunny in Gloucester today, it has been belting it down pretty much from dawn until dusk. I was supposed to be helping Ryan out with his car today, but as most of the stuff he's doing requires clear weather, we did some indoors stuff to mine instead.

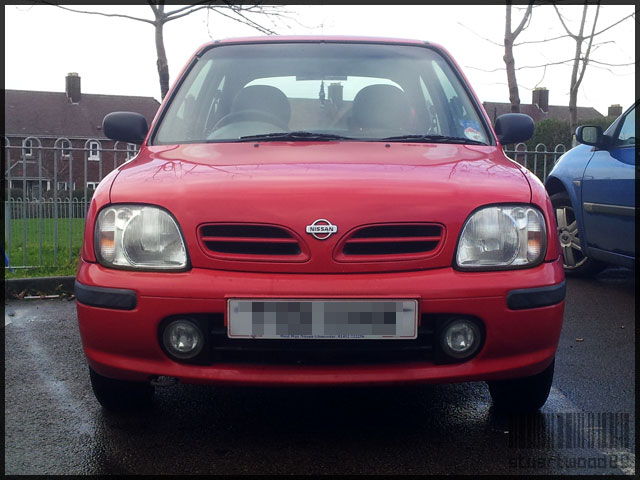
First up I wanted to see how the fogs looked on the car. We used some bumper shine to bring the black back to the plastic surrounds. I had a before/after photo of this but it got corrupted so couldn't use it. Anyway here they are on the car:

YdSQqvY.jpg


Really happy with how they look. They're not connected or anything at this stage, still need to get wiring, some new bulbs, yellow tint and a switch.

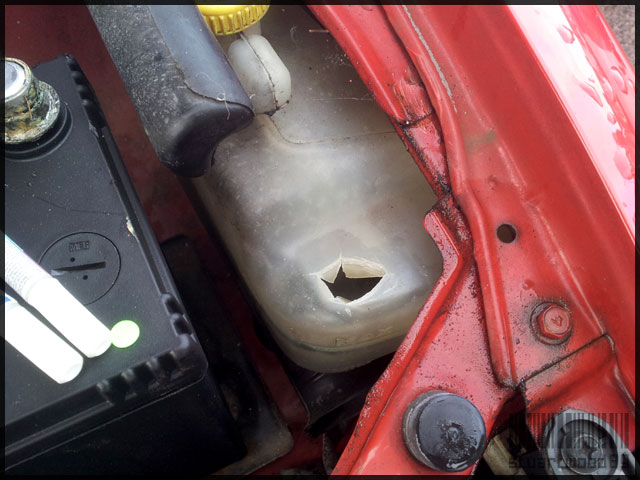
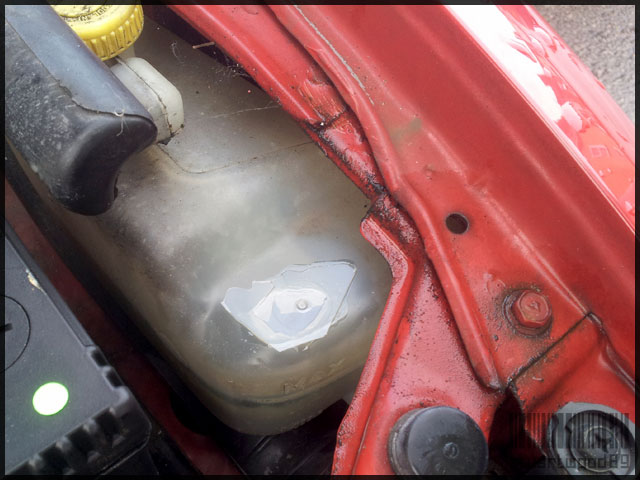
Whilst I had the bonnet open, I checked all the levels in the engine bay (oil, washer fluid, coolant etc). I was checking the coolant level and there was a faint line at the 'max' mark. In case this was just a scum line or something, I gave the bottle a tap, and when doing so, managed to put my whole finger through it:

ti4nGEd.jpg


The plastic was really brittle, so I guess I'll need to replace this pretty soon. The coolant probably needs a change anyway, so I can do that at the same time. In the meantime, we patched it up with a piece of plastic and some super glue:

idvlwom.jpg


Once the glue had set it was covered in duct tape as a precautionary measure. I'll be keeping an eye on the engine temperature for the time being, but this should hold just fine.

Whilst we had the bonnet open, we were talking about cleaning the engine bay up at some point. I'll most likely be painting the rocker cover and cleaning all the visible parts in the bay, but after looking some something we could easily detatch and polish, we found that pretty much everything in the engine bay was either steel or plastic, so no polishing :(

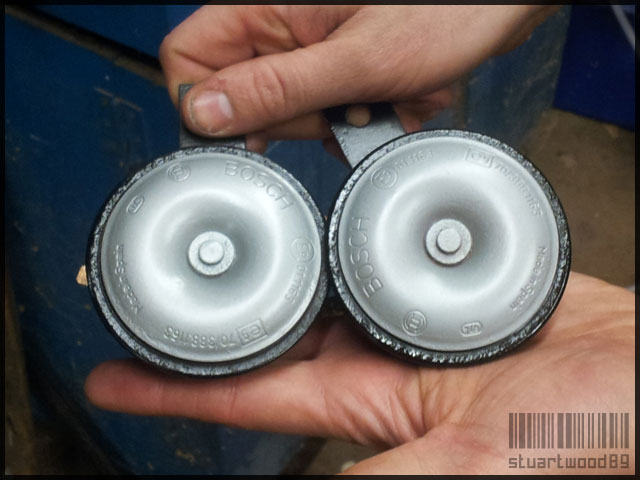
As Ryan had already got his polishing itch, we decided to take the horns off and give them a spray job. The bodies are black, and the front parts are metallic silver:

ya7CJkH.jpg


Nothing major, but it's a nice addition to the engine bay. I don't have a photo of them fitted because (as usual) we ran out of light.

Quick update on the spoiler and plinth. They've both been rubbed down with 2000 grit paper and given their final coat of lacquer. Next week we'll be rubbing them down with 3000 grit, then they'll get a mad polish before going on the car. At this stage I'll need to update the insurance company so they're aware of the change. As it's a stock spoiler, I don't see it being too much of a problem.

Thanks again for reading :)
 
Oh, glad to see I'm not the only one. I guess this means I can use pretty much any tank I want, providing it screws into place and has the right capacity.
 
So my speakers from @Shamalam arrived over the weekend. They work beautifully and really improve the overall sound quality inside the car. Previously everything came through the two door speakers so it's a definite improvement. I also have some tweeters which I'll have to try and wire up into the A pillars soon.

I did try to install the rear speakers on my existing parcel shelf, but managed to make a real hash of it. This is mostly because it was difficult to line the holes up so that they could be properly screwed in. I ended up cutting a load of the shelf recess so it's not looking too smart right now, I really wish there was a template available as this would have saved a load of stress. The wiring loom is also hanging off the bottom, as the sellotape I used to attach the cable came off. They're on, but only by a few screws to stop them from rolling around. I hope to tidy up the whole thing soon anyway.

I've fitted a bee-sting aerial with the intention of decreasing my drag co-efficient. I've seen a noticeable improvement in speed since fitting it. :rolleyes:

Also put in an order for some yellow Lamin-X for the front fogs and some genuine Nissan K11 floor mats - bargain for under £17!

Also trying to find some headlamp protectors, I managed to find one at the scrappy, but just the one :(
 
Back
Top