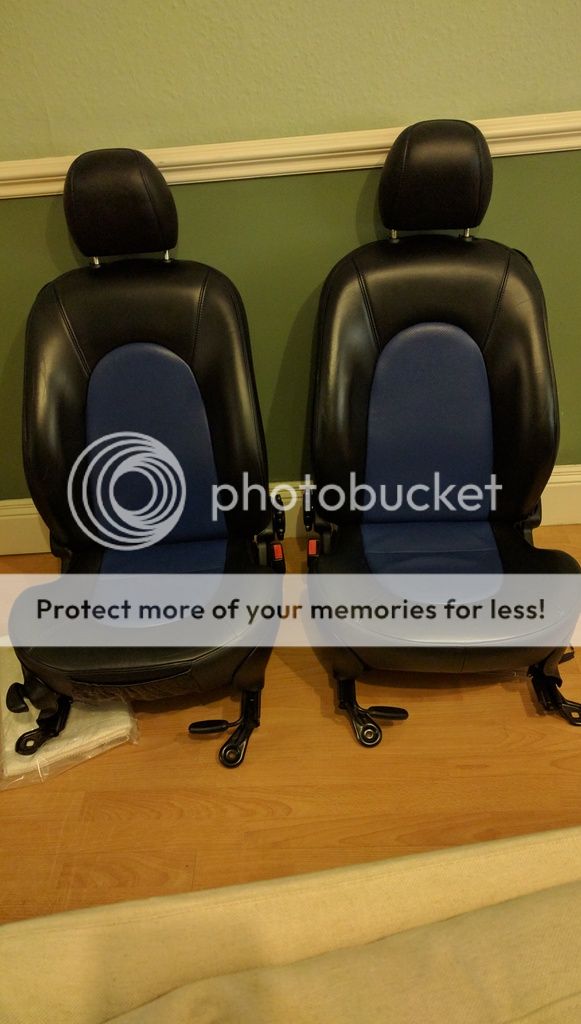
what did you do to your micra today ?

Parcel Shelf... learned a way few years ago to mend broken plasic (in my case)lug that holds the parcel shelf.
Stuff required:
Gorilla Glue,
Baking Soda.
Dab in some glue on both parts, give it a good lick of glue, put some soda on it and let it saturate with the glue. Apply some more glue on top and walla..... solid like a rock.
What's the soda for? Presumably it makes the glue more gooey so it stays on the joint?
 
Today I applied the first coat of colour coded gold paint on the repaired sill on my SR! B-)
1476979439899.jpg
1476979452623.jpg
 
What's the soda for? Presumably it makes the glue more gooey so it stays on the joint?
It works like Fairy Dust. Dont know but seems like some chemical formulation to make it work better.. whatever the reason it worked great for my repair. Dont know if it will work on the bumper repair (got a little crack) i will try tp upload some pictures on the go...
 
Hi Andy i am thinking to remove and repair or replace the sill as ot got some nastu rust. Got 1999 T-reg 5 door. How much should i b looking in terms of money for the inside sill.

Hi mate not sure on the cost of a new sill I "rubbed" the sills off my poor donor car they were like new and my mate welded them in! Fellow member bls might know I think he bought new sills?
Donor car without it's sill! :-(
1476983197133.jpg
 
Last edited:
Found the expansion tank had gone brittle a week or so ago and has a hole in the top. Funny I'd read a thread about this just the week before so wasn't worried other than loosing a bit of coolant so stuck sivler duct tape over the hole as a quick fix. Bought a replacement (copy but new) and its a very simple job and the duct tape has now gone! Nice simple job - took 25 mins start to finish :D

The old one removed:

IMG_2993.JPG


New tank:
IMG_2990.JPG

New tank in place (needs a but more antifreeze though!)
IMG_2991.JPG
 
Found the expansion tank had gone brittle a week or so ago and has a hole in the top. Funny I'd read a thread about this just the week before so wasn't worried other than loosing a bit of coolant so stuck sivler duct tape over the hole as a quick fix. Bought a replacement (copy but new) and its a very simple job and the duct tape has now gone! Nice simple job - took 25 mins start to finish :D

The old one removed:

View attachment 51866

New tank:
View attachment 51864
New tank in place (needs a but more antifreeze though!)View attachment 51865

Looks like the same reservoir bottle I bought off eBay for my SR! B-)
 
It works like Fairy Dust. Dont know but seems like some chemical formulation to make it work better.. whatever the reason it worked great for my repair. Dont know if it will work on the bumper repair (got a little crack) i will try tp upload some pictures on the go...
Super glue needs a gardener to cure. In 2 part epoxy one is glue and another is hardener.
In superglue the hardener is CO2 found in air. If you add baking soda it will add donor COx to help hardening. Also epoxy can cure in a shape. But superglue will only cure on the outside of a blob, where air is making contact. Baking soda turns superglue into epoxy.

Sent from my Blade S6 using Micra Sports Club mobile app
 
Today I applied the first coat of colour coded gold paint on the repaired sill on my SR! B-) [
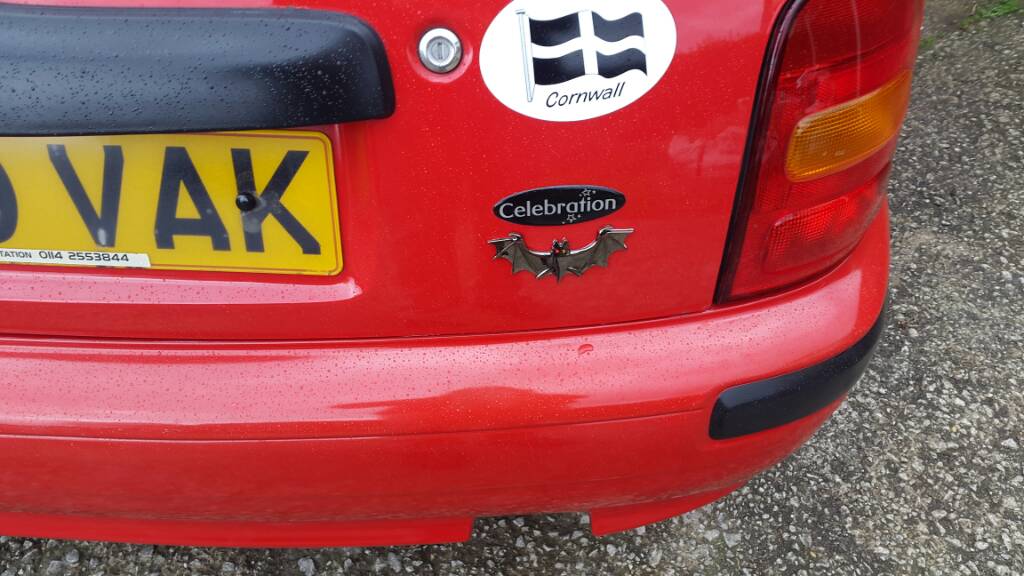
Today I've done completely opposite - applied underbody seal that came off with the time.

Also, planning to deal with the scratch that been done by previous owner(got touch up kit from paint4u) and polish the whole car with DA polisher and Meguiars Ultimate polish/205.
 

Attachments

  • IMG_5361.JPG
    IMG_5361.JPG
    168.6 KB · Views: 227
  • IMG_5413.JPG
    IMG_5413.JPG
    774.7 KB · Views: 209
  • IMG_5414.JPG
    IMG_5414.JPG
    713.8 KB · Views: 221
  • IMG_5415.JPG
    IMG_5415.JPG
    989.3 KB · Views: 249
Was not happy with some very small blemishes so re- filled with more P38 then used wet/dry paper to sand down and then applied another coat of paint looks better now! B-)
1477068732768.jpg
 
Last edited:
Started my speaker upgrade today! Never done this before (only done straight swaps with cheap speakers). 10 hours later (most of it spent scratching my head) and I have 2 sound deadened doors, one mdf spacer and the woofer cable ran to the driver side door.

A couple of questions if anyone could lend a hand:
I've ran the cable through the existing grommets and just zip-tied it in between to the existing rubber tube for the other cables. Will this be fine or should it have some sort of protection?
Where do you guys fit your tweeters? I'm thinking fitting them flush on the A pillar.
Any ideas on crossover location? Wasn't too keen on inside the door so thinking velcro to the inside of the kick panels.
 
Engines in and running. Drivers side driveshaft in with the outer bolt at the rear of the wishbone snapped . Started unbolting the passenger side wishbone to push that shaft in and that outside bolt started looking like it was going to snap doh


1993 Prefacelift GT15 turbo cg10de(t) @ 7psi
2001 Facelift cg10de
 
These rare clear beauties arrived today and also had a stock check of my spare rear light clusters for future refurbishment projects:
1 x JDM AK11 Pre-face lift unit
1 x JDM AK11 Pre-face lift clear unit
1 x JDM AK11 Kouki 2nd Face lift unit
3 x K11 1st Face lift units (1 x donor car)
2 x K11 2nd Face lift units
Here's a pic of some of them! :-S
1477330937330.jpg
1477330950159.jpg
 
Couldnt find anyone to weld the sill(s) for my cheap ass so have to try myself. Less than 20 hours of any welding experience and only have stick burner so not going to be pretty but Finnish MOT thingy instructions said something about having to only have 50% of seam spot welded for it to pass so i think it's doable. And my gas tank breather must be stuck because it hissed at me when i went to fill it. Wasn't there a way to make it breathe to atmosphere instead of the canister or where ever it goes?
 
These rare clear beauties arrived today and also had a stock check of my spare rear light clusters for future refurbishment projects:
1 x JDM AK11 Pre-face lift unit
1 x JDM AK11 Pre-face lift clear unit
1 x JDM AK11 Kouki 2nd Face lift unit
3 x K11 1st Face lift units (1 x donor car)
2 x K11 2nd Face lift units
Here's a pic of some of them! :-SView attachment 51911View attachment 51912
If those clear ones fit mine Andy - hand them over - or I'll be over to see you with the boys ;)
 
Car failed mot
Only on loose strut bolts on the hubs (oops) and split drivers side ball joint dust cover.
So passed emissions with the turbo fitted and only the secondary cat with ga16 injectors couldn't believe it.


1993 Prefacelift GT15 turbo cg10de(t) @ 7psi
2001 Facelift cg10de
 
How do I fit one of these? Not having a tachometer is irritating for some reason... :)
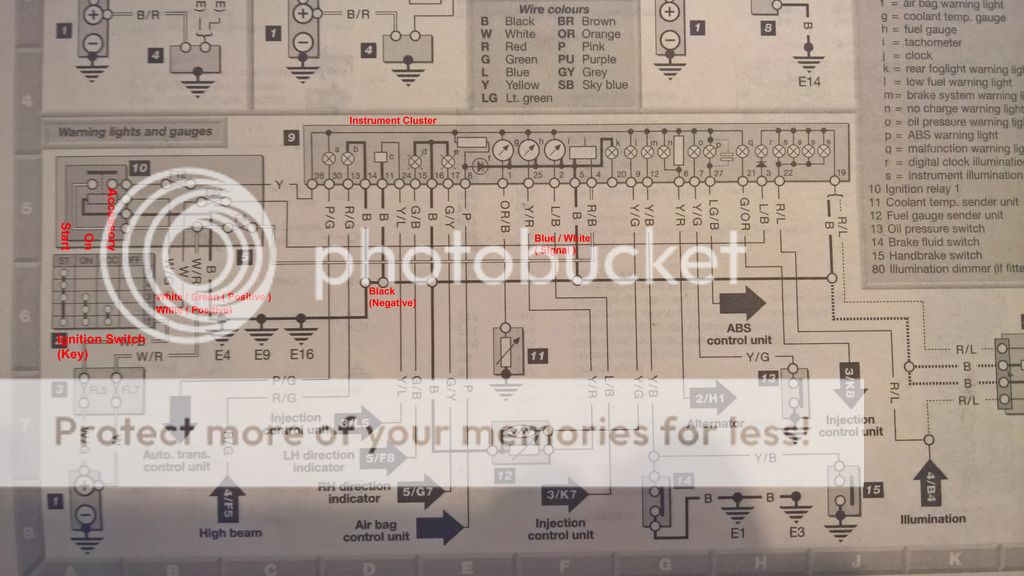
It's really quite easy to do. Just need a phillips screwdriver, single core wire ( incase of needing to extend a wire or 2 ), snips and electrical tape for the quicker route or also a soldering iron and some solder for a cleaner more permanent connection.

Mine is a coil pack ignition, so my signal cable is spliced into the blue/black wire that goes into the instrument cluster, negative into one of the two black wires going into the instrument cluster, positive into the just white (could use green/white) wire of the ignition switch(key), quite a distance for the stock cable on a tacho hence why I suggest having some extra cable hanging around.

There's 2 screws holding the instrument shroud in place at the bottom then the whole piece will lift up and slide out, that will give you access to the instrument cluster which is secured with 3 screws. You also have to lower the steering column as far as it will go for the shroud to have enough room to be removed.

To get to the ignition switch, there's 2 screws holding the casing around the steering column together on the underside, the top just lifts away, the bottom also needs the plastic cylinder around the key barrel to be removed ( just pops of with some persuasion ). The switch is plugged into the rear of the key barrel.

I ended up making use of a dremel on the shroud so that the tacho cabling had somewhere to go without getting squished and so that the shroud sat flush.
WP_20161025_23_34_13_Pro_written_on.jpg
 
Sheared two bolts (the nearside ones) off the battery tray, even though they were soaked, while starting an ambitious gearbox recon and clutch replacement...
 
Sill repairs looks like swiss cheese but the goddamn plate is on there. Tomorrow will Go and buy some fiber glass and cover it all and then bodypudding on top of it. Must Invest in some cheap MIG in future if i need to do more rust repair (lol "if").

Sent from my ZP980+ using Micra Sports Club mobile app
 
Today I applied a 5th coat of gold colour coded paint to the nearside sill and applied a 2nd coat to the drivers side sill it's getting there! A few more paint coats on the drivers side sill and it will be time to apply the clear lacquer! B-)
1477499451302.jpg
1477499480837.jpg
1477499496290.jpg
 
It's really quite easy to do. Just need a phillips screwdriver, single core wire ( incase of needing to extend a wire or 2 ), snips and electrical tape for the quicker route or also a soldering iron and some solder for a cleaner more permanent connection.

Mine is a coil pack ignition, so my signal cable is spliced into the blue/black wire that goes into the instrument cluster, negative into one of the two black wires going into the instrument cluster, positive into the just white (could use green/white) wire of the ignition switch(key), quite a distance for the stock cable on a tacho hence why I suggest having some extra cable hanging around.

There's 2 screws holding the instrument shroud in place at the bottom then the whole piece will lift up and slide out, that will give you access to the instrument cluster which is secured with 3 screws. You also have to lower the steering column as far as it will go for the shroud to have enough room to be removed.

To get to the ignition switch, there's 2 screws holding the casing around the steering column together on the underside, the top just lifts away, the bottom also needs the plastic cylinder around the key barrel to be removed ( just pops of with some persuasion ). The switch is plugged into the rear of the key barrel.

I ended up making use of a dremel on the shroud so that the tacho cabling had somewhere to go without getting squished and so that the shroud sat flush.
WP_20161025_23_34_13_Pro_written_on.jpg
Cheers. Just to make sure I understand you right, theres already the capacity for having a tacho on the Micra so you just need to wire the aftermarket one in using your instructions?
 
Cheers. Just to make sure I understand you right, theres already the capacity for having a tacho on the Micra so you just need to wire the aftermarket one in using your instructions?
that's correct, as all models will have used the same wiring loom, including the super s / sr which had a tacho in the instrument cluster
 
Cheers. Just to make sure I understand you right, theres already the capacity for having a tacho on the Micra so you just need to wire the aftermarket one in using your instructions?

that's correct, as all models will have used the same wiring loom, including the super s / sr which had a tacho in the instrument cluster

Not the always the case. On the dizzy engines The wiring will be there at the clocks yes but the wire goes back to the Ecu where it's often not connected at the ecu. On coilpack engines however it is connected .


1993 Prefacelift GT15 turbo cg10de(t) @ 7psi
2001 Facelift cg10de
 
Not the always the case. On the dizzy engines The wiring will be there at the clocks yes but the wire goes back to the Ecu where it's often not connected at the ecu. On coilpack engines however it is connected .


1993 Prefacelift GT15 turbo cg10de(t) @ 7psi
2001 Facelift cg10de
was hoping for someone else to chime in on this in regards to dizzy engines, only worked with the coil pack engines so far
 
Went on a shopping trip to town. Picked up some super cheap carbon fiber i ordered, 1.2x10m roll of 300g UD for 84€. Then drove to buy fiber glass and resin/hardener and spotted some sweet number plate lights for 3€ each, need some trimming to be perfect. Then groceries aka beer, pizza and liqourice :D.

Came back and wondered why is the car still spewing that bloody dirty smoke under throttle so went and put my hand behind exhaust on idle and smelled, smells like pure gasoliña so running a bit rich there are we oh boy we are. Did some audio check as in engine makes not cool sound, i usually can hear if there are noises that are not supposed to be there, and i think my timing chain rattles quite nicely not sure as i have never had a car with chains before.

Also air filter is super dirty, probably needs oil change and new sparks and i should check if the tank breather actually breaths. So all in all a good day. Shall try to put a ****ty video about the rattle and pic of a plate light.

The videjo (and no need to point out that the bay looks like a land fill:oops:)
http://tinypic.com/player.php?v=1zw1d8x>&s=9
The light
http://imgur.com/a/z6q8G
 
You mean oh so tasty but toilet be hasty type of morning? Good thing i have a day off :cool:. Also tomorrow in the afternoon be taking a trip to free booze party, the only type of party i'll ever attend. Any telling from the video if there is indeed chain rattling or is it too ****ty?
 
Back
Top