what did you do to your micra today ?

looking good matt (Y)
i finally got around to repairing the bumper damage from when it was a cat C writeoff


and the damage from that cone at japfest right? hehe :D

i think you should loose the bump strips there too heavy and the badges and the centre of the grills

and the locks etc saves weight:p
 
top works peoples!
today enjoyed the ride some more .whole new outlook now with the way its prowling about handling an all :grinning:
very happy, all me k11's and one k10 were standard ride height. got to work on power now,,,,,,,,,,,,,,,,,,,,,,,,,,,,,,,,,,,,,,,,,,,,,,,,,:grinning:
got to do rad,water pump,thermos,coolant change this minute
 
Removed some stuff from the SuperS to preparing it for the March conversion and for the bodywork/paint job. Discovered that it was a pre-loom for A/C, and a different bracket with a pulley replacing the compressor.


IMG_0160.jpg


IMG_0161.jpg


IMG_0162-1.jpg


IMG_0163-1.jpg


IMG_0166-2.jpg


IMG_0164.jpg


IMG_0159-1.jpg
 
had a go at this 1.3 back box, probly from factory.

DSC02457.jpg

look'd strange to me from inside :grinning:
had no baffle cloth inside
DSC02438.jpg

DSC02439.jpg

DSC02449.jpg


so may have to do a straight threw and just keep the hanger brackets, grinder ftw, until molten metal starts landing in the wrong places :grinning:
DSC02444.jpg

patent pending :grinning:
 
No soundproofing R-Reg? That is weird fwn. Definitely need to just weld a straight bit of pipe onto the midsection :laugh:
 
yeah kinda ended up pulling it out as it was hanging about a foot out my exhaust looked stupid!

must admit though didnt make the exhaust any louder at all without it! the back box rattles a goodun

from the rust in it
 
fitted a pair of stock corsa rear shocks :grinning: as you can see somewhat shorter than k11, so keeping those springs captive (Y)


franks misfiring :laugh: captive springs ftw :grinning:
hows the ride now mate ?

back box jobby, pipes attach'd so now i need more cutting discs to cut everything not necessary apart from hangers and get good access to the pipe to weld , got plenty scrap pieces to fill holes and that
DSC02463.jpg

DSC02464.jpg

DSC02465.jpg
 
top man :grinning: if i knew this back box hadnt any baffle fluff stuff inside i'd have just put it on straight:laugh:
 
well unless i cut my springs my dampers are fine as they are apparently uprated!

i have gone a long while without opening my bonnet! this is a mega +
 
Well, it was yesterday as well....:p

  • Fitted rear sunblind
  • Fitted front and rear numberplates
  • Replaced washer pump as that had packed up
  • Took out front wiper linkage as the wipers had a 'orrible squeak, just waiting on a replacement linkage from ebay
  • New set of wheel trims too
 
Took it for an mot, sailed straight through as usual and the mot man said "it's a little minter", now to sell or not to sell that is the question. :laugh:
 
this stick welder i am getting used to, the stick doesnt actually touch the work piece. it sort of pastes (ark's on) on the weld making it real good at filling holes,more practice should have me doing the thin body panels soon
have to cut off the rest of the unneeded back box pieces tomoro ,gun gum and done
first time welder so it aint too tidy but does the job !
DSC02466.jpg

DSC02467.jpg

DSC02468.jpg

DSC02469.jpg
:grinning:
 
Nice exhaust R-Reg :laugh:. Need a sound vid when it's fitted (Y). Then a cat bypass pipe and a 4-2-1 manifold :grinning:
 
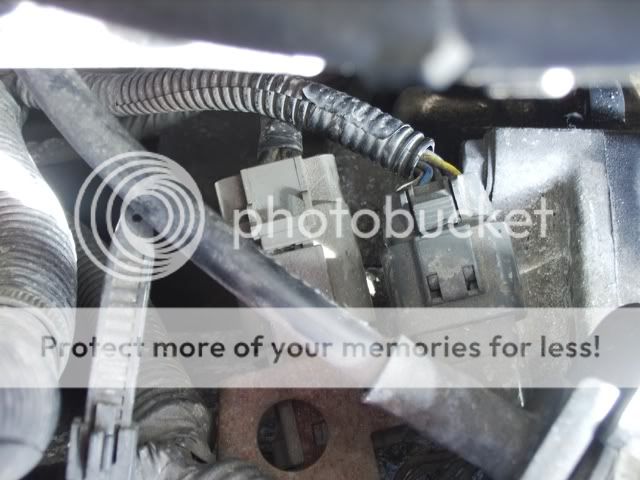
Ok, manage to make some progress about the March wiring loom, already found the CVT start inhibitor and reverse/neutral switches.

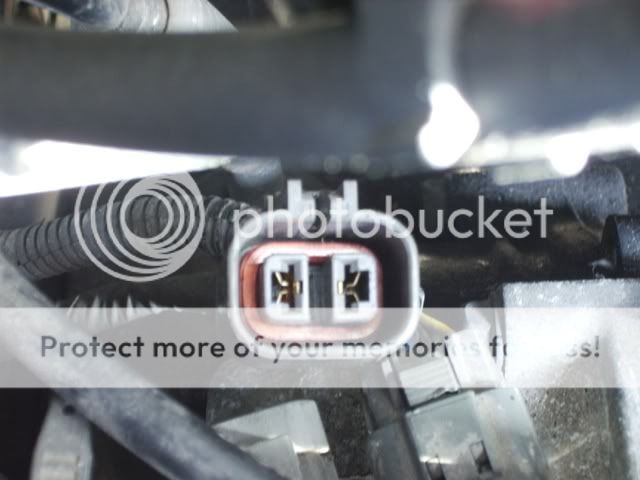
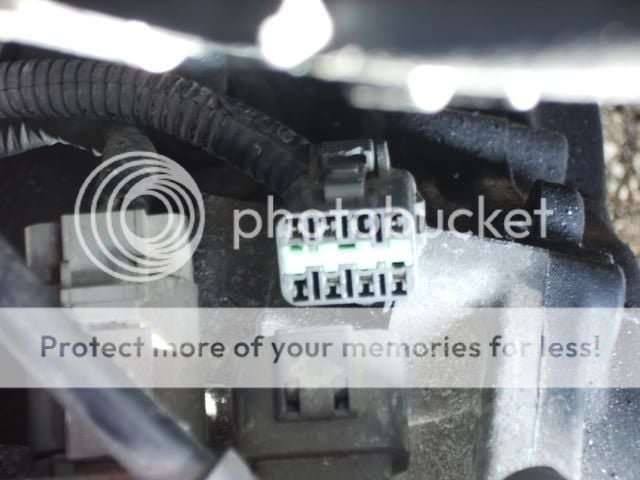
This two connectors are the ones you need to "work":

IMG_0171-1.jpg


To bypass the CVT inhibitor, its just a matter of joining the two wires on this connector, make sure its thick enough:

IMG_0173-1.jpg


To enable the reverse/neutral switches, use this connector:

IMG_0172-1.jpg


Use this diagram to make the right connections:

caixacvt-interruptores.jpg


That wiring diagram is from the gearbox connector, on my pic is, front left to right on the upper line to lower line:

6 - D
5 - Ds
X
3 - Positive
X
9 - N
8 - R
7 - P

So, you just need to join the pin #3 to both switches on the manual gearbox and join each of the other wires to pin #8 and pin #9 on the auto loom, in correct order.

Hope this can be helpful.
 
Managed to install one yes ONE extended stud today. getting them out wasn't the problem. winding the new ones in is very time consuming took me almost two hours to do just one!!
Wheels looking tasty now though and there is gonna be some thread left for spacers too! (Y)

b3d846c3.jpg


53ba953e.jpg


4147c551.jpg


Sorry for the Cheapy iPhone pictures...
 
went to remove the new afr gauge that stopped working already and decided to remove remains of aierial and alarm system ready for new one!

ended up removing the dash and all the surrounding parts heating system and everything!

removed the sound deadening and bits behind there and done the dim dip bypass that joe had made a very simple guide for!
 
resonating is exhaust noise

nothing wrong with it
now these speed humps are fit for 4x4's only so making them illegal for street cars :grinning: ilegality
 
Back
Top