Throttle Body EBB style

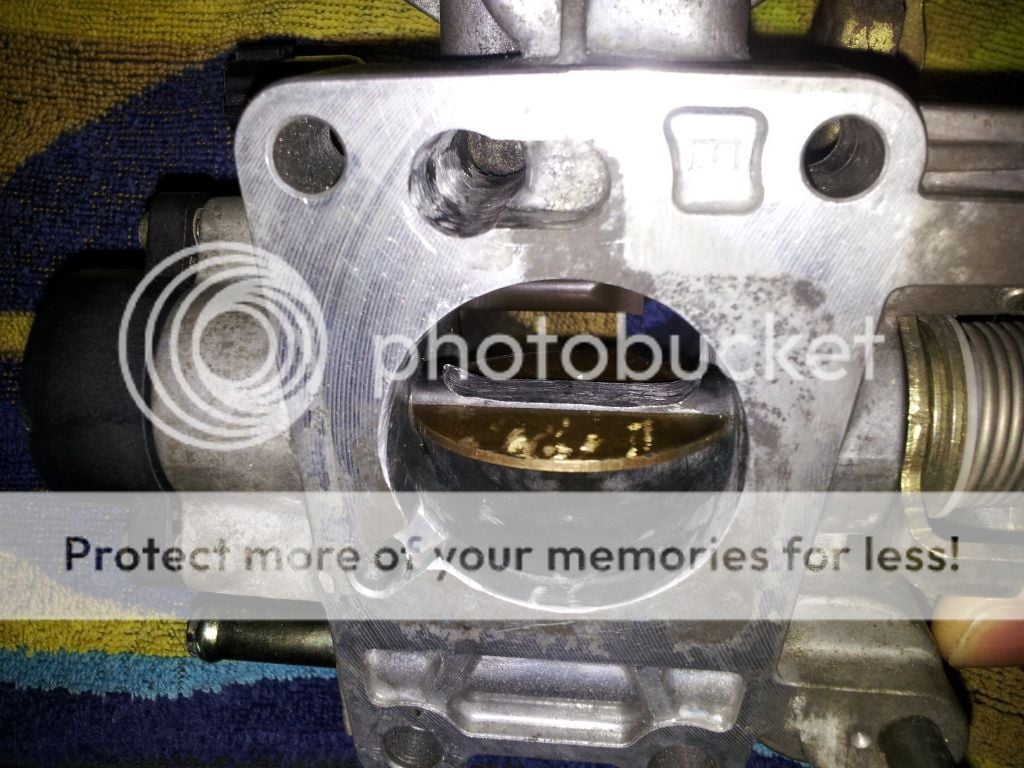
Ok, I have sarted to prepare a spare throttle body, EBB style, intended to improve performance on my 1.0

2012-03-31150207.jpg


2012-03-31150241.jpg


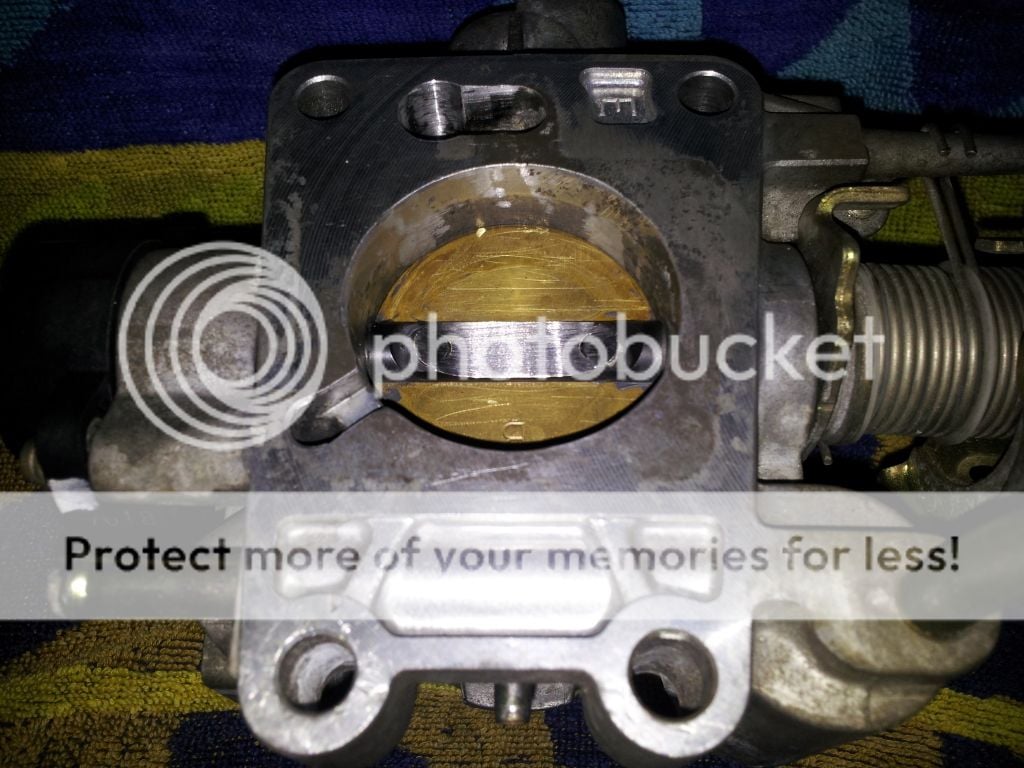
As you can see the butterfly valve 'stem' has been reduced in its proportions to reduce the blockage it represents when fully open. The smallest diameter at the bottom of the TB is 46mm. I don't know how big the 1.5 or 1.6 Tb's are, perhaps this is a 'halfway house' flow capacity improvement? I couldn't undo the screws holding the brass disc so I just atacked it with my dremmel and left a bit of the head behind.

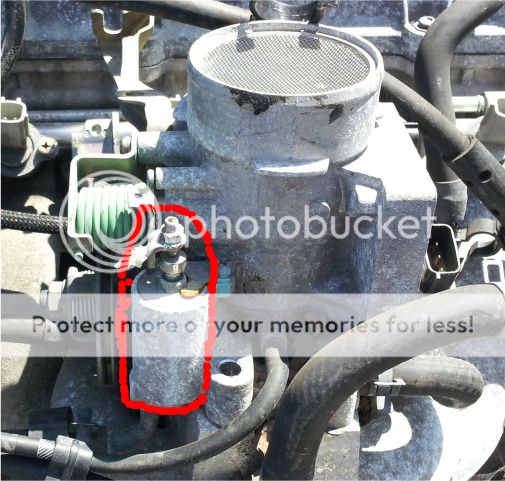
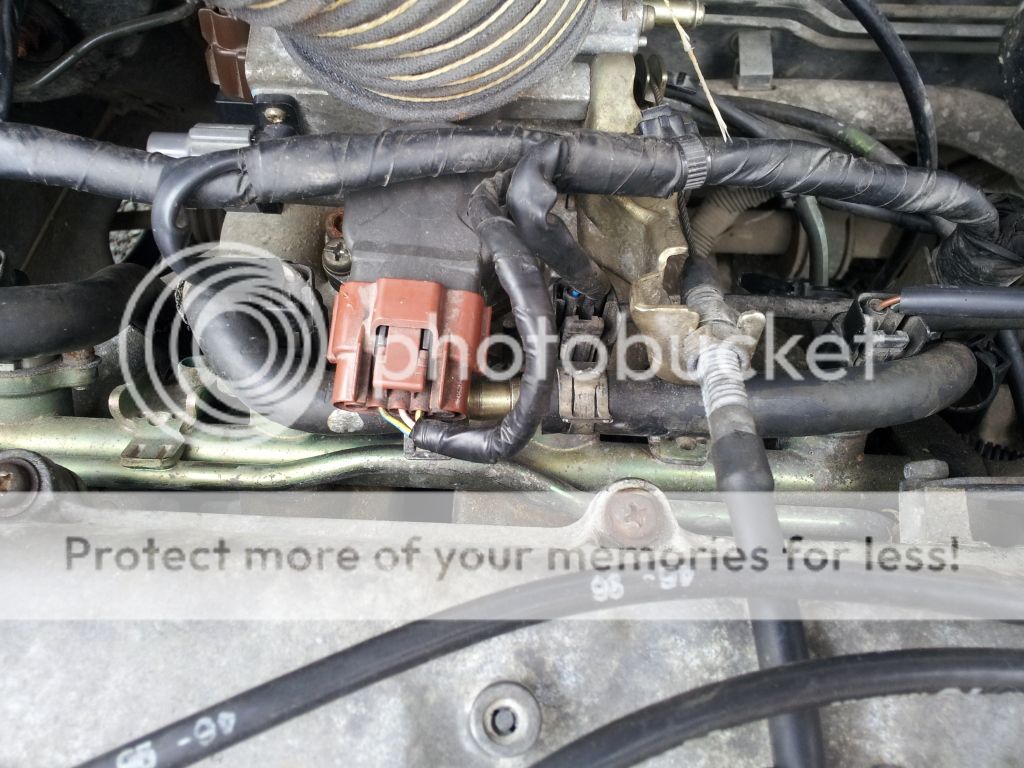
I have removed the waxstat - the wax is in that bottle shaped piece with the plunger in the top, it is heated by the flow of coolant passing by in the two rubber pipes visible right and left. The bit with the big green spring wound around it connects it to the butterfly valve. It's job is to be to prevent the throttle from closing fully until the engine is warmed up. Removing the piece with the green spring disconnects it. The coolant pipes can be connected together so the tb heats up less in use giving the engine marginally colder denser air to breath. The tb temp will still rise in use due to conduction from the cylinder head via the intake manifold but hey, every little helps.
2012-03-30145222.jpg


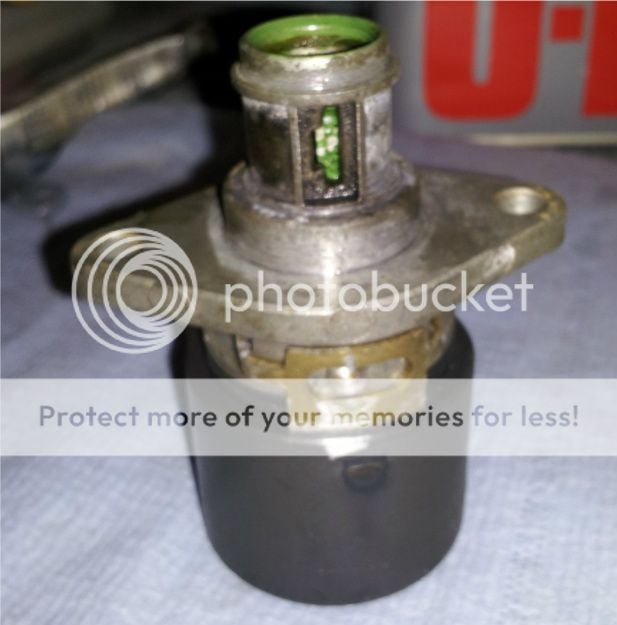
Next came the intake air valve IAV

2012-03-30155358.jpg


It hs a rubber O ring that sits on the top of it which was stuck in the casting. I removed the pair of lock screws but it wouldn't come apart any further. The inside of this rotates to open and close a pair of small windows (one visible, one opposite),you can work it with the tip of a finger and I read it should be free and easy to do so, fortunately mine is. Clearly it's connected to a motor which is controlled by a signal from the ecu to open and close it. I understand this is also to keep the engine running while it warms up and it can operate in conflict with the waxstat, particularly if the waxstat sticks in it's cold start position. I read that it can do the cold starting job perfectly well without additional assistance of the waxstat, giving further confidence to waxtstat deletion.

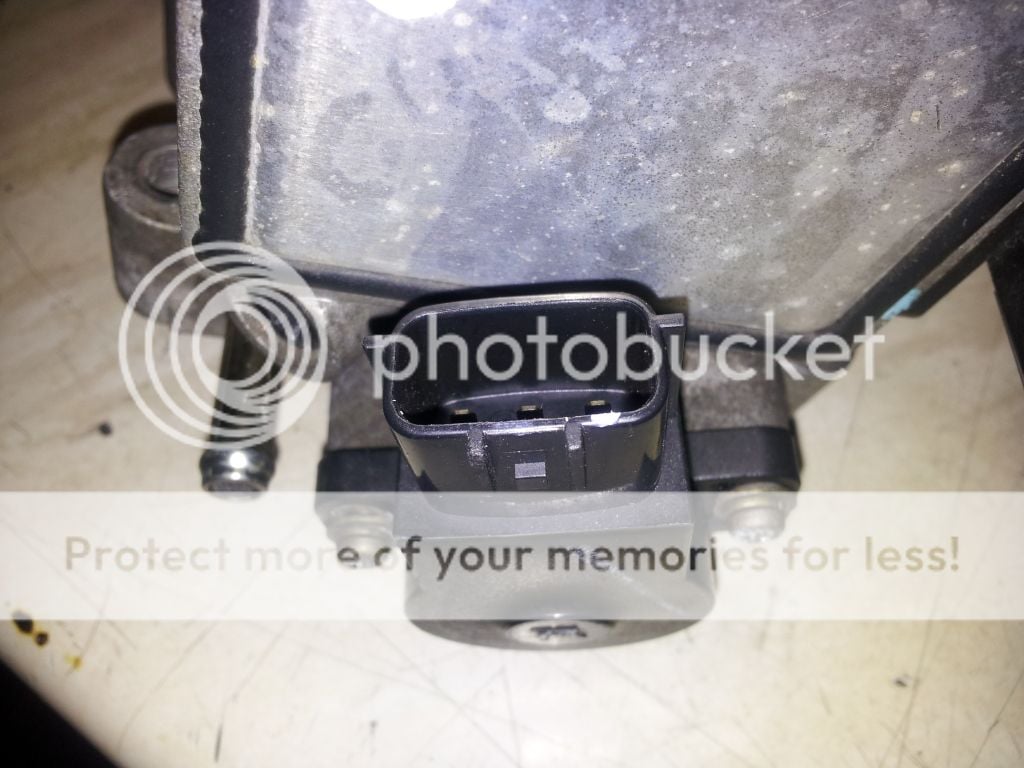
Next the TPS Throttle position senor
2012-03-30153312.jpg

Clearly a simple potentiometer which sends a signal to the ecu to tell it how much the throttle is open. It does however have slotted mounting holes, and can be rotated when installed. I don't know where to positon it and I'd like to know how to put it back properly. That's what prompted this post in the first place! lol

This TB is off a '98 1.3 which had covered 54k miles. It worked nicely when I parked it hence I don't feel the need to open it up and resolder the maf connectons. I attempted to clean a maf on a vag tdi recently and somehow, by wiping i with soaked cotton buds, I managed to damage it. That was describd as a 'hot film' type. Is there any likelihood that could happen in this case?

Anyhow I enjoyed my afternoon dismantling and trying to understand a throttle body. Is there anything else I can do to enhance it's performance and reliability?
 
Good work!
My 2cents thoughts about TB servicing:
-always take measures/make marks when you tweak any potentiometers/timing stuff to be able to come back to factory value
-it's important to gently fit back the o ring on top of the valve with a very light touch of oil on the outter edge so it doesn't move when you fully insert the valve back (it's tight and without oil the o ring has chances to fall and remain trapped inside)
-if you don't have random stalls while idling, regular fuel consumption, don't do the solder trick indeed
-about the hotwire, don't touch it with anything, if you seek on the web you'll see that Nissan hotwires MAF are known to be very fragile. Rather spray CRC throttle body cleaner on it, engine off after a good run so it's warm. Wait so everything is dry/evaporated before starting the engine again.
-
-Good related topics to read are Frank's, Polly's build, and EBB's (missed man :() it's custom spacing plate under the TB looked awesome...
 
Yes, that nylon spacer turned out to be a worthwhile addition. Unfortunately, well beyond my capability to make. Does anyone on here make a similar part for us to do it with?
It was nigh on impossible not to touch the maf during the clean up with all the metal dust. The dry paintbrush and cloths had to be stuffed in there to sweep it out. If it doesn't work immediately when I fit it I will start thinking that means the maf is fubar! I hope not. I finished off with agood swill of Electrical contact cleaner / carb cleaner / brake dust remover - trichloroethane it used to be though this can claims to be non chlorinated, it's all the same stuff.
I did lube the O ring, it felt like it went back in properly, square.
I didn't make marks and can't put it back identical, who's to say it was right already anyway? I prefer to gain a full undestanding of things and set them up acurately than trust that putting them back is best.
Can this potentiometer be set with a multimeter?
 
Well a month has passed and no advice on setting the TPS throttle position sensor properly so I had to get familiar with the search function again. I can find references to setting it to 0.5V?! and 0.5ohms between the centre pin and the front pin measured with a multimeter? Which is the front pin when it's off the car then? So here is a hopefully clearer explanation.
20120430_195523.jpg

The front pin is the one I marked with a white dot, it's nearest the front of the car when the tb is still fitted. The resistance measured between it and the middle pin should be 500ohms when the throttle is fully closed. That's the only value I can position mine to read, 5000, 50, 5 and 0.5 are all impossible. Beware the waxstat and it's habit of preventing the butterfly valve from fully closing! Hence this shoud be done with the engine warm or waxstat removed. (Prefferably the latter as it seems the wax goes solid over time causing idle revs isues and general ecu confusion) Nip the fixing screws when the correct position has been attained. It's really sensitive, the resistance changes significantly with only a tiny movement of the tps body. Personally I doubt it would go back right by marking its position before removal, on the other hand I can't really see any need to remove it in the first place unless you're replacing it in an attempt to erradicate a problem, usually an erratic idle revs type problem. I'm unsure how important the accuracy of this 500ohm resistance is, or where the value even comes from, my search didn't uncover it.

This pic shows where the tps is now located set this way. I'm pretty sure it wasn't there when I disassembled it!
The resitance measured with the throttle wide open is (in my case) 3500ohms. resistances measured between centre and back pin are 1163ohms on wot and infiniteohms throttle closed. I only include this information for comparison.
2012-04-30202132.jpg
 
btw the TPS should measure 0.48ohm (middle & front pin) when throttle fully shut, preferably with waxstat removed, to signal the ecu that its closed and cuts fuel when decelerating. WOT should be bout 4.2ohm.

resistor degrades over time n use so needs adjustment as with any wear item
 
Pollyp posted the following guide....

How to configure the IAV & idle speed with Nissan Datascan
monchi asked me how to configure the IAV & idle speed, i did afew tests and this is how i did it.

1. warm up the engine to 80C

2. check in datascan the Closed TPS & Neutral icon are both showing On, ign timing is bout 15deg (on both datascan readings and using a timing strobe). turn Ign off

3. take out the IAV, loosen the motor screws & pry loose the locking fingers on either side
dsc03967r.jpg


4. plug IAV into loom, IGN on

5. open datascan, goto diagnosis and set the IAV to 0%, press start

6. rotate the IAV motor till the valve opening is just about closed. Ign off

7. tighten the IAV motor screws & locking fingers to lock its position

8. reinstall IAV & plugs

9. start engine & datascan. hold at 2k to warm engine back upto 80C then release throttle, let the IAV value settle down. it will slowly drop towards bout 17%

10. with engine warmed up and radiator fan off, adjust the TB idle bleed screw at the back till the idle speed shown in datascan is at 750rpm. blip the throttle then let the IAV settle to make sure it consistantly stabilises at 750rpm.

11. let engine cool right down to bout 15C then restart engine with no throttle to check the IAV opens up bout 70-78% during cold start then slowly reduces down to 17% as coolant reaches 80C

when the engine's warm, setting the IAV at 100% in datascan should rev at 1500rpm and setting the IAV at 0% should rev at 500rpm
pollyp, Feb 19, 2011Report
#908Like
 
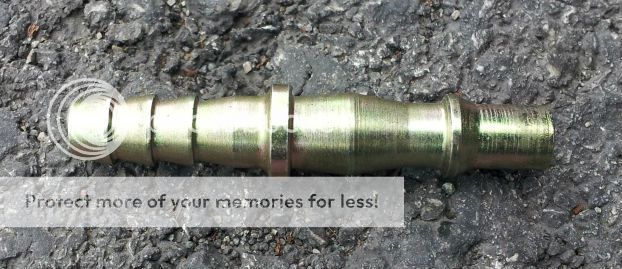
nope. just unscrew that green sprung loaded fast idle cam mechanism off then bypass the coolant tubes going in/out the TB with a pipe. preferably unbolt the TB off the manifold for easier access, then adjust idle
 
nope. just unscrew that green sprung loaded fast idle cam mechanism off then bypass the coolant tubes going in/out the TB with a pipe. preferably unbolt the TB off the manifold for easier access, then adjust idle
Cool, just had a look and everything looks pretty easy to get to. My waxstat doesn't seem to be seized but nothing moved then I gave them a little prodding.
Best way to connect the hoses? I doubt they'd just slide together with a jubilee...

Also noticed my throttle cable was extremely slack, adjust the nut to take out the slack and the response is so much nicer!

just a length of pipe that the hoses will slide over snug and then use the same sprung clips that held them to the TB tubes
 
without telling the ecu to fully close the IAV via consult before adjusting the iav motor/valve position to match, you'll be guessing its calibration in the dark
 
k did a quick test.
with engine warmed up n idling, the IAV is 20%, timing 15deg, revs at 800ish

when you blip the throttle, the IAV opens towards 70% and everything else compensates and rev responds instantly

unplug the TPS, the IAV stays stuck at 20% irregardless of how much throttle, timing advances towards +40deg and stays there, idle revs upto 1500ish and throttle response is sluggish

when I reattach the TPS, IAV quickly opens to 70% briefly, timing drops back down to 15deg, IAV gradually drops down to 20% and idle revs back down to 800

p.s. note this is for my remapped turbo map so the stock map might handle the IAV differently
 
good info. :)

Out of curisity do you know what happens when you have the IAV unplugged, as in does anything else gets fiddled with?

Mines currently unplugged (doesnt seem to have any adverse effects apart from no cold start support).
 
can't remember, other than sluggish response.
thats my next test tomorrow

Ah right, guess the larger TB on mine is countering any similar affects. :)

Be interesting to know. Im 50/50 to either get the intake pipe adapted to let the IAV work as it should or to unbolt it (its now a seperate item on mine) and chuck it away :D
 
it's purely an idle device, dunno what data the ecu uses to affect the IAV position.
without the IAV maybe you could either manually blip/fast idle the throttle pedal when cold? or make a manual bleed valve actuated like a choke lever? so you open the valve when cold which allows more air above the throttle (filtered or unfiltered) to bleed past and into the inlet mani and raise the revs (just like what the IAV does) and then close it once warmed?
 
Yeah i've been holding the throttle open to compensate (what a pain that is, you really need three feet lol). Hopefully the tweaks i've made will let it run without the IAV valve...worst case i need a pipe welding on (10 min job tbh).

I just didnt want to get it welded (as i've used all my spare pipe :D) to then find out it doesnt work / i didnt need it.

All idle adjustment is butterlfy only now...no IAV or bleed valve. Figured i'd try the easiest / least parts way then step up each stage until i absolutely need the pipe welding.
 
rather than weld bleed pipes etc, what bout simply plumbing a bleed tap (located in cabin or in the bay) with silicone tubes to the vacuum lines below the throttle (carbon canistor vac line or fuel reg vac line) and above the throttle (anywhere along inlet pipe or airbox if it has that 5mm port going to the carbon canistor thermal port?)
so in morning you open the tap to increase idle and close once warm to lower revs?

or u could attempt to plumb the IAV back in somehow rather than a manual bleed tap? think frank did that i remember?
 
I've got a plan for re-attaching the IAV if i need to (its actually really simple and should work the same as stock). Biggest hassle is the maf is now away from the TB, so it has to be fed from the main line or it'll be unmetered.

I'll figure it out haha. Will be testing tomorrow, to see if i can continue to delete the IAV. :)

Will update anything interesting here, so atleast the slight thread hijack might be useful to reflexuk :D
 
K i tried unplugging my MAF but the thing is that my dizzy is abit offset when it was remapped, plus its a turbo remap so this test will prob be irrelevent to anyones setup. anyway

unplugged the maf, the IAV operates as normal (rest at 20% and rises when you blip), but the timing is forced to stay at 15deg (my dizzy is offset 10deg so will actually be 25deg), revs drop low and afr really rich

reconnecting the maf, my idle afr is abit screwed towards rich but ecu slowly tries to relearn towards 14.7 with the lambda.
 
Time for another update. I've had this tb fitted for a few days now and the car seems to drive properly with it on. The downside is the idle speed is high, around 1100rpm. My first instinct was to go for the idle screw low down on it’s right hand side, it takes a 6mm hex key and screw it in a bit. It’s job is to partially and adjustably block a small air pathway that goes around the butterfly valve. To my horror I find it is seized! I round it off with the 6mm so I ram the 7mm key in. A decent heave on it caused the plastic to disintegrate revealing it has and air seal O ring around it’s outside. I easily remove the one from my spare tb so my mission now is to get this one out and replace it. After much drilling, reaming, blowing out of plastic dust bits, dremeling and swearing I have just about got it out but the thread down there is still jammed with plastic which the new screw doesn’t have a cat in hells chance of re- tapping. The unthreaded tip of it is still in there so I resort to drilling a hole in it with the purpose of threading a metal bolt through it in an attempt to further block said airway. As I gingerly screw a bolt through it began to spin, so now I’m left with a plastic slug on the end of a bolt I can wiggle in and lever out with a flatblade. Bummer! The idle screw was just about the only part I didn’t fiddle with when I disassembled the tb in the first place I think I might have lost this throttle body. Anyone encountered this before and how did you overcome it?
A servicable idle screw
idleadjustscrew.jpg
 
So are you saying the threads in the TB are now gone...so you cant replace the idle screw?

In that case probably only way would be to readjust the butterfly a tiny bit.
 
I think I stopped dremeling in time to save the thread, but I don't have anything metal to thread into it to clean it up. That's a good idea, I could bung the bypass channel with bluetack and reassemble, then try using the butterfly valve stop grubscrew to set it up
 
I think I stopped dremeling in time to save the thread, but I don't have anything metal to thread into it to clean it up. That's a good idea, I could bung the bypass channel with bluetack and reassemble, then try using the butterfly valve stop grubscrew to set it up

how bout make a diy thread tap by simply dremeling slots along the sides of a bolt that has the same thread size/pitch?
 
I would, but look at the picture, what thread is that? it must be 10mm dia or so with a0.5mm pitch or something, where would I get it from?
 
yea tis like a fine metric thread. tis why i have a big tub full of collected nuts bolts etc from all sorts just incase its needed. i use my pitch measurer from my tap die set to find the correct pitch.
 
Ah, brilliant Polly! Do you have anything like this among your collection? and if so can I borrow it? lol. I think I'll try taking one down the local trade fasteners place though.
 
Great Site !

Short story,1996 K11 with intermittent flat-spot problem.
Managed to source new/reman TB complete and fitted same.
Result was hunting on tickover with also high tickover baseline.
Should have gone into step-by-step diagnoistic mode then,but decided to bull my way through and successfully interefered with EVERY setting on the NEW TB...Grrrrrr
TPS-Waxstat Screw and Idle Screw.
What I want to try now,in the colder,calmer light of day is to get back to basics,particularly with the TPS setting.
I've no access to Fault Code equipment but do have a good multimeter....any suggestions before I venture back to thefront ?
 
Thread Read agin and further news from the front (Garden that is).
As fitted the new TB had readings of 480 Ohms closed and 3870 Ohms TWO,which looked suspiciously OK.
Revisited the Waxstat settings and brought them back to their original points (The yoke is in fact working smoothly)
THEN........I focused upon the IAV...and noticed that the plug was pointing at quite a more actute angle than the one in your pic,and upon checking,my original TB.
SO...I swapped over the IAV's and hey pwesto....lovely smooth tickover and a throttle blip to die for.
Closer inspection reveals the rotational adjustment is fully over to one side on the new IAV whilst the original is smack bang central in the grooves.
Off out now for a spin to see what it performs like !!
 
Back
Top