• Please only use these forums for blogs, they are not a discussion forum

PollyMobiles Rebuild

time to remove, jig & weld the manifold

DSC00404.JPG


slight cracking at the edge of the welds, also notice the warped turbo flange has been leaking at the front

DSC00405.JPG


removed

DSC00406.JPG


copper gasket from above, sides seal ok but front & rear slightly leaked

DSC00408.JPG


from below, can see where it leaks

DSC00409.JPG


turbine inlet looks ok

DSC00410.JPG


warped turbo flange

DSC00412.JPG


closer look at crack, looks like the old weld had just seperated from the cast iron

DSC00413.JPG
DSC00414.JPG


grinded the weld down

DSC00415.JPG


to make a jig of the mani for andy, cut afew square tubes

DSC00417.JPG


drilled & bolted to the turbo mani

DSC00420.JPG
DSC00421.JPG


cut a v-slot to form an L-support tube

DSC00422.JPG


and clamped the support

DSC00423.JPG
DSC00424.JPG
DSC00425.JPG


weld it tomorrow
 
welded the jig frame

DSC00428.JPG
DSC00429.JPG


now welding the manifold

DSC00430.JPG


not my best nor pretty but will hold for now till the proper replacements made

DSC00431.JPG
DSC00433.JPG
 
has yours got a flexi joint on the downpipe paul ?

yup.

dsc04559-jpg.34246


it's cos the weight of the turbo n exhaust is hanging offset from the manifold via that stressed front weld and when under extreme heat or high shock such as when I went off track, it eventually cracks.

I need to make a support bracket after the new manifold
 
tried to sand flat the flange tday but tbh wasting my time cos just look at the awful warpage

DSC00434.JPG


look at it, upto 1mm of it :/
fookit lets just botch seal to get me places, then andy'll help make a proper one with the new jig

DSC00435.JPG


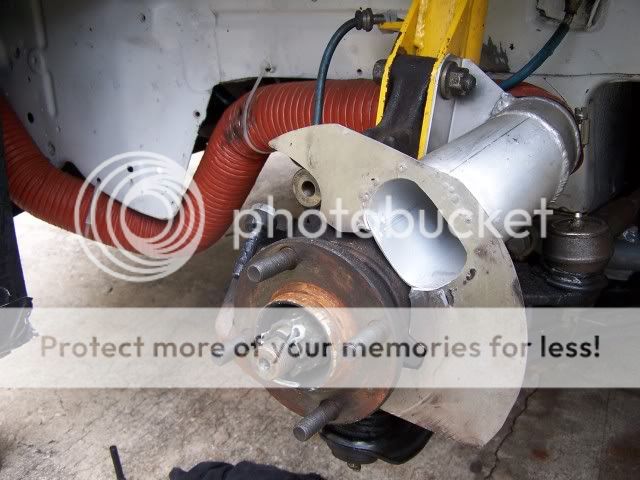
looking around for a support bracket point on the engine, can use these two, grind away some of the beefy alternator bracket

DSC00438.JPG


support option 1: weld the bracket from the edge of the new 10mm turbo flange (not the turbo cast housing) n bolts down into the engine block. but this just supports the manifold and doesn't resolve the cantilever stress of the turbos offset CoG trying to tear on the manifolds front welds.

DSC00436.JPG


support option 2: extend the WG actuator bracket to support the turbo weight via the compressor housing from the engine block. due to the long L-bracket distance, must also not obstruct the bolt access or WG adjustment, it'll have to be quite beefy thick.

DSC00441.JPG
DSC00439.JPG


support option 3: anchor turbo to the engine via the turbine housing retainer bolts, will need new longer bolts but accessing the lower bolt will be impossible since it already fouls the drain port.

DSC00440.JPG


support option 4: extend turbo elbow gasket. this is the stiffest option being so close to the engine mounting point but will have to be perfectly flat smooth to be able to seal the turbo elbow and the studs for the elbow will need removing & extended, which will 100% likely to be seized on

DSC00442.JPG


splat a whole lot of copper sealant to try seal the warped flange briefly

DSC00443.JPG


think I put wayy too much which gush outwards, hope there's not too much inside the hole :/

DSC00444.JPG


what for that to cure overnight, and awaiting the discs that andy sent before it gets lathed over few days by local machinist. I just hope it gets machined in time for bedding the brakes then goto modified live
 
ok not sure if I'll get the new discs off andy in time and definately not sure it can be machined in time so lets assess and see if these current discs can be reused for now.

the RH pads are down below minimum

DSC00445.JPG


at high temps they just crystalise n turn to crumbling dust

DSC00446.JPG
DSC00447.JPG
DSC00448.JPG


fit new pads

DSC00449.JPG


looking at the bad whirring LH and ohh my o_O

DSC00450.JPG


the outer pads down to last mm

DSC00451.JPG


the inner pad is literally down to metal with a tiny bit of pad left :confused:

DSC00452.JPG
DSC00453.JPG


considering the totally worn pad, the disc is just useable

DSC00454.JPG


not much scoring, just alot of old pad dust stuck in the grooves

DSC00455.JPG
DSC00456.JPG
DSC00457.JPG


the grooves were easy to scrape clean

DSC00458.JPG
DSC00459.JPG


to make it to modified live I'll just pop new pads on, bed em and sort out the new discs afterwards
 
Looks like you need to construct a brake cooling duct asap! :D

Maybe something like this?
Sentraracecarbrakeduct.jpg

aye, could do that.
even better if they're an active/thermostatic ducting (rather than overcooling 24/7) so it only delivers enough cooling once the disc is above it's optimum temp range just like the coolant thermostat.

if only the front calipers were positioned at the rear of the hub like on high performance cars so it's easier to get airflow straight to the hub centre intake of the vents
 
both new pads fitted and went for test drive.

DSC00460.JPG


with the rough pink "bedding" coating on the pads that bite & cleans the discs, the braking bite point is much higher/earlier, the amount of pedal travel/pressure per brake force is much shorter and therefore felt more sensitive due to high CoF.

this high CoF may mave been the reason why the brake pedal briefly felt very high & sensitive at one point in the afternoon at Blyton cos one of the front pads was at it's last few mm,

was in this video from 8:00 till 10:00


superimposed the firm braking point at each point, marked the pedal position with a cursor, and noticed that whilst cooling down from following traffic, the bite point briefly went up and then went back down afterwards.

14.30-brake-point.gif


perhaps the thinner pad material would heat up alot more rapidly,
heat & CoF shoots up so it felt grippy
whilst the serrated grooved disc shreds the last remaining pad till its bare metal.
once that front inner pad became bare metal and lost it's braking ability, I'd then be only running 7 out of 8 pads so the braking felt back to normal or even less and the whirring noise got louder.

after making the adjustable throttle stop, it kept banging metal/metal.
I didn't have any rubber cap large enough so found the next best thing, a piece of hose bunged on the end. worked a treat

DSC00461.JPG


ok suppose she's ready to goto cadwell on saturday
 
Last edited:
got a new universal air filter

IMAG2118.jpg
IMAG2119.jpg


dirty old vs new

IMAG2120.jpg


the old filter cover is abit tatty n requires re-tieing so I'd rather make another from good old tin of oyster sauce :p

IMAG2121.jpg


and fitted, should prob keep the label on for a laugh, makes it tasty :cool:

IMAG2122.jpg
IMAG2123.jpg
 
Oh bug. Was on way to andy for modified live when she broke down 1hr away. Ran outa power, think alternators not working :( breakdown vans gonna be over an hr so guess I'll have to miss the show n get home somehow cos got important stag do tonight.
 
well it's been an eventful day.

this morning set off at 8am to andys for modified live show at cadwell.

at 10am as I was on m62 passing m18 I noticed the wideband gauge was beginning to irratically restart, showing "E9" error which usually only shows when ignition power was reapplied, then goes through heatup percentage values, hmm odd.

it began to occur more frequently & randomly. eh thinking could there be a loose ground? sensor going bad? although it's relatively new and previously when it goes bad it shows E8 heater error rather than E9 power error, so continued on..

then it got so frequent till it just stays flashing at E9, wtf? is the sensor dead? it still runs and nothing I can do to it.

moments later, my cd mp3 stereo began to restart itself in the same pattern as the wideband. selected FM radio that requires less power and it's stays on fine, then resume cd player and it restarts itself again till eventually it all dies. oh crap I have a big electrical problem.

then the temp gauge was reading lower than usual. then the tacho shuts off. then I noticed the engine beginning to cut off under high load (similar to when my boost pipes & MAF pops off the TB and loses all power)
oh crap, the hard shoulder was full of cones, had to nurse her long as I can to reach empty hard shoulders and immediately pull over.

in neutral, engine stalls, dash lights dim, turn on hazards and is very dim and flashing faster dimmer as battery dies.
the battery is literally dead, multimeter says 9V, oh pants.
I had no battery light warning at all but I think the alternator wasn't running till the battery eventually drained.

was 1hr away from andy and wasn't gonna make it in time. checked fuses all intact, alternator wirings fine, puzzled.
if alternators duff and breakdown can get me going for abit, andy has a spare but he's living house from 11:30.
if it's more serious then I'd have to miss the show and have the guy recover me back home instead.
no option but to call for breakdown service. holly from call centre informing me they'll be bout 60-90mins.
gary in green van turned up at 11am
connected his battery booster, hazards flash more brightly, crank and she starts.

battery terminal with the booster connected says 12v.
lets check if the alternator terminals working? test the outer metal nut & threads n 0v. test the inner part of the teminal and I spotted 14v, oh could be bad connection.

took apart and the pegs have heavily oxidised. we sanded it shiny, try again and yay it outputs 14v.
unplug the booster, battery still says 12.5v n rising, so it's charging.
disconnected the battery whilst running and doesn't stall, meaning the alternator is now generating 14v to keep the system running.
all fixed, simple problem :cool:

was able to goto cadwell with andy n family, then return home for stag do.

just have to wirebrush this alternator for good tomorrow.
 
Last edited:
noticed the exhaust kept banging on the rear axle whenever I go over bumps, looking under I see the edge of back box been rubbing on the ABS cable holder bolts, perhaps the axles too far back or the exhausts too far forward, the exhaust hangers need restiffening anyway.

DSC00479.JPG


instead of adjusting the axle forward which needs the rusted lower trailing arms completely wirebrushed and then have to realign all the wheels, which I CBA, lets just remove the abs cables since it's all removed anyway.

DSC00480.JPG


this bumper hanger was flopping about but oops the lower section was already rusted through anyway.
a stupid design, gonna chop this lower hanging box sections off which tends to collect water n dirt n rust, remove the cabin exit vent, then weld it over. there's enough holes in the boot to allow air to escape out anyway :p

DSC00481.JPG


was checking the over bumper hanger when I spotted the left damper is unusually damp whilst all the other covers are bone dry tday

DSC00482.JPG


wet inside, that ain't water right cos it would've dried out by now like the rest

DSC00483.JPG


removed the soaked damper to investigate

DSC00484.JPG


removed the cover and yup its soaked

DSC00485.JPG


removed the rubber gaiter and oil dripping out, ohh crap

DSC00486.JPG


ah crap after blyton park, the rear damper seals finally worn through n leaking badly :(

DSC00487.JPG
DSC00488.JPG
DSC00489.JPG


but I think the main cause is this, the chromium plating has worn/chipped off at where the damper spends most of it's time at static ride height till it eventually eats the oil seal away

DSC00490.JPG
DSC00491.JPG
DSC00492.JPG


pretty certain it's outa warranty since I brought it bout 4yrs ago, actually prob didn't register for warranty anyway :p oops.
Andy! I need ur help with this before m8s wedding in fortnight and before any more trackdays obviously :D
 
Last edited:
Paul, are you still after a 1.3 f/w? Cause I may have one

heya karl, I sure am. is it a one-piece fly with 273mm dia starter ring?
been looking to get one lightened from the hefty 8kg and redrilled holes for the 200mm clutch cos upshifts on track take forever.
 
I can get you a damper no problem :)
Or I can soon get it rebuilt for you :)

fantastic. I'll check the other dampers, won't be surprised if they're also close to worn n need rebuilding.
I'd prefer the keep this same setup since its what we finalised last time n like the feel.
hope it's a simple case of new shafts n seals n regassed.

since I got nothing on at the mo, I'll reassemble n head down soon.
whilst there, may as well try fix this rusted rear end. the sills need doing another day cos it's a big job.

pulsar discs still hasn't arrived yet.

u tried those BBS wheels yet?
No worries Paul
We'll put them through the dyno to make sure we match your currently flow resistance.
If we re-use your current piston (pending outer seal) and your shim stack we won't be far off with fresh oil. But as with 99.9% of damper rebuilds they tend to be stiffer than when they left the car :)
Other than it should be a simple case of new shafts, seals oil n gas :)

Feel free. If there's space to work in at the time go for it.

I'll check up on the discs :/

They fit alright :) was checking of tyre condition etc too, some very odd depth readings. It must've been used on a right handed circuit and slightly over inflated by the looks of things 3mm depth in some areas, none in others. And someone got them hot and clearly had fun :D
 
Super. Shall we rebuild just the rears or is it worth refreshening all 4 to make sure it's balanced?

We'll see what ur workloads like. Welder still playing up?

Yea the prev r888 user had a lot of camber n odd wear, hope they have enough life left once heated up. If u want em I can begin stuffing a set in the car :p
 
since I mainly use my phone as satnav rather than the old tomtom, think it's best to secure it in a holder rather than have it resting on the passenger seat or in my shirt pocket.

but rather than buy a horrid generic holder, why not make a custom holder on the printer :D

measured the phone & modelled the holder

holder1.JPG


printed, printer still needed more tuning cos it's too long but'll do for now.
I had a spare suction cup so bonded the cup to the back

DSC00499.JPG


joined

DSC00498.JPG


one phone holder

DSC00497.JPG


phone slips on and secured to the windscreen at a nice angle

DSC00493.JPG
DSC00494.JPG


can have it portrait

DSC00495.JPG


or landscape :cool:

DSC00496.JPG


just refine the measurements slightly and it'll be snug :D
 
Super. Shall we rebuild just the rears or is it worth refreshening all 4 to make sure it's balanced?

We'll see what ur workloads like. Welder still playing up?

Yea the prev r888 user had a lot of camber n odd wear, hope they have enough life left once heated up. If u want em I can begin stuffing a set in the car :p
I think the welder just overheated tbh Paul. It's getting old and really not made for what I put it through. Just a regulator away from getting the monster welder running :)

Re shocks; I'd recommend you do all 4 even if it's just fresh oil in the fronts :) brings em on par
Plus you may catch any potential issues early :)

Just enquiring with friends about wheels as I want tyres only :)

was that the old small'ish mig that can't handle long duty anymore?
suppose when ur running a full on garage, u need a heavy duty welder to keep up with the workload considering the amount of welding required from now on. last thing a shop needs is inconvenient downtime from underspecced tools pushed beyond their limits and having to wait for them to recover.

agree bout freshening the 4 shocks. I'll clean up the threads n also may as well measure & replace the pillowball tops.
damn I guess these BC coils r getting old n well used now :)

ok I'll await what ur m8s say before I bring em.

free tomorrow? possibly stay over if work requires more time.
Yea little mig wasn't happy. But it's fine today. Few changes made to perfect it and all was well. Little bugger puts up a good fight where long duty is concerned. 2 hours constant on just below max voltage its holding its own :D
Big mig is alright now though too new gas solenoid in n ready

Ok we'll do a preliminary inspection if plausible and get some parts ordered :)
I can get the bearings too no problem

Welcome to Paul :)

it just needed abit of tlc

u able to get the same damper shafts with top adjuster holes? actually suppose they're all like that anyway.
take long to order or u think u have some ready?
I'll measure the pillowballs next

kind man, I'll bring sleep bag n pack lunch n plastic tea set :D
 
top of the boots been rubbing n leaking, possibly allowed water n dirt on?

DSC00500.JPG


the rubber top bush thats usually bonded to the upper cap has now rusted n separated, no prob

DSC00501.JPG


cleaned

DSC00502.JPG


assembled n refitted

DSC00503.JPG


the rear RH damper looks fine

DSC00504.JPG


still intact

DSC00505.JPG


but thing I notice is alot of moisture still trapped within the dust boot & bumpstop, could contribute to wear?

DSC00506.JPG


damp n slight dirt

DSC00507.JPG


wiped it clean and the chromed shaft looks fine n smooth :cool:

DSC00508.JPG


another thing I noticed with the travel is that the worn LH shaft can only travel down till the top cap barely touches the bumpstop and bottoms out (thinking that bumpstop won't be doing much), whereas on the working RH damper, the shaft can travel all the way down beyond the top of the bumpstop.

ah I think it's cos since the LH oil seal has breached, the once pressurised nitrogen chamber eventually pushed some of the pressurised oil out till the gas chamber is now neutral, resulting in the oil/gas separating piston to shift upwards and shortening the available travel.
 
heya karl, I sure am. is it a one-piece fly with 273mm dia starter ring?
been looking to get one lightened from the hefty 8kg and redrilled holes for the 200mm clutch cos upshifts on track take forever.

I have 2 both 1 piece, think 1's a 1.0 and the other is a 1.3 but will check at the weekend for you
 
checking the catchcans tday

DSC00509.JPG


the crankcase - PCV can caught 25ml after 800miles

DSC00510.JPG


the breather - inlet can didn't catch much cos I've been mostly cruising

DSC00511.JPG


just need to find some metal 90deg elbows to begin using the screw top jars properly.
 
yesterday went to andy's, had a chat, we craned the engines out of a K10 and out of h701 too.

can't do much on the dampers cos he needs to order the new shaft n rebuild kit from usa n just needed to know my coilover model.
ok guess I'll still be using this duff rear damper for the wedding day, till andy gets the new parts n rebuilds the dampers or replace both rear dampers after the wedding.
 
the last oil catch can made from soup can was abit flimsy to seal & mount and hard to see if it's full so its time to make a proper one that seals easily using this glass jar with lid, it's also see through, and located in a cooler area

imag2096-jpg.40995


to fit a metal hose elbow on the jar lid I tried searching for some barb hose elbow adapters but twas hard finding the right size & type I wanted so instead lets just design & print my own version.

so the two hoses go 90deg down through the jar lid

catch can 24 top.JPG


through the jar lid, one port spins the flow along the outer walls of the jar like a cyclone to condense the vapours whilst another port collects the flow from the centre of the jar

catch can 24 lower.JPG


assembled like this

catch can 24 a.JPG
catch can 24 b.JPG
catch can 24 c.JPG


printed


DSC00512.JPG
DSC00513.JPG


trimmed the finish, drilled hole in jar lid & bonded the pieces together with PU sealant

DSC00514.JPG
DSC00515.JPG


trimmed the card seal

DSC00516.JPG


assembled catch can

DSC00517.JPG


even condenses my breath blowing through it so it's working

DSC00518.JPG
 
Back
Top