• Please only use these forums for blogs, they are not a discussion forum

My Blue Turd - K11 Sport

Thought I'd start a progress thread for my new acquisition!

I picked up a blue K11 Sport on Monday with the CG10DE for a grand total of £525! My previous car was a Subaru Outback 2.5 and due to recent unemployment, I wanted something to replace it that's super easy to work on, parts cost nothing and I'm not constantly worrying about being financially screwed if anything goes wrong.

The Outback the Micra replaced:
11540939_10204910093736894_690203574972759843_n.jpg


Body wise, it's pretty perfect. Front x-member is the only thing that I was slightly worried about, some flakiness and bubbling but not as bad as the others I've looked at and seems to hold up to a good prodding with ease, nothing on sills or arches. I was just looking for good bodywork as I know on these 90's jap cars that's more of an issue than the mechanics.

Nice spec with clean paint and bodywork, only 61k on the clock and a few extras such as a sunroof, fogs and central locking.

Couple of small niggles. Despite what looks like a near new exhaust system, it's blowing slightly at the back box. I'm thinking it hasn't been sealed properly so that's job one and there's an advisory on the rear left brake which does feel a bit odd. Almost like a warped disk, but I'm pretty sure it has drums.

Other than that it's just the passenger window doesn't seem to be attached to anything. I can move it up and down with my hands but the winder does nothing. Shall be taking the trim off to try and sort that out later today!

Here's some pics from the all important first drive in the beautiful Northumberland national park!

IMG_0885.jpg


IMG_0886.jpg


Plans!

- It's pretty boat like with the stock suspension and tires, so I'm going to get some strut braces on combined with some slightly stiffer lowering springs and eventually a set of grids or similar with lower profile tires. Cheapest first!

- Fix the broken passenger window winder mechanism.

- Dye interior trim and carpet black (90s grey is pretty horrific).

- Possibly a clearer exhaust system to let her breathe with that tiny engine.

- New seats (stock have no support whatsoever and are really high, although I'm not sure there's much I can do about height, coming from a Subaru where you are basically on the floor it might just take some getting used too.)

- Soundproof with flashband (did this on my van and it made a massive difference, dynamat isn't worth it on a £500 car!)

- New plates, pressed if I can find some 100% legal ones.

- Rust proof in time for winter, the sills and arches are 100%, the front x member maybe 70% and the rear about 80% rust free, but searching for a rust free example has certainly showed me the importance of stopping it now.

- Paint rocker cover red because SR20
tongue.png
 
Last edited:
I got to work on the passenger window issue this morning. Removing the card was a doddle compared to any other car I've owned, boy is it empty in there! Definitely room for some soundproofing.

The issue was obvious, the window was seated in the clips that attach the windows to the regulator and would wind up and down fine without the rubber seal on the door card, as soon as I put my hand against the window and wound the handle, the window would come right out of the plastic holders.

I forgot to take photos of the process but these are the holders:
$(KGrHqV,!hME3vhJk!G-BOF0SVPwmQ~~_1.JPG


I went to the local £1 shop and got some of this:
IMG_0905.jpg

I cleaned up the gunk from the original adhesive and applied a liberal amount of the £1 sealer into the holders, then wound the window up and replaced the door card. I tried it an hour ago after a day of setting and the window now works fine! :D

I also took the horrifically battered wheel trims off. Going to paint the steelies silver when I get a chance to buy supplies. Apart from that, I made the most of the beautiful weather for a fun drive up to the famous Hartside Cafe. I'm amazed at how fun the little Micra is on the windy stuff! I can see what the fuss about MX5's is now. Going slow can be really fun.

I felt like I was hammering it on the edge, and then someone would close the gap behind me in a van :p Opposite of the Subaru where you would take a leisurely drive along the B roads and be at a steady 60 round the corners as if it was the motorway. I love how you have to really be involved to drive the Micra with a bit of go.

IMG_0901.jpg
 
Last edited:
Blue turd as in MightyCarMods? Looks nice mate, wouldn't know about the going slow bit as i have the 1.4 (lucky me ay) looks like its in good condition though! Nice car :D
 
Blue turd as in MightyCarMods? Looks nice mate, wouldn't know about the going slow bit as i have the 1.4 (lucky me ay) looks like its in good condition though! Nice car :D
That's the one! Blue turd = great little Japanese car that is blue and cost nothing :p It's certainly taking some getting used to after my 2.5 Boxer engine but in the best way. Only time I really miss it is on the motorway.
 
Just refuelled and worked out that I did 325 miles to 32 litres of petrol, working out at 46.1MPG. Not bad considering probably 250 of those have been hammering her around the steep back roads of Northumberland to start the bonding process, reckon 50+MPG would be easy with flattish more normal driving which means more road trips!
 
Cleaned up the engine bay, gonna paint the rocker cover when I get some paint sorted. I noticed when I bought it that the manifold heat shield is basically gone in the middle, is there any reason not to just remove it completely? I want to do a Janspeed mani eventually but it will be a while yet.
IMG_0944.jpg


IMG_0943.jpg
 
I would think if you removed it, the heat could affect the paint finish directly above. Just a thought.
I would use paint that could handle high temperatures, more worried about more important things being affected. That said, it's hardly doing much in it's current state and the temperature has been fine. Is there any difference in heat output between the standard mani and the aftermarket?
 
I think what davyboy was getting at by saying " the heat could affect paint finish directly above " means your bonnet, especially on say a warm day after a hard drive, when you park up there would still be a lot of heat contained in the manifold that would of course then rise. I have seen a few people with extractors fit heat tape on them like this......
image.jpg
 
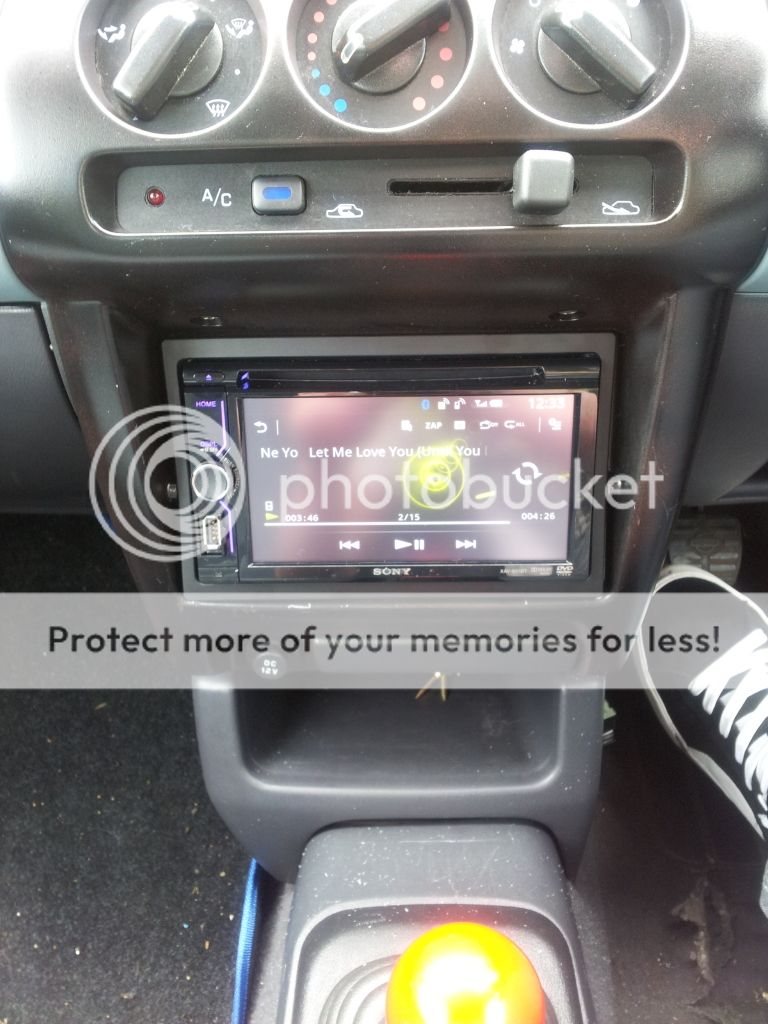
I'm thinking heat wrapping is the way to go. Should be better for those hot days! I've also been inspired by this setup (MarkTracey on here), I've always wanted to put a Playstation setup in a car and it looks like you can get a double din in the second facelift :D
20120818_123453.jpg
 
I'm thinking heat wrapping is the way to go. Should be better for those hot days! I've also been inspired by this setup (MarkTracey on here), I've always wanted to put a Playstation setup in a car and it looks like you can get a double din in the second facelift :D
20120818_123453.jpg
Where did you get that from ? Looks pretty sweet mate :D
 
Last edited:
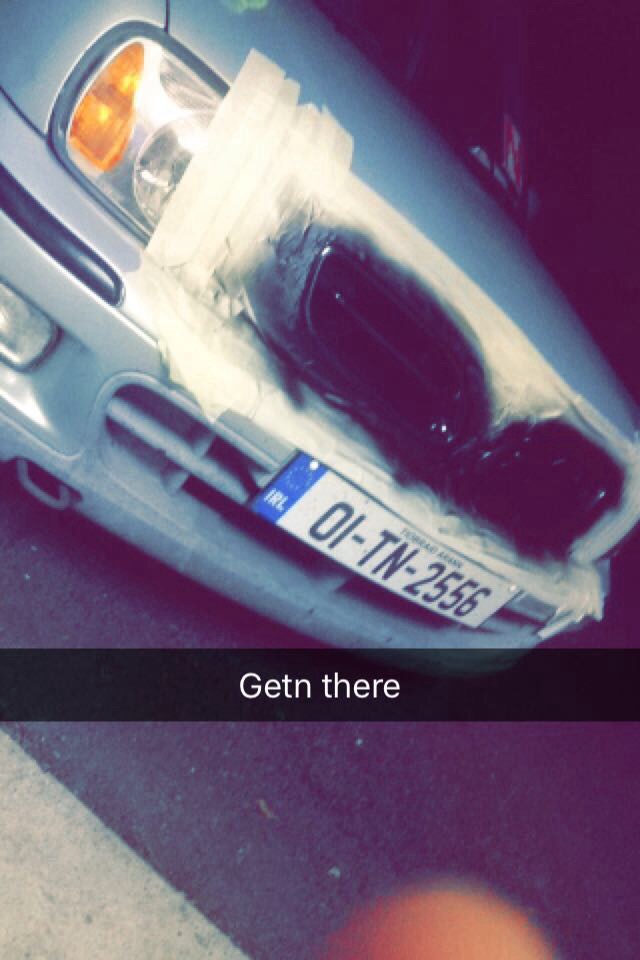
Did the Joey mod today, not sure if that's what it's called on a Micra but that's what everyone called it when I had a Golf :p Basically just involves painting the non reflective parts inside the headlights. I'm not a fan of smoked lights or anything in your face, I like mods that look like they could have been done stock. After seeing a few people that have done it on MSC and spotting a few Primera's / Sciroccos with this style lights stock, I decided love how these look!

First step was to remove the lights, which I found stupidly simple on a Micra. Here's a quick not very clear picture for anyone wanting to do it themselves:

Remove bolts 1 and 2 (Both the same, just can't see 2 in the picture) along with the obvious one on top of the headlight.
3 isn't a bolt, but you'll find when you try to pull the unit out, it's being held in by a plastic insert type thing, just wiggle it out.
light_removal.jpg


Step 2, pop the 3 metal clips that hold the glass to the unit with a screwdriver. Whack the whole unit minus all bulbs and rubber in the oven at 200c for just under 5 minutes, then pry apart the glass from the plastic with a screwdriver and your trusty Nando's card. I found I had to start it off and then return it to the oven to get it all the way off.
IMG_0953.jpg


After that, the chrome insert just pulls out, then you can pop the orange indicator cover off with a screwdriver and mask up the reflector for painting. I personally didn't bother masking the sidelight reflector as it's not really a reflector and it would be a pain to get right.
IMG_0954.jpg


Painting involved sanding down to the primer already on the insert and then I did 3 coats of gloss black and 3 coats of clear lacquer to give it a nice shine. After that it was just a matter of using some silicone sealant to ensure the seal was as good as when I took them apart and re-assembly is the reverse of removal! Test everything still works and then wicked cool lights :cool:

IMG_0958.jpg
 
Last edited:
Looks good, although most people detango at the same time and replace with orange bulbs.
I quite like the tango, I've gone as far as replacing clear stuff with orange stuff in the past! Chrome on the other hand I despise. Trying to work out to do about the grill trim, not sure black will work, maybe gloss black?
 
Went to explore a possible through road to Kielder that would cut about 30 miles off when going mountain biking etc, turns out 15 miles of it is dirt and it was raining so I turned back. Beautiful singletrack for miles and miles though! Driving heaven. I seriously need to get my iPhone 5 lens replaced, didn't realize how cloudy and awful my images are until I started putting them up here :(

Note the dent between the plate and the right light. That's on the to-do list!

IMG_0966.jpg
 
Forgive me for being really bad at taking photos, I didn't get any of the cable jobs. I'll happily go and take some though if anybody wants to see!

Since my last post, I've sorted out my throttle response. It was horrible! Nothing on the pedal until about halfway down, then it felt like stepping on a sponge. Fixed it by snugging up the throttle cable which looked like it should belong in flappy bird.

Easy enough once you stop trying to get around removing the air box! Just a couple of hose clamps, one bolt and some force to get it off and reveal the throttle cable adjuster.

Next was the clutch cable. The biting point was top third of the pedal which I wasn't happy with, so I snugged that up too after freeing up the rusty locking bolt. It's now about a third of the way up and I'm able to confirm that the clutch is absolutely fine :D

Next job was to start making faded things black again and strip then repaint any rusty bits. I started with the battery tray. Bit of a pig to get off with all the plastic clips holding the fuse box on! I went at it with a wire brush drill bit followed by rust converter, then painted black. Same for the horns, although I couldn't for the life of me get all the corrosion off them :( I also did the wipers.

Before:
IMG_0977.jpg


After:
IMG_0978.jpg


IMG_0980.jpg


And so starts the long process of removing rust and painting ALL THE THINGS! The front crossmember, engine bay, rear axle, brakes and suspension components all need doing. Mostly just surface rust though which is good! Sills and arches are practically new.
 
And ooooh, goodies! Along with this lot I ordered a rocker cover gasket and some stainless hex bolts to replace the awful Philips head screws that hold the rocker cover on. They'll go on when I paint the rocker cover if I ever get the old ones off. I have the paint now, decided to go with gloss black, bit more subtle and OEM than SR20 red :)

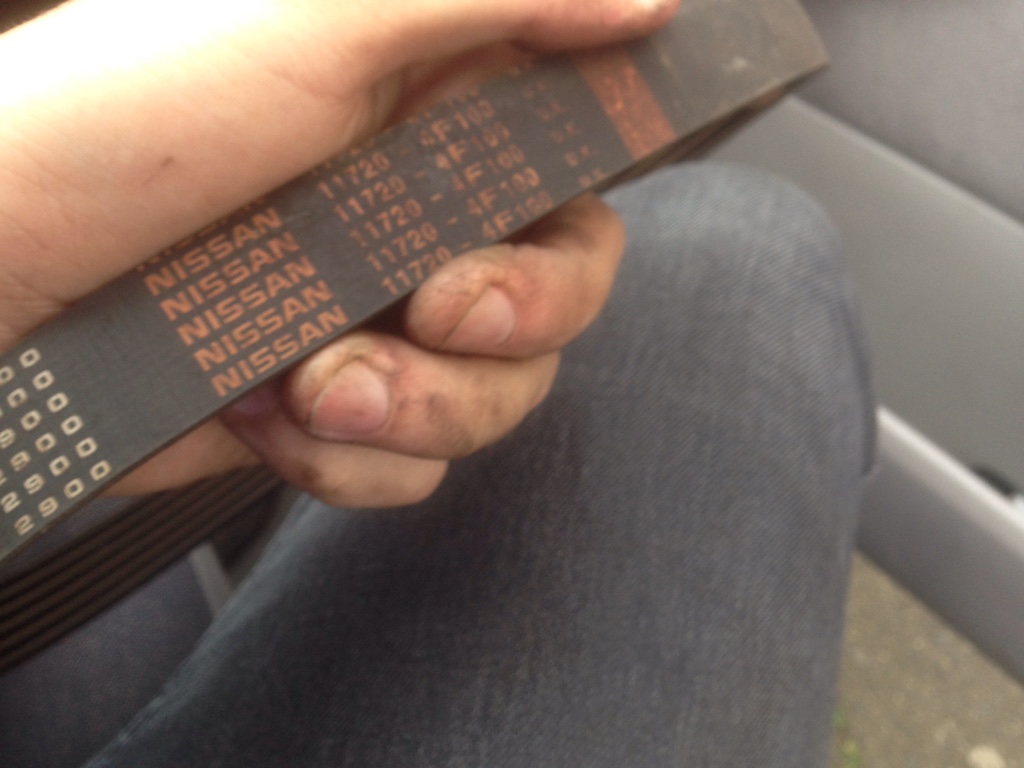
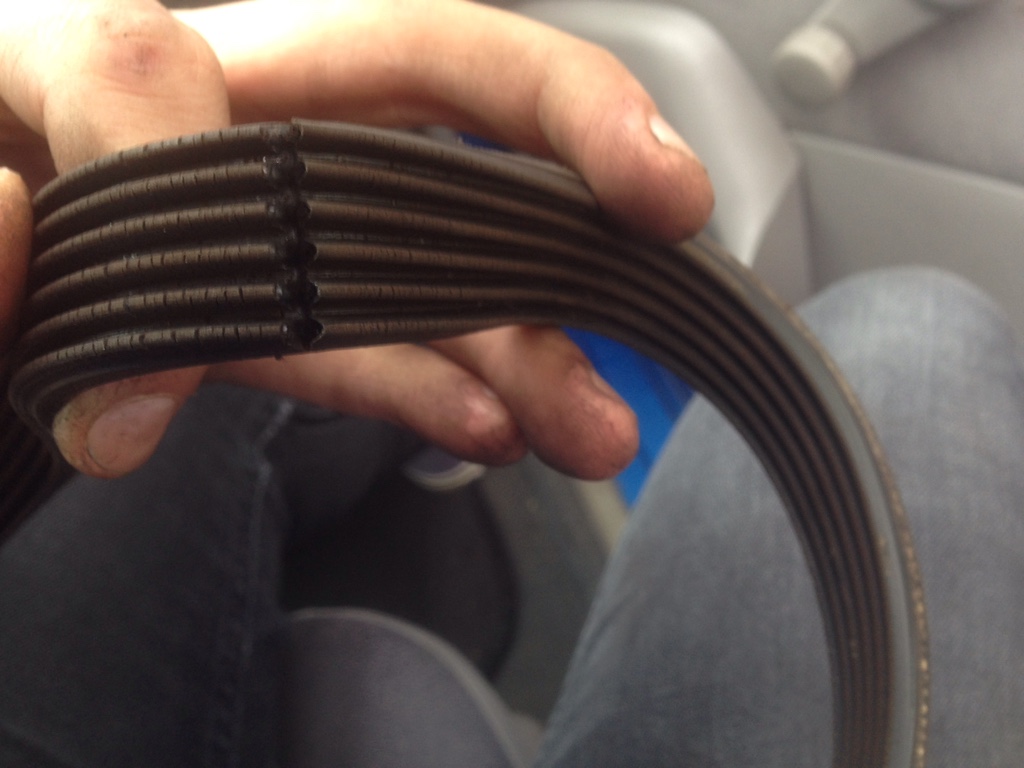
The drive belts look to be original Nissan. They're fairly dry rotted and noisy after 62,000 miles and 15 years!
Screen_Shot_2015_08_06_at_10_35_41.png


I also had a bit of luck when I visited my mum's house yesterday. A while ago, I was helping clear out one of her partner's houses that he rents out, an I found buried in a pile of rubble a set of 13" Vauxhall alloys. No idea what they're from, but I test fitted them on the Micra and it turns out they fit!

Not sure what I'm going to do with them yet as I was after 15's so I can have thinner tyres and have the option of brake upgrades. I think I might clean them up and keep them as a winter set for now though :)

Here's the one I bought home to test fit, the other three have tyres although they'll need replacing before going anywhere near a car.

IMG_0981.jpg
 
Last edited:
I noticed the blower fans were working very poorly, so after asking around on here I found out that the facelift's do have a pollen filter, so I set about finding it to see if it was blocking the air flow.

I removed the glovebox, there's two little black pins you have to twist and pull until they pop out, then it just lifts out revealing this:
IMG_0982.jpg


For some reason, Nissan decided not to make this plastic panel removable, so I had to cut along the groove on the left. I used a bread knife as I don't have a hack saw or a Stanley knife :rolleyes:
IMG_0984.jpg


Once one side is cut you can just fold it over and undo the little black screw, slide the panel off and reveal the filter.
IMG_0988.jpg


...This would appear to be the problem.
IMG_0983.jpg


Being poor and living in the countryside, pollen filters are expensive so I decided just to clean it up. This was the third bowl of soapy water :eek:
IMG_0985.jpg


Clean. Blowers are nice and powerful now :) Just have to remember not to have it on fresh air in the tyne tunnel, as I'm pretty sure it's not keeping out fumes anymore!
IMG_0987.jpg
 
I half replaced the drive belts today. The alternator belt was easy, but the water pump / PAS belt I couldn't get off. The face lifts don't have an idler tensioner. I THINK I can see a tension adjuster on the back of the PAS pump, but not too sure and I didn't have a spanner that could get to it or the locking nut.

Also found out that the crossmember is worse than I thought. With the splash guard off, I managed to poke a large hole in the right third. That will be a job to replace soon! Can't be much harder than getting this bloody belt off.

The alternator belt was Nissan, presumably from factory!
95150d3be25363949ca484f6268668f6.jpg


1e8bdbbd101a276b6187ec7a3df917d2.jpg
 
if you don't know what your doing with the Vauxhall alloys you found id be happy to take them off you ;) im after a set of alloys at the mo
 
if you don't know what your doing with the Vauxhall alloys you found id be happy to take them off you ;) im after a set of alloys at the mo
I've found a set of Primera GTI alloys so feel free to have them if you can pick them up. I'm not going to bother posting them unless somebody gave me some money for them, which seems unlikely as they're super cheap anyway!
 
hey fooby what rims are those and where did you get them from the vauxhall ones :p
It's in the post with the wheels in :)
I also had a bit of luck when I visited my mum's house yesterday. A while ago, I was helping clear out one of her partner's houses that he rents out, an I found buried in a pile of rubble a set of 13" Vauxhall alloys. No idea what they're from, but I test fitted them on the Micra and it turns out they fit!
 
I've found a set of Primera GTI alloys so feel free to have them if you can pick them up. I'm not going to bother posting them unless somebody gave me some money for them, which seems unlikely as they're super cheap anyway!

If you get a postage quote I'll have them of ya ;)


Cheers Kieran
 
Just a small update, developed a mis-fire on the way home the other day and found that my spark plugs are way out, hence the slightly iffy idle I've been getting too. New NKG plugs in and runs far better than ever. Got two weeks of saving to do so I'm going to be house bound making a bit of money and saving on fuel and parts for an upcoming wedding.

I reckon I might have a go at cleaning up the engine bay wiring. Not sure how viable a full tuck is on a Micra but I'm loving what people do with S-body's. Loads of inspiring bays. First thing is to find a way to re-route the throttle cable. Could be tricky as it comes out facing the front, but I'm sure there's a way. I haven't managed to find a single person who's done a tuck on a K11, any tucked ( :rolleyes: ) away threads I'd love to see!
 
Ended up going for NGK BKR5E-11's. I had a lovely surprise from my old insurance company from the Subaru who wanted £90 for cancelling my policy early. I have a wedding to attend in two weeks, and Christmas is looming ever closer so the wheels have had to wait :( Gutted as I'd found a set of 15" Almera GTi's with tyres for £70. He was Bradford based if anybody else wants to try him. Hopefully I'll have more luck at Christmas :)

I've also been looking into the possibilities of engine swaps. After Christmas I want to start getting into performance upgrades whilst sticking with the OEM+ theme. I'd love to turbo down the road but for now a CG13DE swap is looking very much on the cards as it appears no fabrication is required.
 
Wire tuck in a K11 should be fairly easy. Hardly any wires in there as it is!

Aside from the HT leads, the throttle cable is the most prominent. Not sure what you can do with that since you'll want to maintain a smooth curve to avoid any drag on the cable. A longer cable or some clever bracketry might allow you to relocate the cable to the side or the rear perhaps.
 
Looks like the Outback is going to be kept and will come back on the scene come June when I've made it perfect and have some no claims to throw at it. Micra will always be kept as a super fun reliable backup / run around.

The next few days are going to be getting it MOT ready. All of my suspension parts look original and are pretty hammered, so they will all be replaced with new stuff over time. The right track rod end had lots of play and making it a horrible clunky drive, so I did that today. Super simple job if it wasn't for the rust that made every bolt a half hour job to crack. The alignment is a couple of mm's off but it was pretty bad before. Will be doing DIY alignment tomorrow.

These are video caps so crap quality, sorry!

Out with the old:
Screen_Shot_2015_10_10_at_19_01_51.png


In with the new!
Screen_Shot_2015_10_10_at_19_02_21.png
 
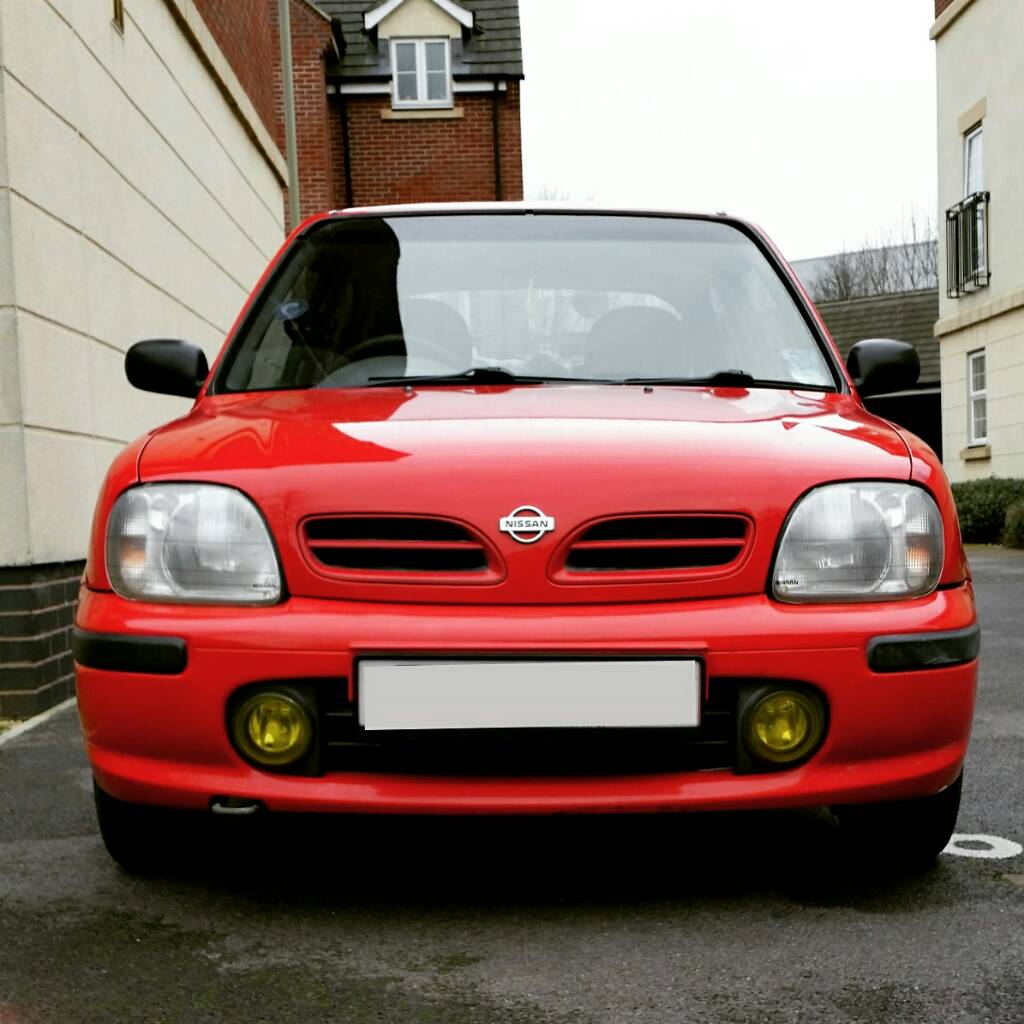
Looking good. Did you get around to de-chroming the front grilles? Most people paint them black but personally I really think colour coding them looks best, especially if you change them out for mid-facelift ones, which sit flush with the bonnet.
 
I never liked the chrome grilles on the last K11 facelifts either.

First thing I did when I got the Sport+ was to swap out for a set of earlier grille inserts in satin black.
 
Back
Top