• Please only use these forums for blogs, they are not a discussion forum

Kev's Glanza V Blog - updated 23.06.09

Kev

Pro Cut Vinyl
Founding Member
Official MSC Trader
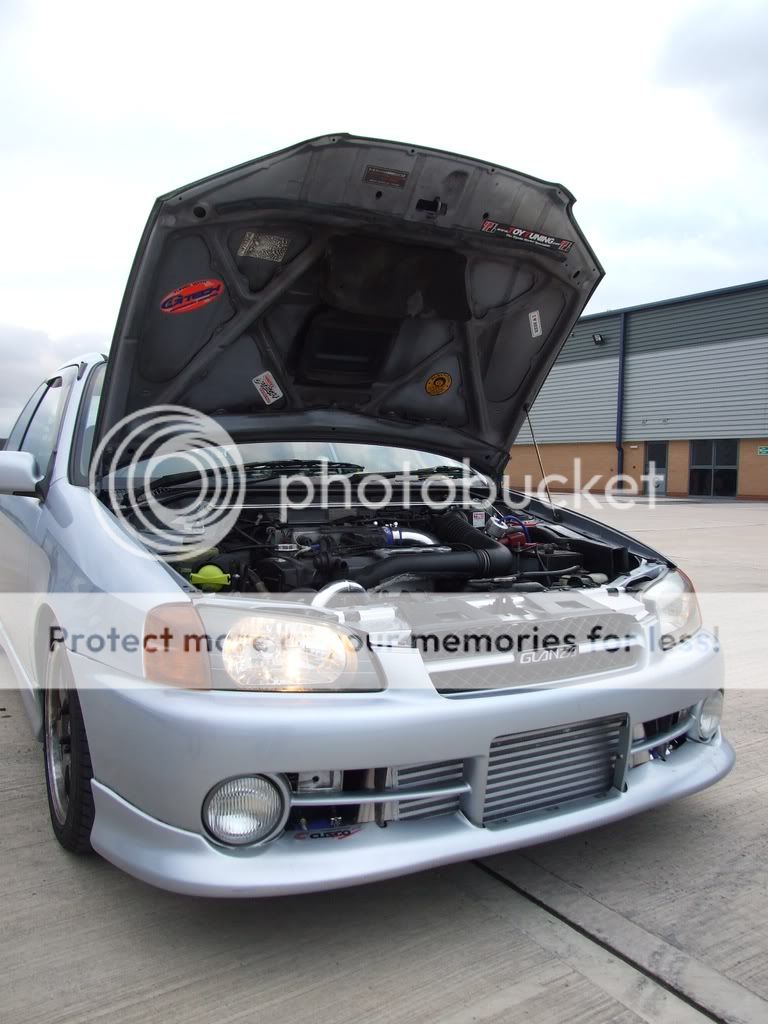
Spec List of my 1996 Toyota Glanza V 1.3 Turbo

Engine:

1.3 4EFTE
Toy Tuning Filter re-location kit
Toy Tuning Hybrid CT9
Toy Tuning Actuator
Japspeed manifold
HDI front mounted intercooler
Stainless Steel Catch Can
Stainless Steel HKS SR Exhaust System
HKS Sequential Blow Off Valve


next modification - fueling modifications - boost increase!

Suspension and Wheels:

Whiteline -40mm lowering springs
Koni Adjustables Shock absorbers
Whiteline anti lift kit
Whiteline uprated front and rear arb's
Whiteline panhard rod

15" Rota Subzero in Gloss White Alloy wheels on 195/55/15 toyo proxes tyres
blue lightweight wheel nuts

next modification - tein coilovers

Styling:

Standard factory fitted bodykit
A few stickers placed on the rear quarter windows

next modification - rear lip

I.C.E:

Alpine DVD headunit and centurion DVD / CD player
Rainbow 6.5" components in custom builds
Genesis Profile 4 amp
Genesis Sub amp
Genesis mini subs
custom light weight build to display amps
Optima Yellow Top deep cycle battery 0 gauge wiring

Interior:

Pretty much standard other then a tim turbo boost gauge that will be eventually replaced with a defi gauge.

Future Plans

After fitting the HDI intercooler I'd like to get some supporting fuel modifications and increase the boost. I'm pretty much happy with the way it stands now, although we do have plans for Barwell to put some finishing touches on the paint work.

Images:

tgtt1


Above is how I bought it, with black alloys.

subzero3


tgtt4


rear


head%20unit


door%20build


install
 
raced one of these once in my old 2.3 20v audi 90, absolutely gubbed it,which was odd seeing as my car was 170bhp and built like a tank, however glanzas not very torquey,like hondas!!!
 
glanzas are awsome, i went in richs down to JAE, managed to keep up with a primera gt. and completly wasted swipers k11 like he wasnt even there :p
 
people like to hype these up alot but there just a starlet at the end of the day, wonder y nissan didnt make a turbo micra?? they are nice,just the lad i knew who owned one is a complete to$$er, and another lad i know who owns a starlet is smarmy also in his starlet sr,not so smarmy getting humped by a k11 though haha,erm a 1.0litre
 
Yes it is a starlet at the end of the day....

however the engine has massive potential for tuning as they have been proven to run reliably on standard internals up to 250bhp+ and with forged internals 300bhp+

Add to this improvements on the suspension setup like I have done, they handle extremely well too.

There is also a huge array of aftermarket parts available for them and not forgetting they are a blast to drive, so much fun out of the box :p

Kev
 
Kev, it's looking lovely.

Do you reckon we could have a small section somewhere for Non Micra Blogs?
You got the Glanza, I got the Orion, james has got the Almera, and there are others around. Just an idea. lol.

I'll give you a race at Pod in the Orion, Essex crap VS Jap lovelyness lol
 
Install update

Today I decided to build a boot install into the back of the glanza.

I picked up a bargain of a genesis profile sub amp a few weeks back and running two amps made it worth doing some sort of build as well as putting the mini subs in enclosers.

Anyway 9-10 hours spent on it today and this is the almost finished look. Mini subs are not mounted properly yet, hence the small gap, but I'm delighted with the overall finish, very tidy and probably the tidiest I've ever done.

The install is very lightweight, the mini subs, amps are all very light and the build was done in 12mm MDF to keep the weight down, so it's not affecting performance all that much.

Excuse the image quality, done with my camera phone.

There will be a massive update next week, but for now that's it :D

Kev
 

Attachments

  • new install.jpg
    new install.jpg
    89.2 KB · Views: 1,190
ooh! very tidy, love this car.
someone near me has a galanza, but it has red learner plates on, hope it lasts with a learner at the wheel.
 
HDI intercooler kit arrived!

Finally my HDI front mounted intercooler kit has arrived today, hopefully have it fitted by the weekend :D

I'll update this blog with fresh images as it appears my previous images have gone!

Kev
 
Finally my HDI front mounted intercooler kit has arrived today, hopefully have it fitted by the weekend :D

I'll update this blog with fresh images as it appears my previous images have gone!

Kev

From reading on the website, don't rush the modifications to the front bumper! You'll have to cut quite a bit away. The black glanza i had, had the HDI and it looked a bit rough. Patience young kevin.
 
Large update coming this weekend and I'll upload plenty of new images.

I won't be rushing the intercooler setup, I'm starting Friday night with stripping it all down and working through the full weekend to get it right.

If you can mount the intercooler further enough back away from the bumper it only requires minimal trimming. Looks like Mr Dremel will be my friend lol!

Kev

Are you going to sell the HDI cooler like we discussed and get the thinner one? Also, be aware of boost creep (so i've heard) from fitting a FMIC! You'll hit fuel cut easier.
 
Are you going to sell the HDI cooler like we discussed and get the thinner one? Also, be aware of boost creep (so i've heard) from fitting a FMIC! You'll hit fuel cut easier.

I'm going to test fit the HDI to see what exactly does need trimming and see if I'm happy to continue and cut away the bumper.

I've seen this one on TGTT and it fits and with what appear very little cutting or none at all and that has the air con

Picture013-1.jpg


front012.jpg
 
Yeah that's a pretty tidy job! I've seen a lot worse ones, like my black glanza.
 
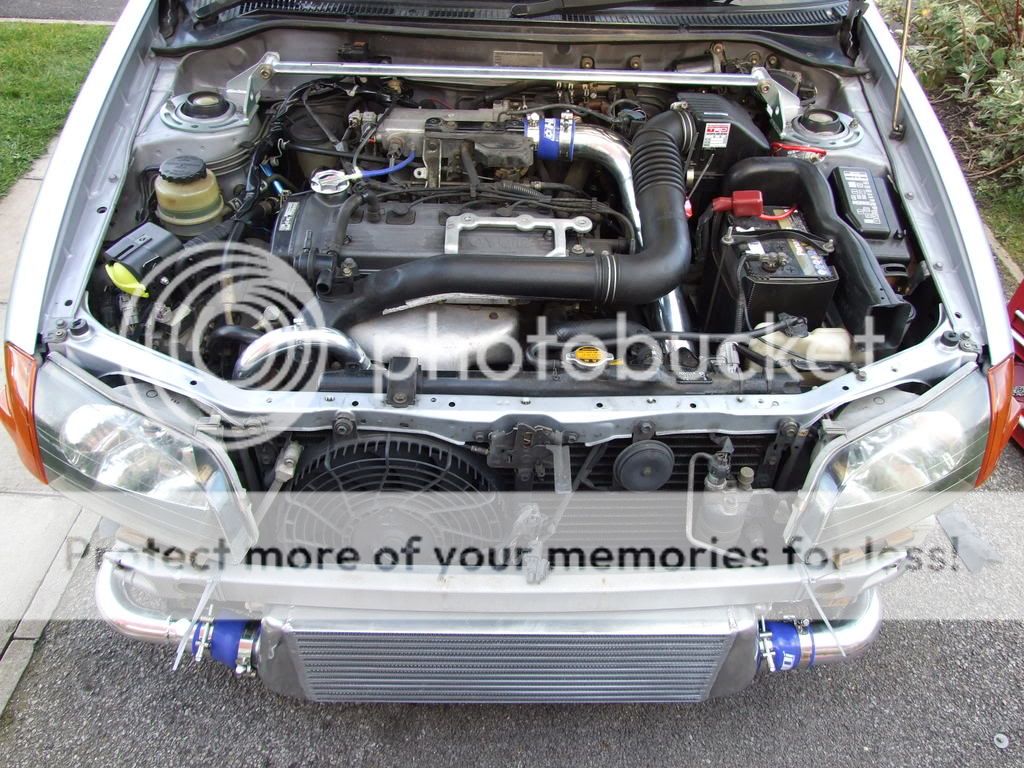
HDI intercooler now fitted........phew lol!

turbo_pipe


The first of many issues with fitting this kit was getting the intercooler pipe from the turbo past my relocated air filter setup.

airfilter


Managed to re-position it to allow the intercooler pipes to run by it.

airfilter2


I might have to get some more samco and piping as the airfilter piping sits a little lower to the ground, there is more clearance then it looks, but it's about an inch lower then before due to the piping.

hdi_intercooler


Temporary cable ties holding the intercooler, only drill bit I didn't have for metal was the one I needed grr. It's still fixed securely with mounts underneath into the chassis.

hdi_front1


Lots of trimming required to get the huge cooler to sit behind the bumper, reasonable neat job, however I've decided I'm going with a custom bumper soon anyway, so I wasn't too worried.

hdi_front


Another pic from the front

engine_top


Engine now looks much more open and easy to work on, next job is to give a big clean up.

Also notice no BOV, I inquired about my HKS SSQV fitting with the new setup, I was told it would fit fine, but after buying the small samco hosing, I now need another adapter as the one I have only works with the stock intercooler setup.

So I now have to wait until I can get that part to even drive the thing.

Anyway lots of progress made and nice to actually get some time to spend modifying the car

Kev
 
I've read on the site about people driving without the BOV connected, or blocked. Look it up mate. Looks pretty cool though! You going to move the reg plate?

Did you get the manifold from SPS Dane?
 
She Lives!!!!!

Manifold is a japspeed which I bought from Toy Tuning when they where a reliable company lol!

I've managed to diy block the bov flange off, thank you B&Q plumbing department lol! :D

Did a road test to check everything and wow what a difference, now pulls like train, very smooth acceleration on boost, Turbo seems to spoil up much quicker. The chatter from having no bov is a little annoying, but I have the correct parts on order to put back on my HKS SSQV this week.

No boost leaks or knocking noises from the kit, fitted very well and all secure. The Reg Plate is staying for now, I've done quite a tidy job with the cutting and I kind of prefer it where it is.

I really want to up the boost now, but need some supporting mods, but getting close now to how I want it.

Well chuffed :D

Kev
 
Not sure at the moment, I want to get it on a rolling road at some point.

Kev
 
Excellent Kev glad it's all running ok! Does look great on your car, now get scrubbing in that engine bay ;)
 
HKS SSQV now fitted

hks%20ssqv


Engine bay clean up happening this weekend lol!
 
Thanks Ed :)

One issue you might be able to throw some light on, I'll copy my post from TGTT.COM as it has some peeps on there scratching heads lol!

Fitted my HKS SSQV tonight to the HDI intercooler kit. I expected it to sound different to how it was setup before on the standard intercooler setup.

however it almost sounds silent with the chatter noise of having no bov when driving the car, it appears to be operating as it should do and you can really feel the air being pushed out, but without the tssssssssh sound if you know what I mean?
 
Thanks Ed :)

One issue you might be able to throw some light on, I'll copy my post from TGTT.COM as it has some peeps on there scratching heads lol!

My SSQV with the HDI on the black one was very audiable. Are you sure you haven't got a leak in the system somewhere? Is your old BOV still in place and unblocked now?
 
My SSQV with the HDI on the black one was very audiable. Are you sure you haven't got a leak in the system somewhere? Is your old BOV still in place and unblocked now?

It's now fitted as the latest images I posted above.

I still can't work out why it's not making any noise, Ed advised adjusting the pressure screw. I have done this with many variants although makes some difference, it's not really noticeable.

The bov seems to be operating just fine, if you engage the bov with the throttle standing over it, you still get a real blast of air coming from it, but with very little sound.

I'm sure there's no leaks, I have tightened all the clips up as much as they'll go, In fact one I did so tight the bolt snapped lol!
 
It's now fitted as the latest images I posted above.!

Ah sorry, i meant the bog standard one, but from looking at the photos i can't see that anyway. I know before you said you blocked the BOV. Did you unblock it fully?

Does the car hold boost ok?
 
Ah sorry, i meant the bog standard one, but from looking at the photos i can't see that anyway. I know before you said you blocked the BOV. Did you unblock it fully?

Does the car hold boost ok?

Yes it's unblocked fully, holds boost perfectly fine.

This is the link to my thread on TTGT.COM. ----> click me

Seems the HKS SSQV goes quiet when fitted to the hdi piping on some installations, but not on others :S, don't know whether to change bov's or not.

Kev
 
I'd go with that as you're running standard boost and a lot more piping then its easier for the pressure drop to not open the dump valve as much, or that the air is moving out of the dump valve at a lower velocity, thus creating a quiter "tsssccchhhh"

Just my guess, but i have had a couple of strongbows!!

I'll be able to tell you if theres any difference in my dump valve this weekend. As i've now fitted a much larger intercooler than standard. Will be running circa 7 psi boost, same as before.
 
When my HDI was fitted Kev, the boost was set higher, so yeah maybe what Ollie says is right :)
 
if you turn the boost up, what route of engine management are you going to look at? Standard ECU flashing, piggy back or aftermarket set up?

Or running on the worst fuelling system in the world!! Mechanical Fuel Injection.....like me :D Although only have to put up with this for a few hundred miles whilst she's run in, then off to the world of Fusion Motorsport for some Omex!!
 
Operation Cam Cover

Well, it didn't take me long from fitting the HDI kit to giving the engine bay a good clean up.

Not finished, but huge improvement on before.

Before:

engine_top


After:

engine_bay


engine_bay1


engine_bay2


engine_bay3


engine_bay4


I've have my earthing kit to go back on as well as the catch can, if i decide to put it back that is.

Cheers
Kev
 
degreaser on the cam cover and engine bay, very careful around the cam cover because I didn't have a spare gasket and didn't want to risk splitting it when taking it off.

Yeah, pretty much good old elbow grease, metal polish and a wire brush on the end of my drill cleaned up the cam cover very nicely indeed.

Kev
 
Kev most starlet owners don't do it but you should put an oil catch can on that vent on the top of the rocker cover and then vent out after that, or you'll always spew out oil over the engine.
 
Kev most starlet owners don't do it but you should put an oil catch can on that vent on the top of the rocker cover and then vent out after that, or you'll always spew out oil over the engine.

Yeah I have one, just need to get new piping for it, then it's going back on.

Kev, did your HDI not come with HDI brackets to secure the hoses on?

It has the HDI clamps on, just not on one where I snapped the bolt doing it up too tight....whoops lol!

Kev
 
Back
Top