You are using an out of date browser. It may not display this or other websites correctly.
You should upgrade or use an alternative browser.
You should upgrade or use an alternative browser.
Changing Timing Chain Guide?
- Thread starter andy_con
- Start date
Belly93
to turbo or new lump :/ hmmm
the sump is removed mate the metal still there is the crank case mate im sure it needs to be removed which is why the gbox needs to be removedok so some photos
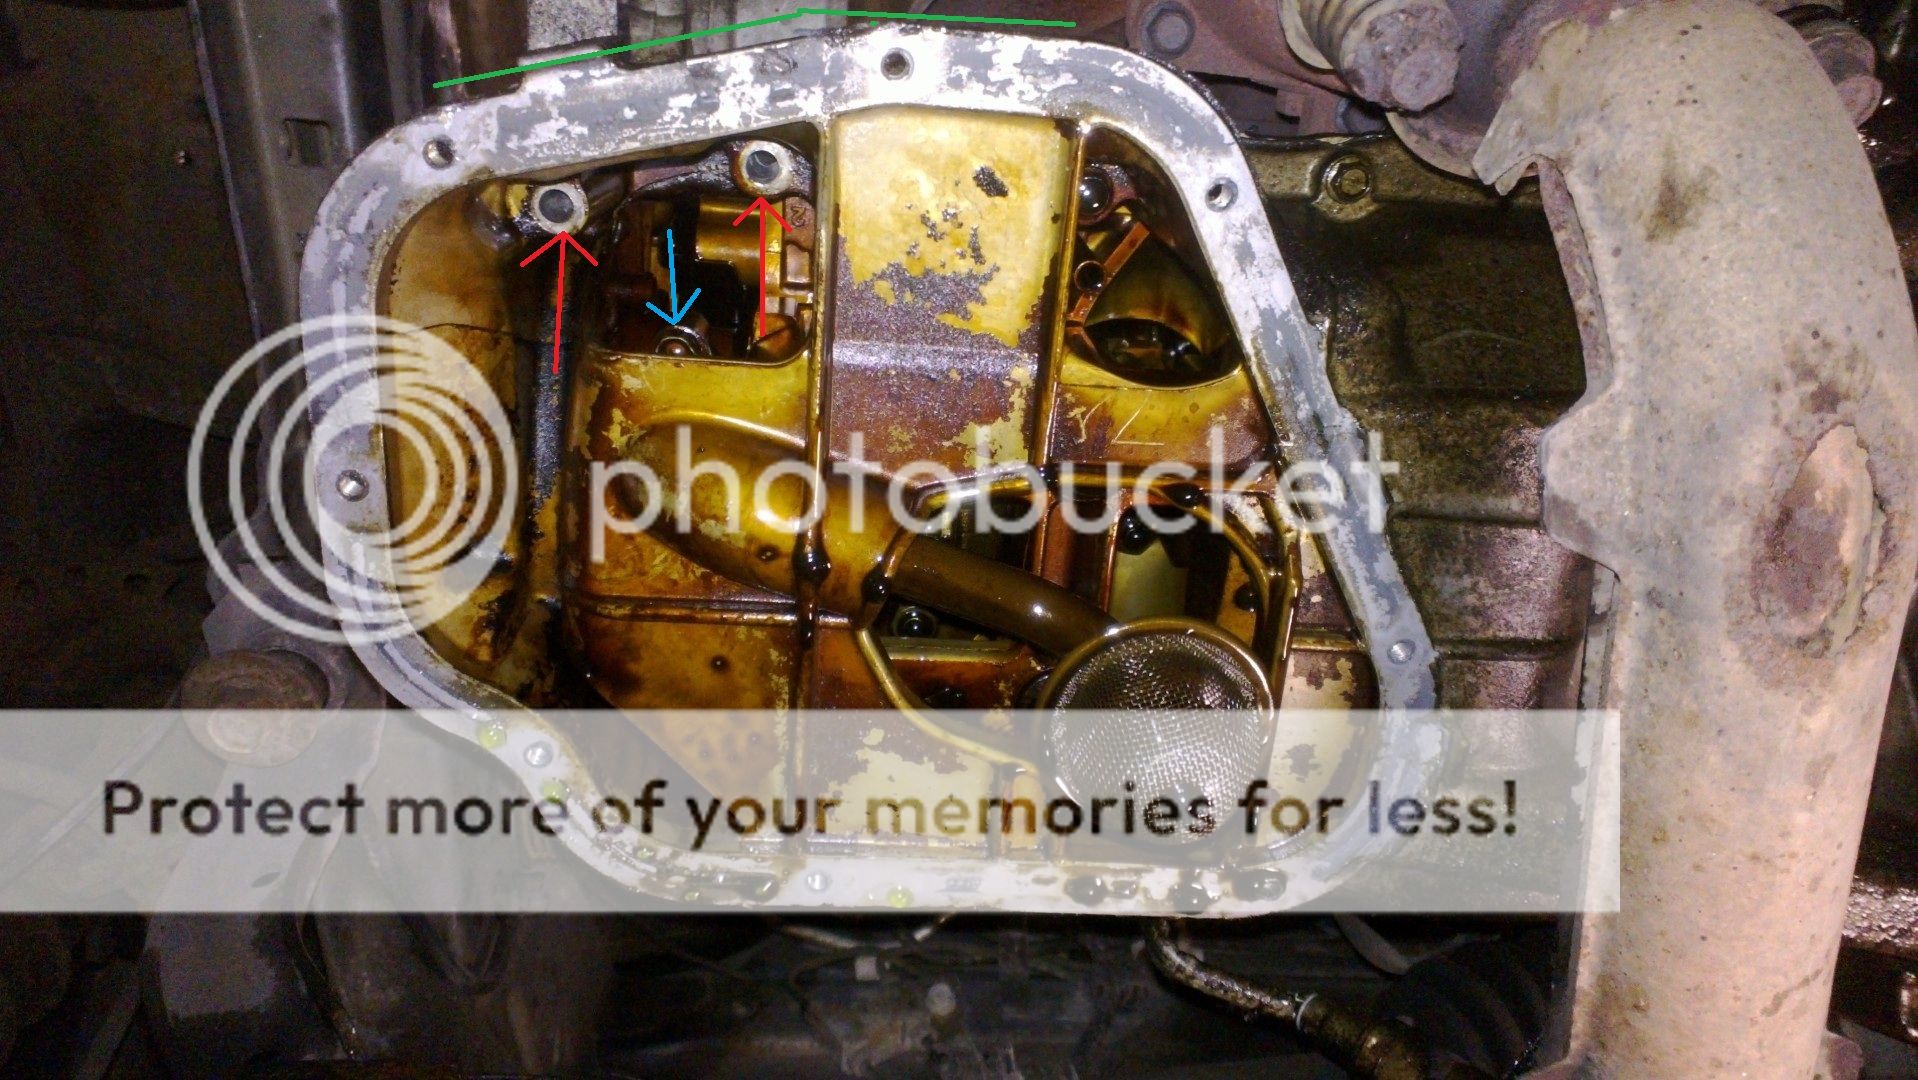
here is a photo looking directly up into the engine with the sump panel removed.
the two red are bolts which we have removed as we believe these hold the timing chain cover on.
the green line is where the timing chain cover is
the blue bolt is the bolt we cant get to but and unsure if we need to remove this or not?

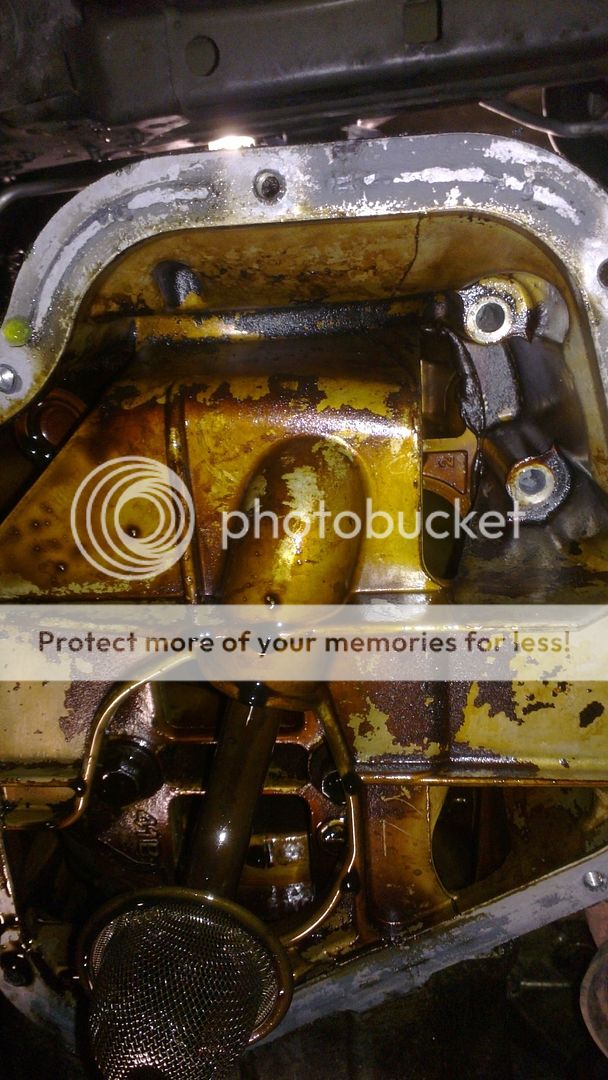
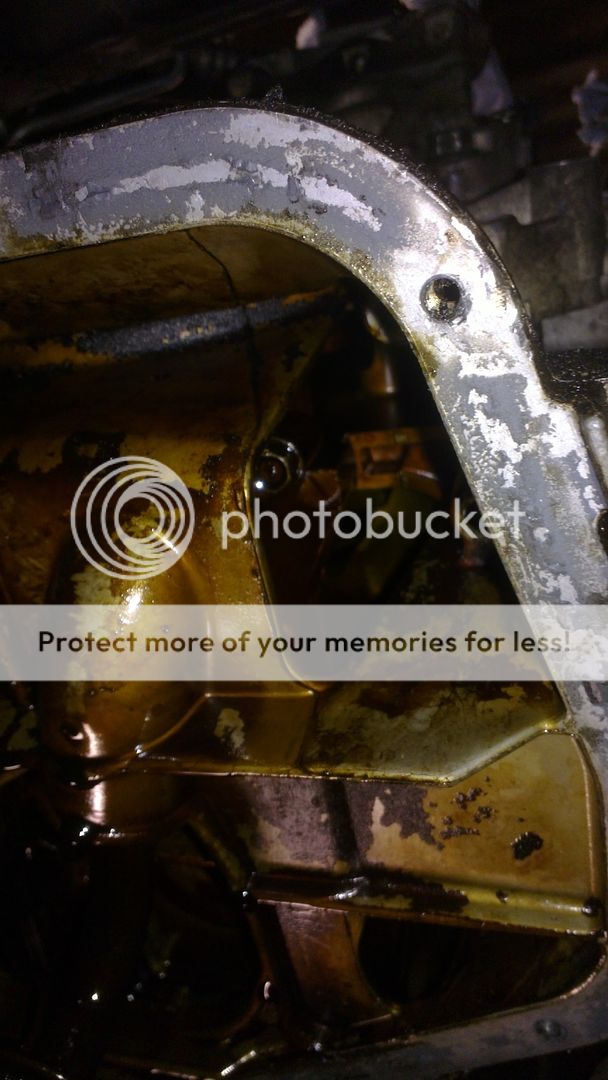
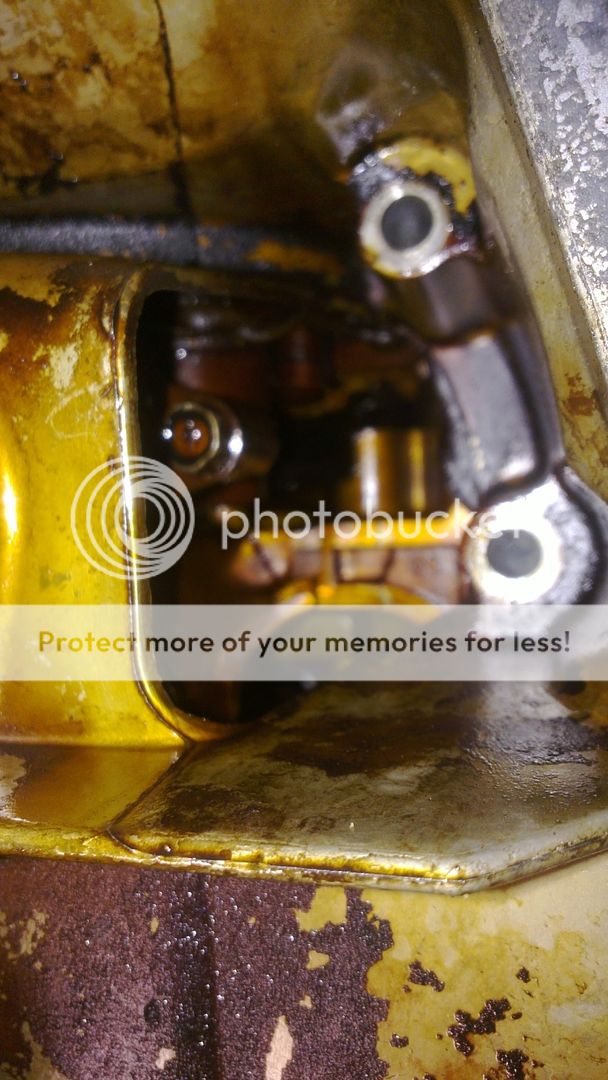
rest of the pics

a photo of the bolt which is blocked by metal

bolt again

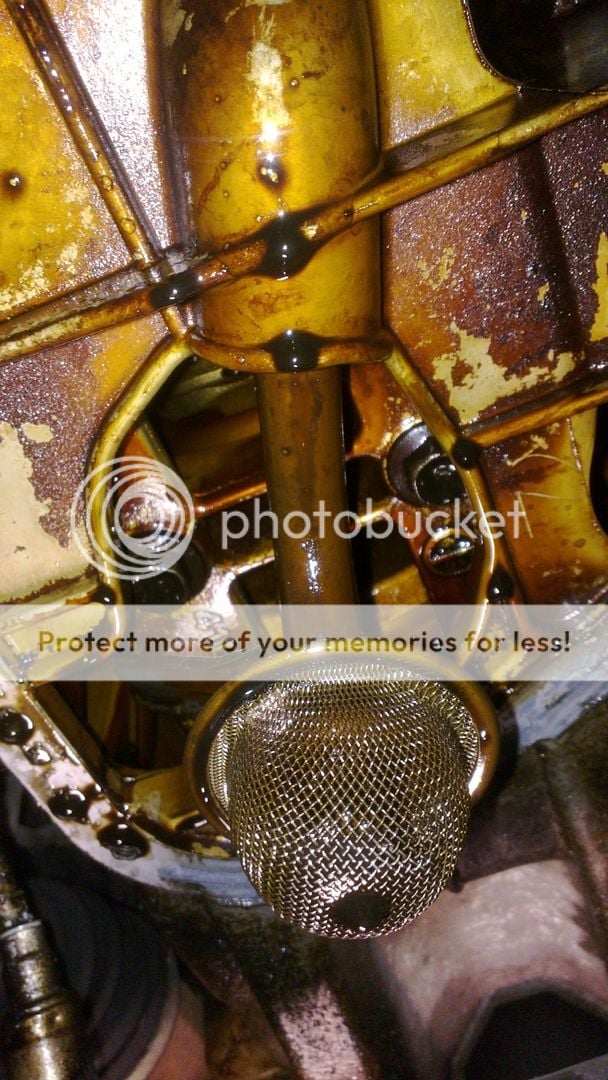
oil strainer we believe the haynes manual says to remove

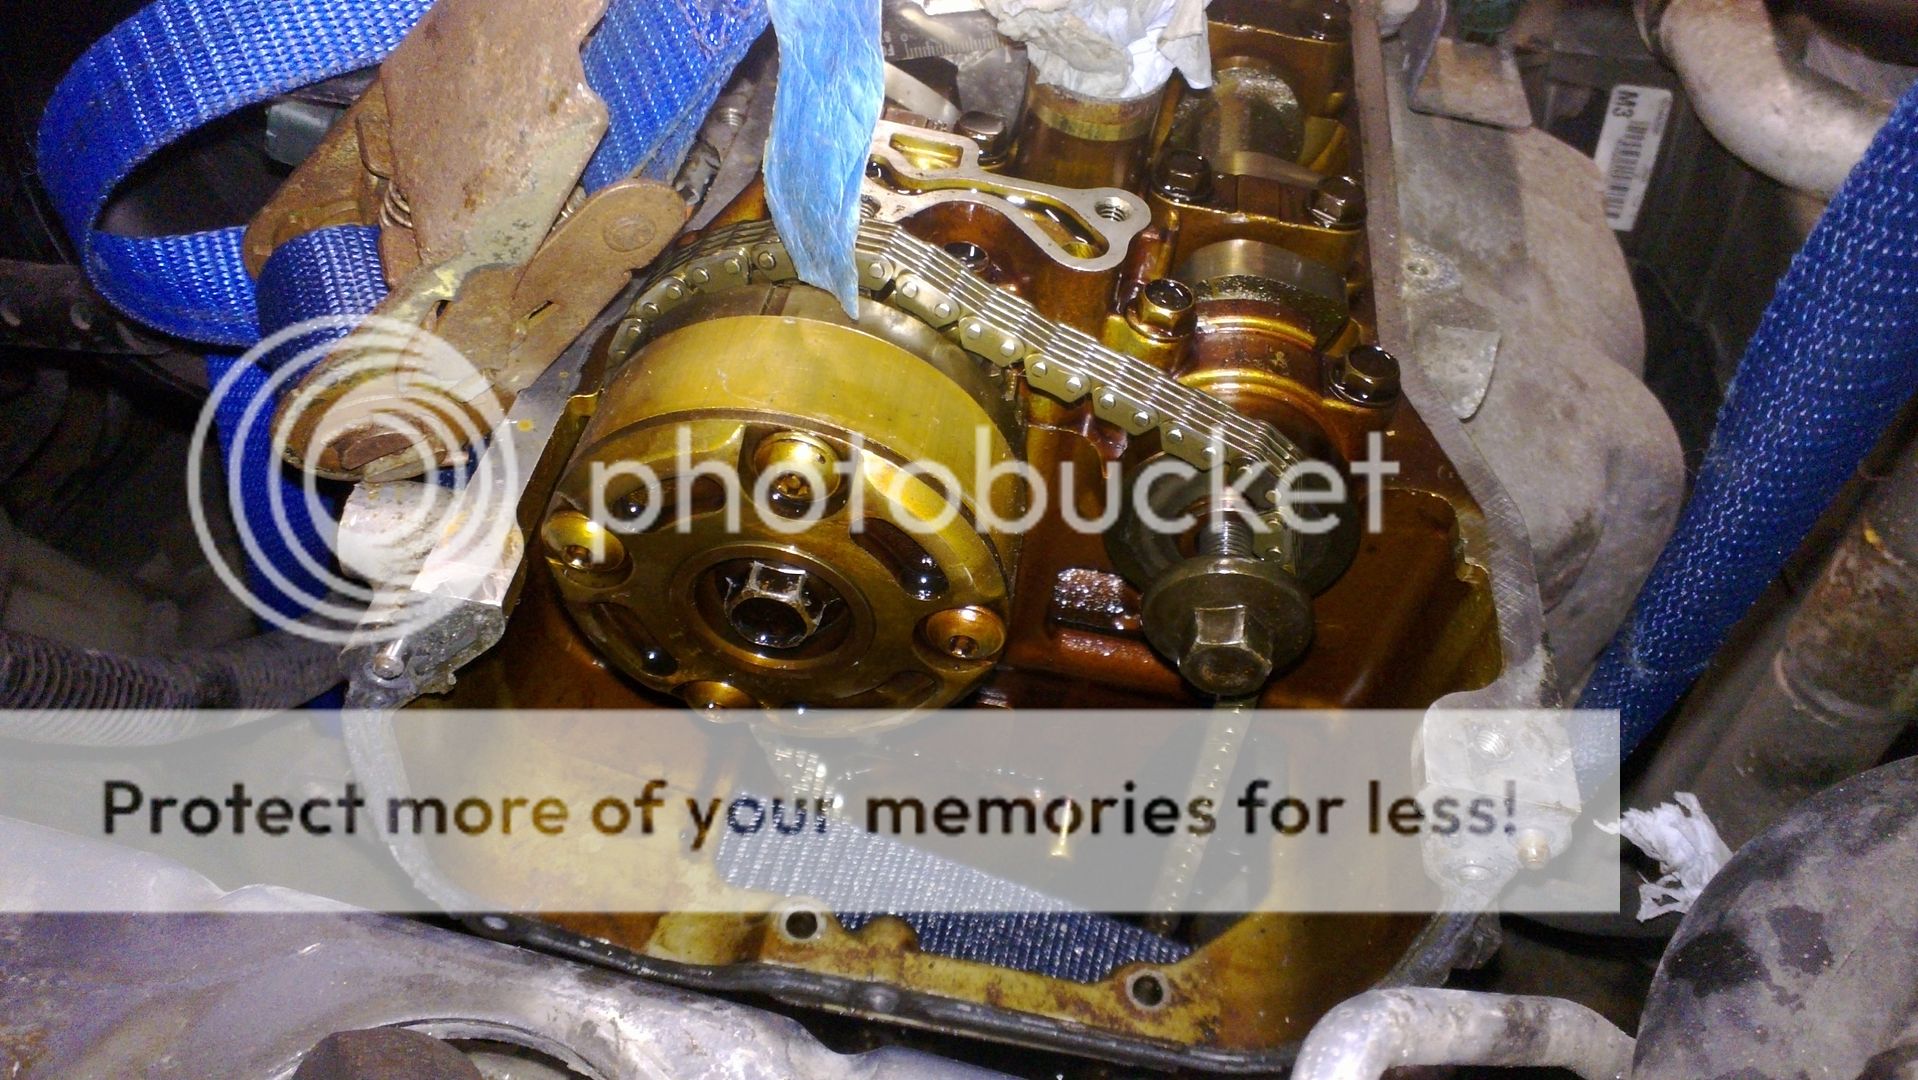
looking from the bottom of the engine at the timing chain cover

then my phone battery died
the haynes manual is a piece of wank, the biggest waste of £20 i ever spent. it simple says remove the bolts and remove the timing chain cover... yeah real helpful.
getting the timing chain cover off is the last part so any info or help would be really great
i hope this video shows things much better.
the timing chain cover is loose and sump or crank case is also loose. but neither will actually come off
http://s187.photobucket.com/albums/x202/magicmushrooms1/car/?action=view¤t=13010095.mp4
the timing chain cover is loose and sump or crank case is also loose. but neither will actually come off
http://s187.photobucket.com/albums/x202/magicmushrooms1/car/?action=view¤t=13010095.mp4
For FOOK SAKE!!!! Just pull the engine out already!!!!!!!!! No more issues!!!!
today is a f**king good day!
we havent done any work on the micra for four weeks as ive been tyring to get anwsers. i even went into nissan and spoke to a machanic but he couldnt tell me what was holding on upper sump on, all he could say was you need to remove the gear box from the engine. no one on here knew the anwser.
well today after about two hours we managed to seperate the two and i now have the anwser to the question that ive been searching for, for about two months.
on the upper sump there is a lip that goes into the gear box, its about 10mm long. so you have to split not remove the gear from the engine enough to allow the lip to pass.
so we are there ready to put the new chain on and put the car back together

the lip


we havent done any work on the micra for four weeks as ive been tyring to get anwsers. i even went into nissan and spoke to a machanic but he couldnt tell me what was holding on upper sump on, all he could say was you need to remove the gear box from the engine. no one on here knew the anwser.
well today after about two hours we managed to seperate the two and i now have the anwser to the question that ive been searching for, for about two months.
on the upper sump there is a lip that goes into the gear box, its about 10mm long. so you have to split not remove the gear from the engine enough to allow the lip to pass.
so we are there ready to put the new chain on and put the car back together

the lip


frank
Club Member
posted on jan 12thi doubt if you can do it without removing the intermediate sump andy (which is why you have to pull the g/box away from the engine iirc)
I have done this job on several occasions and what Frank is telling you is correct. The upper aluminium sump has to come off to releases the timing cover. Even if you did manage to get the cover off with sump on, you would damage the front of the Head Gasket and you would never get the cover back on.
You need to undo the Bellhousing bolts, push gearbox away from engine slightly, then undo all bolts from sump to remove. This is why as Belly 93 has said alot of people remove the engine to do this job. It can be done with engine in situ but be very carefull as when front engine mount is off and gearbox is un-bolted from engine only your jack will be supporting the engine and it will move around loads!
The red arrowed bolts in your pic are not timing case fixings, there just the front fixing bolts for the upper sump (one just happens to go into the timing case) The blue arrowed bolt is one of the fixings for the oil strainer (it has two) they are bolted into the bottom of the oil pump, which is part of the timing case (again access to these bolts is possible after removing upper sump)
Sorry unless you can seperate chain and feed it through as has been previously mentioned, there is no quick way of doing this.
Have you pushed the gearbox back?? It will not fully clear if the gearbox is bolted to the engine, even if it feels loose. Also sometimes they get stuck on the dipstick tube (the rubber seal goes dry and seizes in the sump.) The manifold bracket is also bolted to sump iirc so that will also need removing.
The oil stainer is bolted to the oil pump which is mounted in the front cover. It is done this way so it can be driven directly from a large keyway on the crank, instead of having a seperate chain to drive it.
we,ve been telling you for months ffs
no your missing my point.
i didnt question the need to seperate the two, the question was why?? and the anwser is there is a lip on the upper sump that goes into the bell housing
what was it about the upper sump that prevented it from coming away from the engine block
i didnt question the need to seperate the two, the question was why?? and the anwser is there is a lip on the upper sump that goes into the bell housing
what was it about the upper sump that prevented it from coming away from the engine block
frank
Club Member
my task this week is aligning the three cogs, currently they are so so far out and nothing lines up what so ever.
anyone offer any help or any tips?
the micra workshop manual makes it sound like rocket science and haynes manual makes it sound a litte easier
aye, pic,s of exactly where the lobes are pointing @ TDC cyl1 are a very valuable reference andy (but my advice back in jan was probably unheeded tho
i align my CG,s with the lobes pointing at the side of the cap bolt (the red marks) and as long as the crank pulley is on the 2nd notch (tdc) its spot on.
but you have the vtec inlet complication too (which that guy will have sussed out i guess)
View attachment 21607
i do but its been a while since ive read things, when you refer to guy are you refering to -
http://www.micra.org.uk/threads/changing-timing-chain.44522/
not much help but hey...
http://www.micra.org.uk/threads/changing-timing-chain.44522/
not much help but hey...
frank
Club Member
it only shows you where to blow the airline, and what marks to line upnot much help but hey...
ah the workshop manual, i did have this but lost it when i had to reformat my laptop.
ok so if general advice is not to remove it how do you get the main off of it and the new one on?
this engine is the worst deisng ever, where there another 5mm gap the chain would just slid off. but no... nissan decided to put the case in the way
ok so if general advice is not to remove it how do you get the main off of it and the new one on?
this engine is the worst deisng ever, where there another 5mm gap the chain would just slid off. but no... nissan decided to put the case in the way
frank
Club Member
that was the page that Guy posted up in the link ffs ^ i copied it onto this thread so save you the bother of clicking on that linkah the workshop manual, i did have this but lost it when i had to reformat my laptop.
frank
Club Member
yeh, and the CG ones are 113nm (pretty tight)um so use a spanner to stop it turning then use a wrench on the bolt?
tried this today and could undo it, this is why we thought it need to be done a special way?
I believe "Full Service manual"...click on the last full stop on the home page of Guy's site....what is fsm everyone keeps refering to?
http://www.micrak12.com/index.htm
You will DL a PDF manual for the K12
removing this sprocket is rocket science and me and my old man just arent getting it.
so we did as the book said and applied a 3bar pressure air feed, but not tick or noise. how can removing this sprocket damage a pin? surely if its strong enugh to drive and engine taking it off wont damage it.
also it seems this pin is internal to the cog so once again how can removing it damage it??
ok so after doing a bit of research am i correct.
the pins in the vvt sprocket stop the centre from turning seperatly from the outside of the cog.
so the reason for disengaging them is so when tightening or undoing the bolt that holds it on you dont bend of break the pins due to the tension in the chain which goes round the cog on the outside.
or am i taking crap?
so in theory you could take the tension out the chain, then just undo this sprocket without disengaging the pins and as there is no tension in the chain you would damage the pins.
right or wrong??
the way i look at it is currently the pins are locking so the units turns as one whole thing.
im assuming the pins are engaged (disengaged whatever) and locked is cos thats how they ended up when the engine was last stopped.
also when we say engage/disengaged/locked what do we actually mean. in my mind the pins are currently engaged and lock as the whole unit turns as one. im assuming if the pins were disengaged the middle would turn but the chain would not.
currently the chain is off although sprockets are still on. P1 is set to TDC.
maybe my mind thinks in strange ways but, turn the engine off and it will set the vvt how it wants it for when you next start the engine.
remove the chain put a new one on and you shouldnt need to touch the vvt as you have not touched it.
generally speaking the marks on each three sprockets are pretty aligned to each other but the marks on the chain are mega out. none of the three marks on the chain are near the marks on the sprockets so im wondering if the chain may have jumped?? dont see how else they could be so out.
Similar threads
- Replies
- 1
- Views
- 3K
- Replies
- 17
- Views
- 11K

