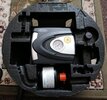
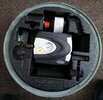
photo of left side engine when battery is removed k12

  • Thread starter Deleted member 31521
  • Start date
Was thinking some clear on the headlights. None smoked just clear to protect them from the elements.
With the rear I think after watching a few guides they do reduce rather a lot of visible light. And also fail to reflect as much if any.
I thought the lowest shade would improve the look without too much of a loss of visible light but could see the difference was big enough to notice yet they said it was the same.
Sometimes is best to ask opinions of others before deciding.

Sent from my ASUS_T00P using Micra Sports Club mobile app
 
Today when I turn the key I notice that the abs light illuminates briefly and then turns out after a second.
I don't recall that happening. Before does this mean that abs has been activated for instance.
Or is this some type of warning.
My brakes work fine and they have been great.
Any info regarding this this subject most grateful.


Sent from my ASUS_T00P using Micra Sports Club mobile app
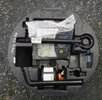
 
It's ment to go onto the top of the air intake but I cannot see where on mine and just tied it to the firewall.
At least that's what I seen recently was to put it onto that area so must be a fitting for it to go on.
I'm just leaving mine how it is long as it can breath and isn't flopping or moving around it should be fine it can breath without any unwanted debris entering the port.
So its ok to leave it asit is m8
 
Yesterday decided it was time to update the space saver spare.
The upgrade is remove the wheel and replace with a tyre repair liquid canister.
Will require an insert of foam the liquid canister and a compatible pump for the upgrade.
Have the canister here and a pump not sure if that needs to be specific but does look like it might be fine.
last thing require is the foam insert from a similar model that would fit properly and be able to contain the parts.
That is NOT an upgrade!! I couldn't wait to lose the spacesaver but I replaced it with a full size 16" alloy spare.... see HERE
 
Maybe it won't be an upgrade as such it is an update on what I'm doing. Should be much lighter than the wheel. Not that I'm trying to loose weight from the car.
I honestly prefer the full size spare being more worthy for long journeys.
And it should be easy to switch if I decide to do that later.
My thought is its a more tidy and easy for me since takes away the need for scissor jack operation.
Con being have to replace a tyre.
I'm not convinced yet but have got the canister and pump already the insert is on its way with spare canister.
A tyre tho I do not have atm.

The insert will look similar to this minus the pump.
Just need my pump to fit.
And I want the floor in boot to be level.
When I tested the full size "steel wheel" spare it was sitting on the tyre and that was not favorable for me.
Will work fine with the alloy and the tyre profile I have now on the road tyres.
 

Attachments

  • Screenshot_20220210_003347.jpg
    Screenshot_20220210_003347.jpg
    397.8 KB · Views: 82
Last edited by a moderator:
So it's arrived I need to cut out part because my tyre liquid repair is slightly larger.
Would also need to cut out the part in the wheelwell as you have done to fit a full size wheel so that might not be a bad thing.
I'm guessing here just looking at it that it will fit inside the 15 inch alloy. Will test that next.
Here is an image of what it might look like the tyre repair that came with it fits nicer.
If you see that area I plan to cut out so the item slides in side ways that might help hold it firmly in place.

I have room for the small breaker bar that I use.
Maybe a smaller pump would help so I can also fit a scissor jack.
This tow eye is crazy long.
But when looking I can rotate that to the pointer arrow and it should fit without any change.
Will see what it's like with wheel next and then later on decide if I need to cut the curved bar in wheelwell.
Might not work as great as first thought but it does look to be possible.
My fingers are crossed for having both options because that would make good use of the space.
 

Attachments

  • IMG_20220210_114735.jpg
    IMG_20220210_114735.jpg
    1.9 MB · Views: 76
Does it fit with the wheel.
Yeah it seems to have a little space around to fill maybe a bit of extra foam might lock that in place.
I didn't think that would be possible.
Its also just about flush with the rim of the wheel.
So that might happen the wheel needs a tyre tho as mentioned earlier and it wants spaying again to match the others.
Was 15 for the insert and the pump was about 15 so in for 30 quid about.
I don't think I could got a tyre for that price these days?
 

Attachments

  • IMG_20220210_120538.jpg
    IMG_20220210_120538.jpg
    2.2 MB · Views: 81
An update on this.
Just looked at how it might fit its kinda small alone so the wheel would help with seating it nicer.
Found a problem tho.
When the car got its last mot it had the plate light replaced whole unit.
Seems to be letting water into the boot some how.
Not sure why this would be has anyone else had this happen before.
This is the first time I've really had a close look at that part and in the boot since the mot.
It was not full of water but it's not been wet in the boot before ever since I got the car.

The jack does not seem to fit in the original area. Has shape for and should fit but sticks up.
Have tried from every different orientation.
Its not really a problem but my turning arm for it is not original and this makes things awkward when trying to place.
Back to the update tho after getting the water out that was unexpected.
The clamp part on the body does not stick up as proud as I initially thought but it does get in the way.
I also noticed there are two drain ports at either side that is slightly differing to what I see in your picture.
Can those be opened and closed?
Also I'm pretty sure the water came in nearest the jack sits and directly next to this is the light on bumper.
Because the wood has a water mark on it.
 
Last edited by a moderator:
Having test fitting the foam insert and seeing how it fits,
Decided now I should get the nutserts with tool.
Will need some threaded rod next and a few nuts to secure.
Really need a tyre on the wheel tho to complete the job but I want it painted first before the tyre is on.
It would be better with the tyre fitted to pick a spot for the securing part to hold down The wheel.
 
Has anyone tried or seen one of these being used before.
if so are they any good.
I think it would be useful to me but perhaps takes up alot of space when not in use. That and it's only for upto 1500kgs
Have seen them raising and lifting a car on similar types online.
Screenshot_20220312_004054.jpg
 
Back
Top