I found this and it has some helpful advice if you plan on buying a K11 or if you are having problems with it.
Released in 1992 the bubble shape Micra (K11) replaced Nissans best selling K10 Micra. Like the Primera, European ones were built in Nissan's plant in Washington. With a choice of 1 litre, 1.3, 1.4 (Actually a 1.35) and later on a Peugeot diesel (in Europe but there are a few over here) The car won European and Japanese car of the year in 1993 It was face lifted first in 1996, 1998 and again in 2000.
Cross member! If you open the bonnet and look at the panel that runs along the bottom of the radiator, that is the cross member. Micras are notorious for this dissolving with rust! If the top edge looks ok have a look/feel along the rear edge and underside. Technically not an MOT fail as it is over 30cm from any suspension, steering or brake mountings but the main engine cross mount, the radiator and bonnet catch are all under stress and headlight alignment will be out if it rots.
Repair sections are available on ebay but it is a weld on job. You can almost guarantee the bottom inner headlight mounting captive bolts will break off the headlamp as you take them out.
When you are putting it back together remove the plastic clips for the grille and fit them to it rather than trying to fit them to the grille on the car.
Throttle body, poor idle/fuel consumption. The mass airflow sensor is mounted inside the throttle body housing. It is soldered in with 3 terminals. These terminals suffer from dry joints as the connection breaks down. If you catch it early enough you can pop the silver square cover off the side of the throttle body and resolder them but if it has been left too long the sensor will have burned out requiring a new throttle body. If you are unlucky it will have caused the O2 sensor to burn out too. Here is the step by step guide
http://www.micra.com.au/technical-articles/cg13de-throttle-body-resoldering-guide.pdf
Later (1998 on cars I think) do not have the small cover on the throttle body so they cannot be fixed in this way.
Non starting. Distributors on earlier cars break up inside causing no sparks. Replacement is the only option but before you rush out and change it, have a look inside the small engine bay fuse box just next to the distributor. The first fuse (a 15-amp blade fuse) is for the injectors. Make sure it has not corroded away or blown.
If you do have to replace the distributor to set the timing properly, warm the engine up, turn it off, disconnect the throttle position sensor (drivers side of the throttle body 5 terminals) then set it. Remember to reconnect it when you are done!
If the engine turns over and here is no fuel, turn the ignition off, lift the bottom part of the rear seat up and listen for the fuel pump motoring when you turn the ignition on. It will run for about 5 seconds after you turn the ignition on. If it doesn't then check all the fuses (in the fuse box on the dash and in the engine bay) if they are ok reach under and give the centre of the fuel tank a good hard punch or kick. Sometimes the motor jams and this amazingly works!
If the fuel pump works try changing he fuel filter as it is often overlooked during servicing. Its pretty easy to get to. (on the bulkhead, passenger side of the engine bay!)
Dash light/tail light fuse keeps blowing. Check to see if the original radio is fitted. If not, remove the radio and you will probably find the radio has been earthed through a red wire with a blue trace. This is actually the live to illuminate the factory stereo unit. when you switch the lights on it will blow the fuse (think its the 3rd from the bottom on the left row in the interior fuse box. If the cigar lighter /radio feed fuse keeps blowing, more often than not its because there is a 5p in the cigar lighter socket!
Dodgy bodywork! Other than the cross member pay attention to the sills. If they have been repaired make sure it’s a good repair as the sill curves under the edge also look inside the rear arch as the sill is double skinned at the back and I’ve seen a few where people haven’t bothered to weld a closing patch on the end.
Door hinges also start to wear and drop with age. Pins are not available separately, not big problems to change although the top bolts are a pain to remove/refit. Be careful not to strip the threads, as it has easily to put the bolt in slightly off centre whilst trying to hold a car door! Unpainted replacements look cr*p if you are replacing them to sell the car.
Tailgate hinges develop a hilarious fault where they appear to be working when you open the boot but after 30 seconds they loose interest and close. Leave the boot open for a minute or so to make sure they are ok.
Bonnet hinges seize. Good soaking with engine oil is usually enough although in serious cases it is easy to buckle the bonnet lifting or lowering them.
Washers. If the jet stops working try removing the pipe and shoving a match into it. There is a small ball bearing that sticks. The match is usually enough to release it. Do not try blowing them out with an airline as this just jams the ball bearing. Because this happens washer pumps burn out. If you are checking them remember they have a switched earth meaning the positive is always live and the pump works when you earth it.
Knocking noises. If the cross member has had it you will get clunking through the gear stick and from the front as you would expect. If the radiator is moving about it knocks too.
Knocking from the rear is usually caused by rear anti roll bar links (check for wear on a 4 post ramp or the ground) or anti roll bar ‘D’ bushes.
Poor gear change. Usually caused by poorly adjusted clutch cable. Failing that check the gearbox oil level. You check it/top it up by removing the complete speedo drive (accessible underneath, top edge of the back of the gearbox) there is a line around the top of the speedo drive gear. That is the maximum mark. They like decent gear oil. Do not be tempted to use ATF or engine oil as the gear change when cold will be affected. These gearboxes do not like low oil level and will reward poor maintenance by smashing up their synchros.
Gearchange bushes seize and wear too causing sloppy or crunchy gear change. Cost pennies though.
Tight gearchanges are usually caused by the above rusting together. Treat as before being careful not to snap the bolt!
Finally, if the gear stick slops about in neutral rather than falling to the right it means the small spring underneath has snapped. Remove the heat shield underneath, bend one of the coils round on the spring, and refit it. 10 minute job… unless the heat shield bolts break!
If you are considering an automatic, roadtest it making sure it shifts up to third gear ok. Third gear is a weakspot on these boxes. Also listen for faint rumbling noises. When the differential bearings start to go on the automatics they go pretty fast! Finally check the oil colour on the dipstick. It should be red. Brown indicates a neglected car, pink indicates a water leak.
Wiper problems. Wiper pivots are usually noisy. To fix them remove, strip and grease them. The pivots separate if neglected for long enough. You know this has happened when the wipers do not park correctly or intermittent speed does not work. It can also burn out the wiper motor. Replacement is the only option here. Rear wiper motors usually fail if the rear washer jet is blocked because the pipe fills the motor with water when it cannot spray it out!
Oil leaks. Not particularly prone to them but timing chain covers sometimes leak on 1 litre engines. Simple case of taking cover off, cleaning off sealer and refitting.
Drive shaft oil seals do not like to be disturbed, so if the car has had a recent clutch make sure they are not leaking.
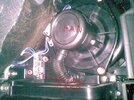
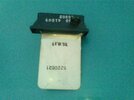
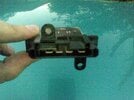
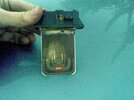
Heater only working on one setting. Caused by the heater resistor burning out. It is under the glove box. Held in by 2 screws and has a long 5 terminal plug. Currently about £30 from the dealer (so keep your eyes peeled at the breakers yard!)
Anything else? Brake pipes, centre exhausts, dash light bulbs but no more than any other car!


